![]()
Diskover Setup Guide | Legacy v2.2.x

Please note that this guide is no longer being updated and some links may no longer be functional.
Please note that this guide is no longer being updated and some links may no longer be functional. If you're a customer or setting up a POC, please create a support ticket for assistance with your installation or upgrade.
This guide is intended for Service Professionals and System Administrators.
Introduction
Overview
Diskover Data is a web-based platform that provides single-pane viewing of distributed digital assets. It provides point-in-time snapshot indexes of data fragmented across cloud and on-premise storage spread across an entire organization. Users can quickly and easily search across company files. Diskover is a data management application for your digital filing cabinet, providing powerful granular search capabilities, analytics, file-based workflow automation, and ultimately enables companies to scale their business and be more efficient at reducing their operating costs.
For more information, please visit diskoverdata.com
Approved AWS Technology Partner
Diskover Data is an official AWS Technology Partner. Please note that AWS has renamed Amazon Elasticsearch Service to Amazon OpenSearch Service. Most operating and configuration details for OpenSearch Service should also be applicable to Elasticsearch..
![]()
Diskover Use Cases
Diskover addresses unstructured data stored across various storage repositories. Data curation encompasses the manual and automated processes needed for principled and controlled data creation, maintenance, cleanup, and management, together with the capacity to add value to data.
System Administrators
The use case for System Administrators is often centered around data cleanup, data disposition, ensuring data redundancy, and automating data. System Administrators are often tasked with controlling costs associated with unstructured data.
Line of Business Users
The use cases for Line of Business users are often centered around adding value to data, finding relevant data, correlating, analyzing, taking action on data sets, and adding business context to data.
Document Conventions
| TOOL | PURPOSE |
|---|---|
| Copy/Paste Icon for Code Snippets | Throughout this document, all code snippets can easily be copied to a clipboard using the copy icon on the far right of the code block: |
| 🔴 | Proposed action items |
| ✏️ and ⚠️ | Important notes and warnings |
| Features Categorization | IMPORTANT
|
| Core Features |     |
| Industry Add-Ons | These labels will only appear when a feature is exclusive to a specific industry.    |
Architecture Overview
Diskover's Main Components
Deploying Diskover uses 3 major components:
| COMPONENT | ROLE |
|---|---|
| 1️⃣ Elasticsearch |
Elasticsearch is the backbone of Diskover. It indexes and organizes the metadata collected during the scanning process, allowing for fast and efficient querying of large datasets. Elasticsearch is a distributed, RESTful search engine capable of handling vast amounts of data, making it crucial for retrieving information from scanned file systems and directories. |
| 2️⃣ Diskover-Web |
Diskover-Web is the user interface that allows users to interact with the Diskover system. Through this web-based platform, users can search, filter, and visualize the data indexed by Elasticsearch. It provides a streamlined and intuitive experience for managing, analyzing, and curating data. Diskover-Web is where users can explore results, run tasks, and monitor processes. |
| 3️⃣ Diskover Scanners |
The scanners, sometimes called crawlers, are the components responsible for scanning file systems and collecting metadata. These scanners feed that metadata into Elasticsearch for storage and later retrieval. Diskover supports various types of scanners, which are optimized for different file systems, ensuring efficient and comprehensive data collection. Out of the box, Diskover efficiently scans generic filesystems. However, in today’s complex IT architectures, files are often stored across a variety of repositories. To address this, Diskover offers various alternate scanners as well as provides a robust foundation for building alternate scanners, enabling comprehensive scanning of any file storage location. |
| 🔀 Diskover Ingesters |
Diskover’s ingesters are the ultimate bridge between your unstructured data and high-performance, next-generation data platforms. By leveraging the open-standard Parquet format, Diskover converts and streams your data efficiently and consistently. Whether you’re firehosing into Dell data lakehouse, Snowflake, Databricks, or other modern data infrastructures, our ingesters ensure your data flows effortlessly—optimized for speed, scalability, and insight-ready delivery. |
Diskover Platform Overview
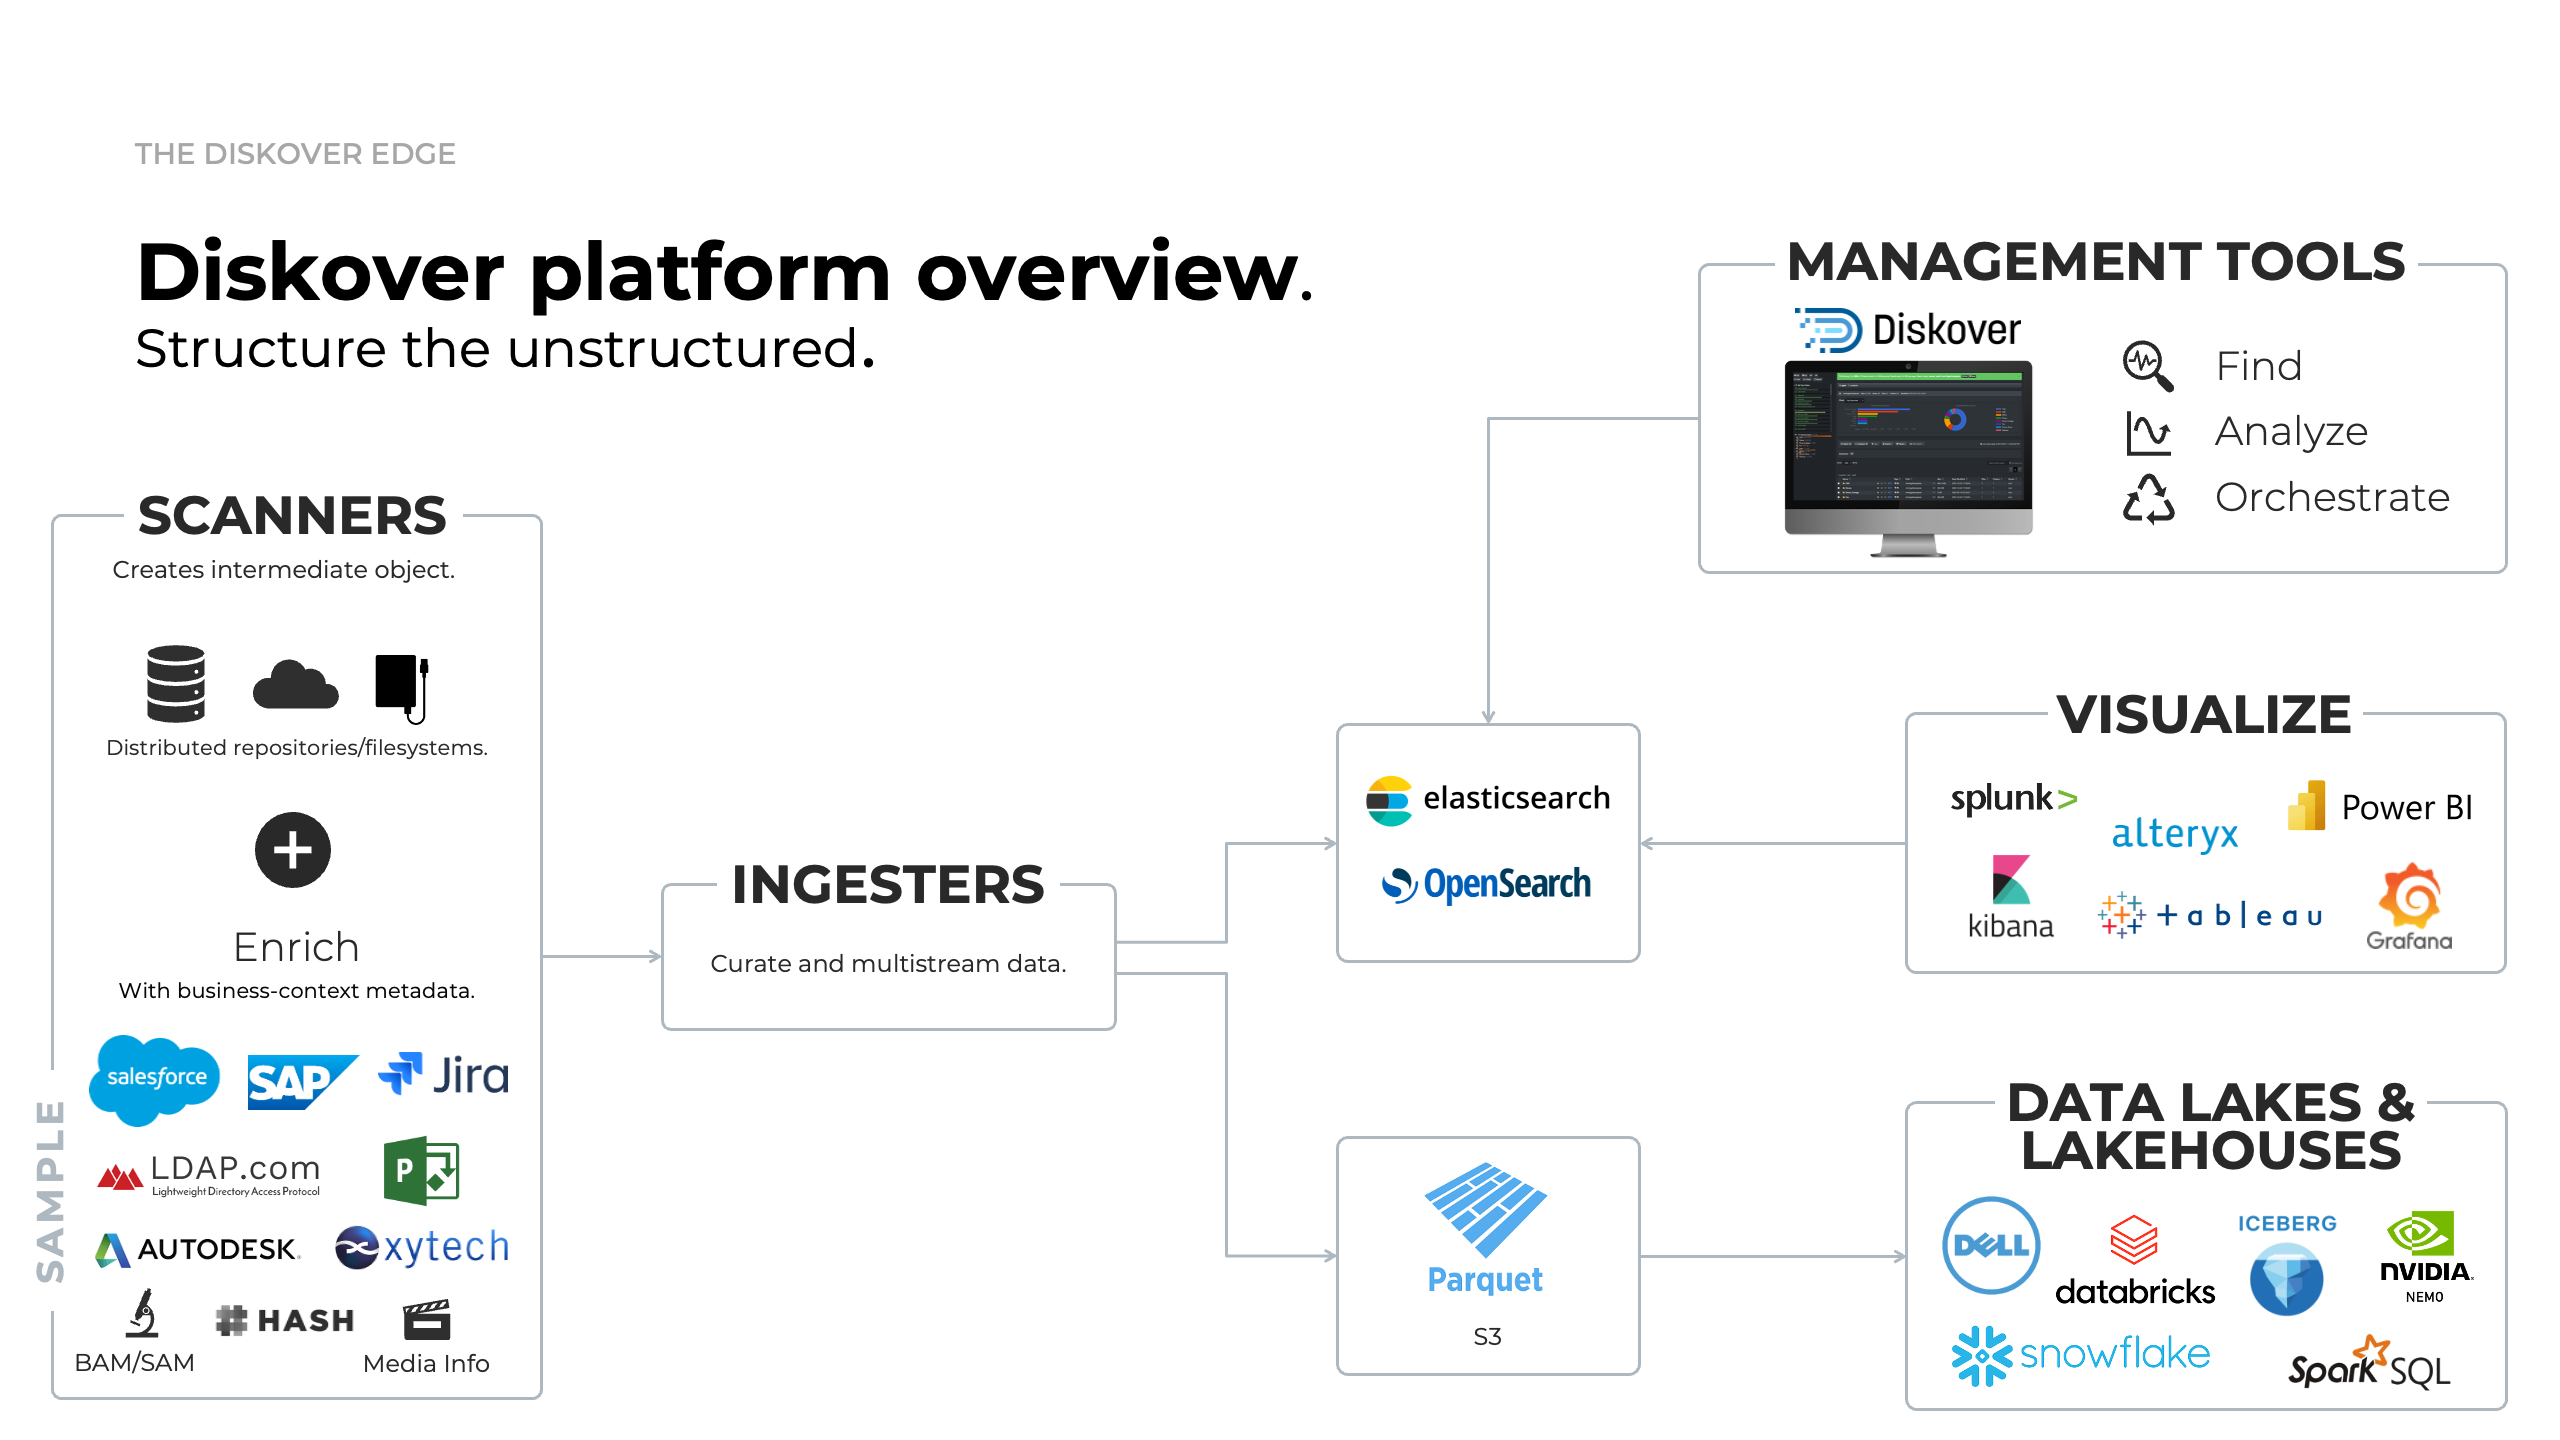
Click here for a full screen view of the Diskover Platform Overview.
Diskover Scale-Out Architecture Overview Diagram
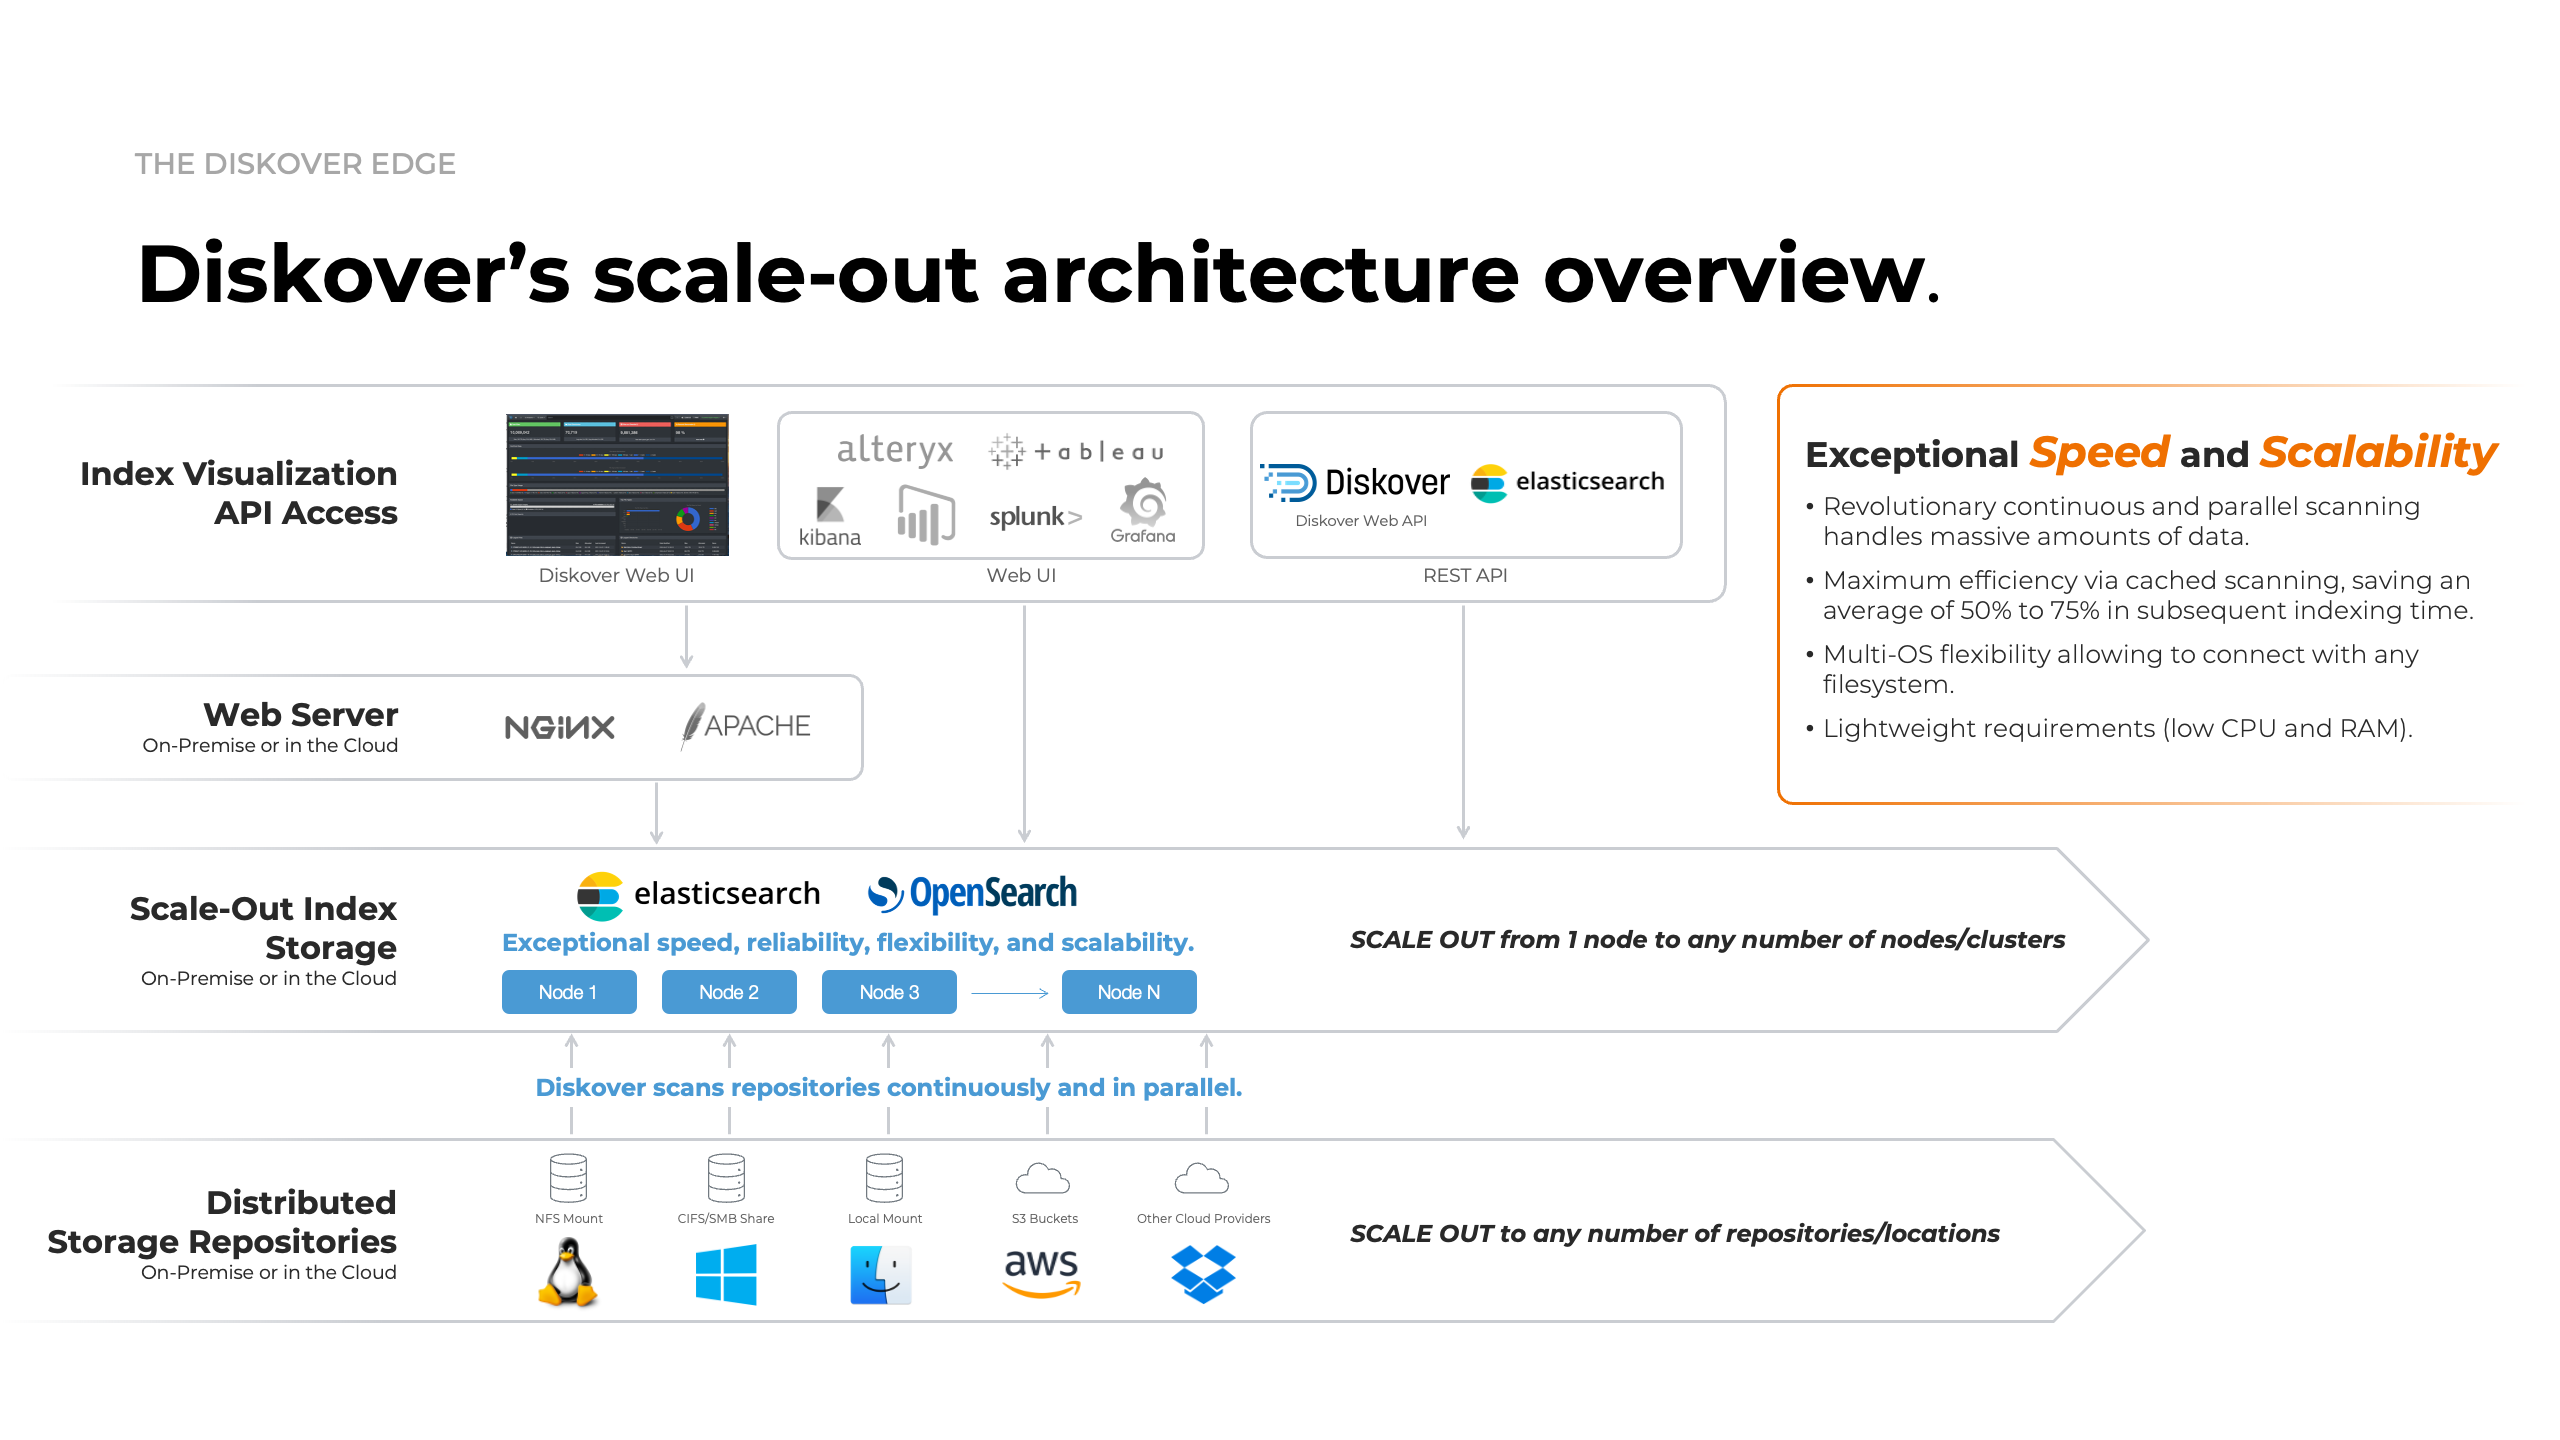
Click here for a full screen view of the Diskover Architecture Overview diagram.
Diskover Config Architecture Overview
It is highly recommended to separate the Elasticsearch node/cluster, web server, and indexing host(s).

Click here for the full screen view of this diagram.
Metadata Catalog
Diskover is designed to scan generic filesystems out of the box efficiently, but it also supports flexible integration with various repositories through customizable alternate scanners. This adaptability allows Diskover to scan diverse storage locations and include enhanced metadata for precise data management and analysis.
With a wide range of metadata harvest plugins, Diskover enriches indexed data with valuable business context attributes, supporting workflows that enable targeted data organization, retrieval, analysis, and enhanced workflow. These plugins can run at indexing or post-indexing intervals, balancing comprehensive metadata capture with high-speed scanning.
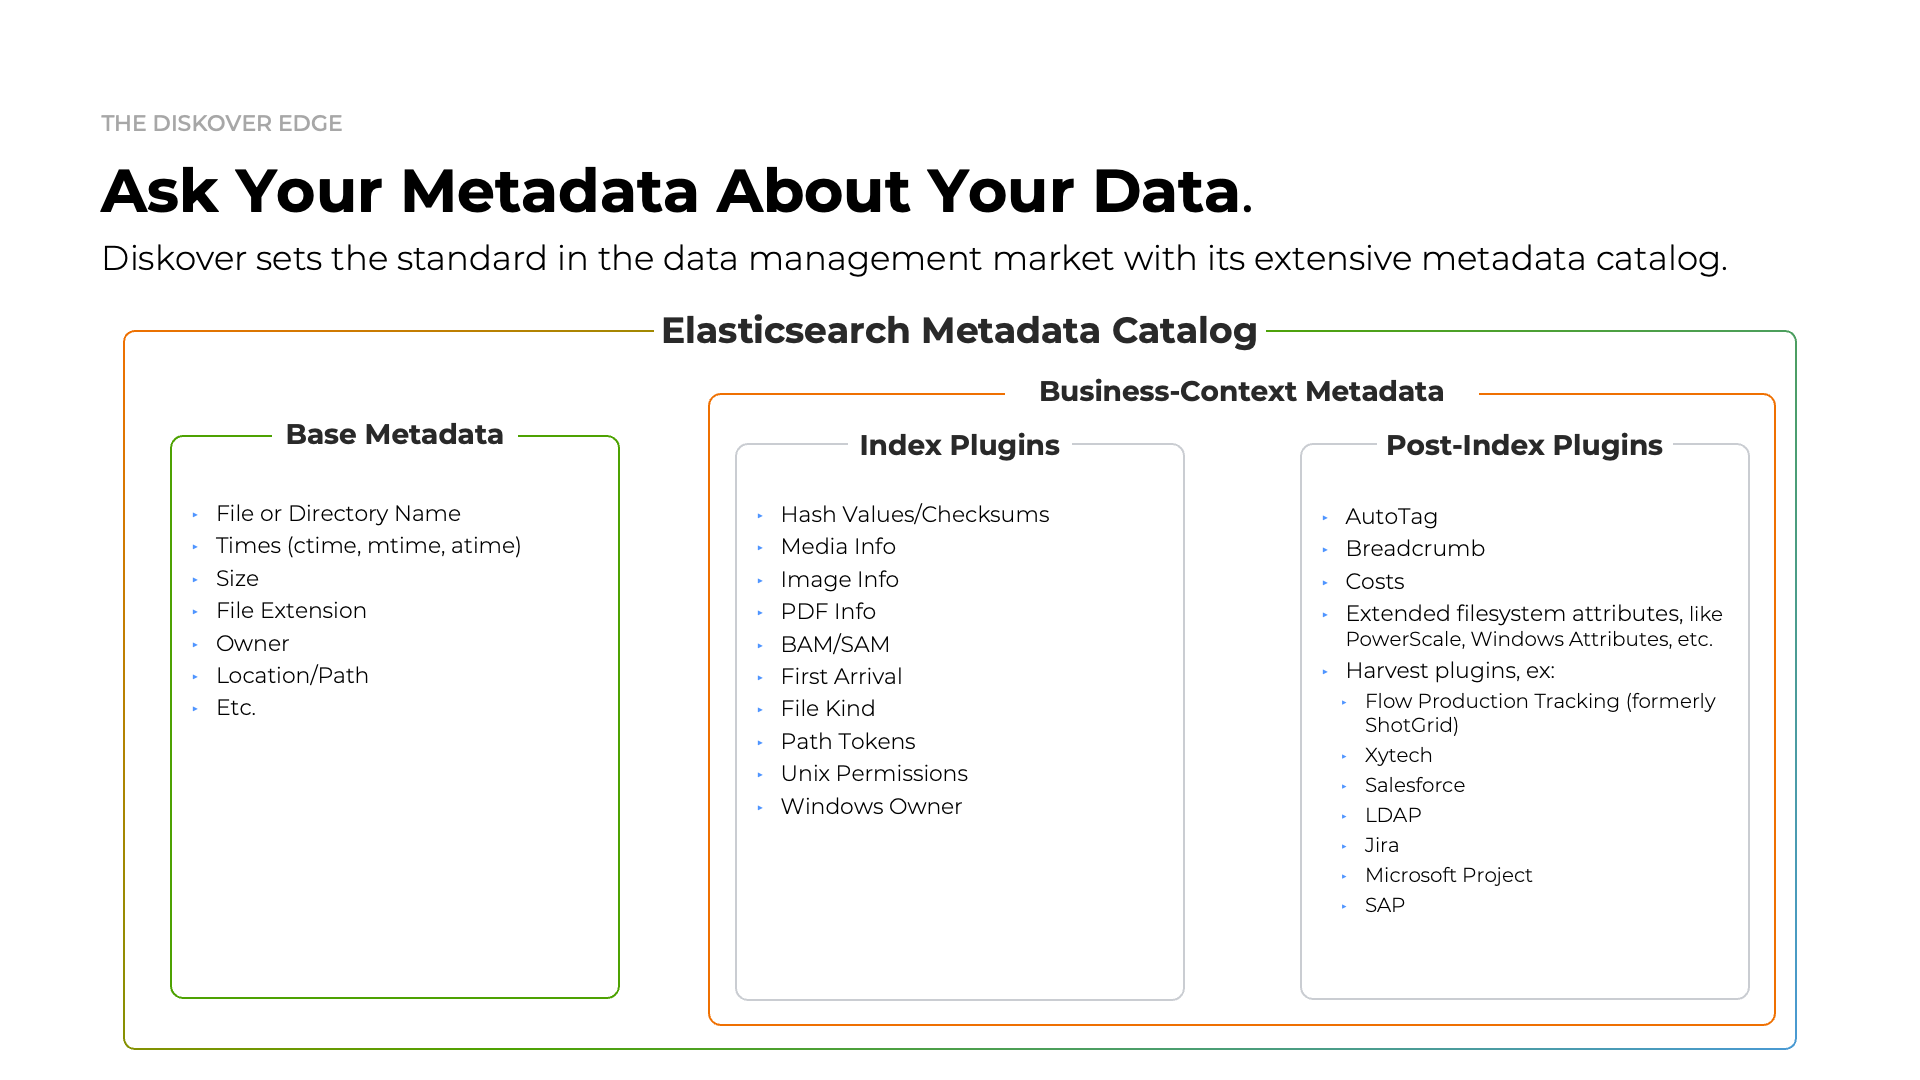
Click here for a full screen view of the Metadata Catalog Summary.
Requirements
Overview
Visit the System Readiness section for further information on preparing your system for Diskover.
| Packages | Usage |
|---|---|
| Python 3.8+ | Required for Diskover scanners/workers and Diskover-Web → go to installation instructions |
| Elasticsearch 8.x | Is the heart of Diskover → go to installation instructions |
| PHP 8.x and PHP-FPM | Required for Diskover-Web → go to installation instructions |
| NGINX or Apache | Required for Diskover-Web → go to installation instructions Note that Apache can be used instead of NGINX but the setup is not supported or covered in this guide. |
Security
- Disabling SELinux and using a software firewall is optional and not required to run Diskover.
- Internet access is required during the installation to download packages with yum.
Recommended Operating Systems
As per the config diagram in the previous chapter, note that Windows and Mac are only supported for scanners.
| Linux* | Windows | Mac |
|---|---|---|
|
|
|
* Diskover can technically run on all flavors of Linux, although only the ones mentioned above are fully supported.
Elasticsearch Requirements
Elasticsearch Version
Diskover is currently tested and deployed with Elasticsearch v8.x. Note that ES7 Python packages are required to connect to an Elasticsearch v8 cluster.
Elasticsearch Architecture Overview and Terminology
Please refer to this diagram to better understand the terminology used by Elasticsearch and throughout the Diskover documentation.
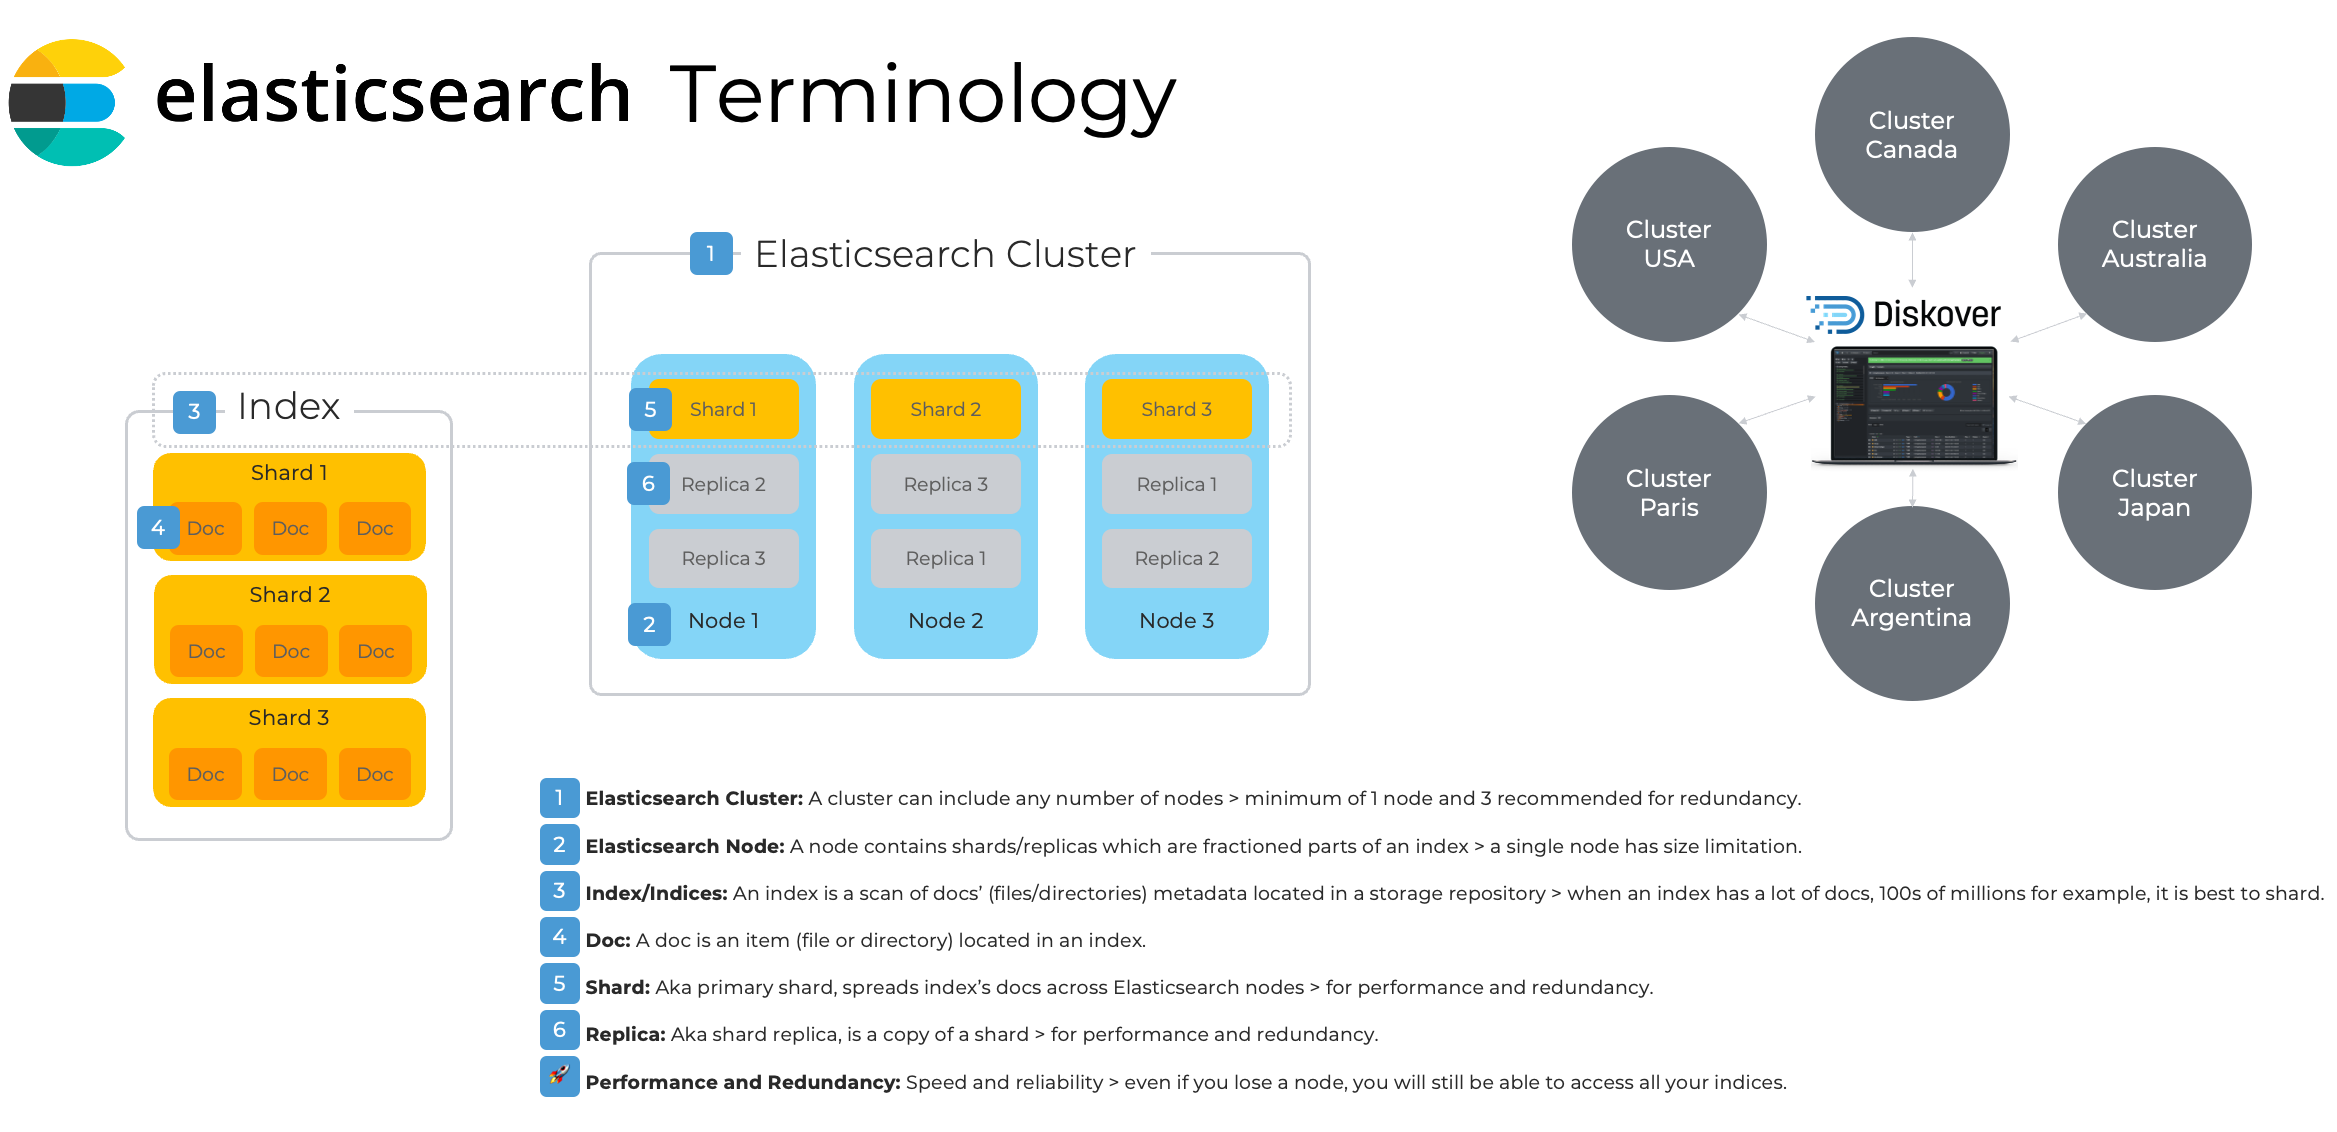 Click here for a full-screen view of the Elasticsearch Architecture diagram.
Elasticsearch Cluster
- The foundation of the Diskover platform consists of a series of Elasticsearch indexes, which are created and stored within the Elasticsearch endpoint.
- An important configuration for Elasticsearch is that you will want to set Java heap mem size - it should be half your Elasticsearch host ram up to 32 GB.
- For more detailed Elasticsearch guidelines, please refer to AWS sizing guidelines.
- For more information on resilience in small clusters.
Requirements for POC and Deployment
| Proof of Concept | Production Deployment | |
|---|---|---|
| Nodes | 1 node | 3 nodes for performance and redundancy are recommended |
| CPU | 8 to 32 cores | 8 to 32 cores |
| RAM | 8 to 16 GB (8 GB reserved to Elasticsearch memory heap) | 64 GB per node (16 GB reserved to Elasticsearch memory heap |
| DISK | 250 to 500 GB of SSD storage per node (root 150 GB, home 25 GB, var 800 GB) | 1 TB of SSD storage per node (root 150 GB, home 25 GB, var 800 GB) |
AWS Sizing Resource Requirements
Please consult the Diskover AWS Customer Deployment Guide for all details.
| AWS Elasticsearch Domain | AWS EC2 Web-Server | AWS Indexers | |
|---|---|---|---|
| Minimum | i3.large | t3.small | t3.large |
| Recommended | i3.xlarge | t3.medium | t3.xlarge |
Indices
Rule of Thumb for Shard Size
- Try to keep shard size between 10 – 50 GB
- Ideal shard size approximately 20 – 40 GB
Once you have a reference for your index size, you can decide to shard if applicable. To check the size of your indices, from the user interface, go to → ⛭ → Indices:
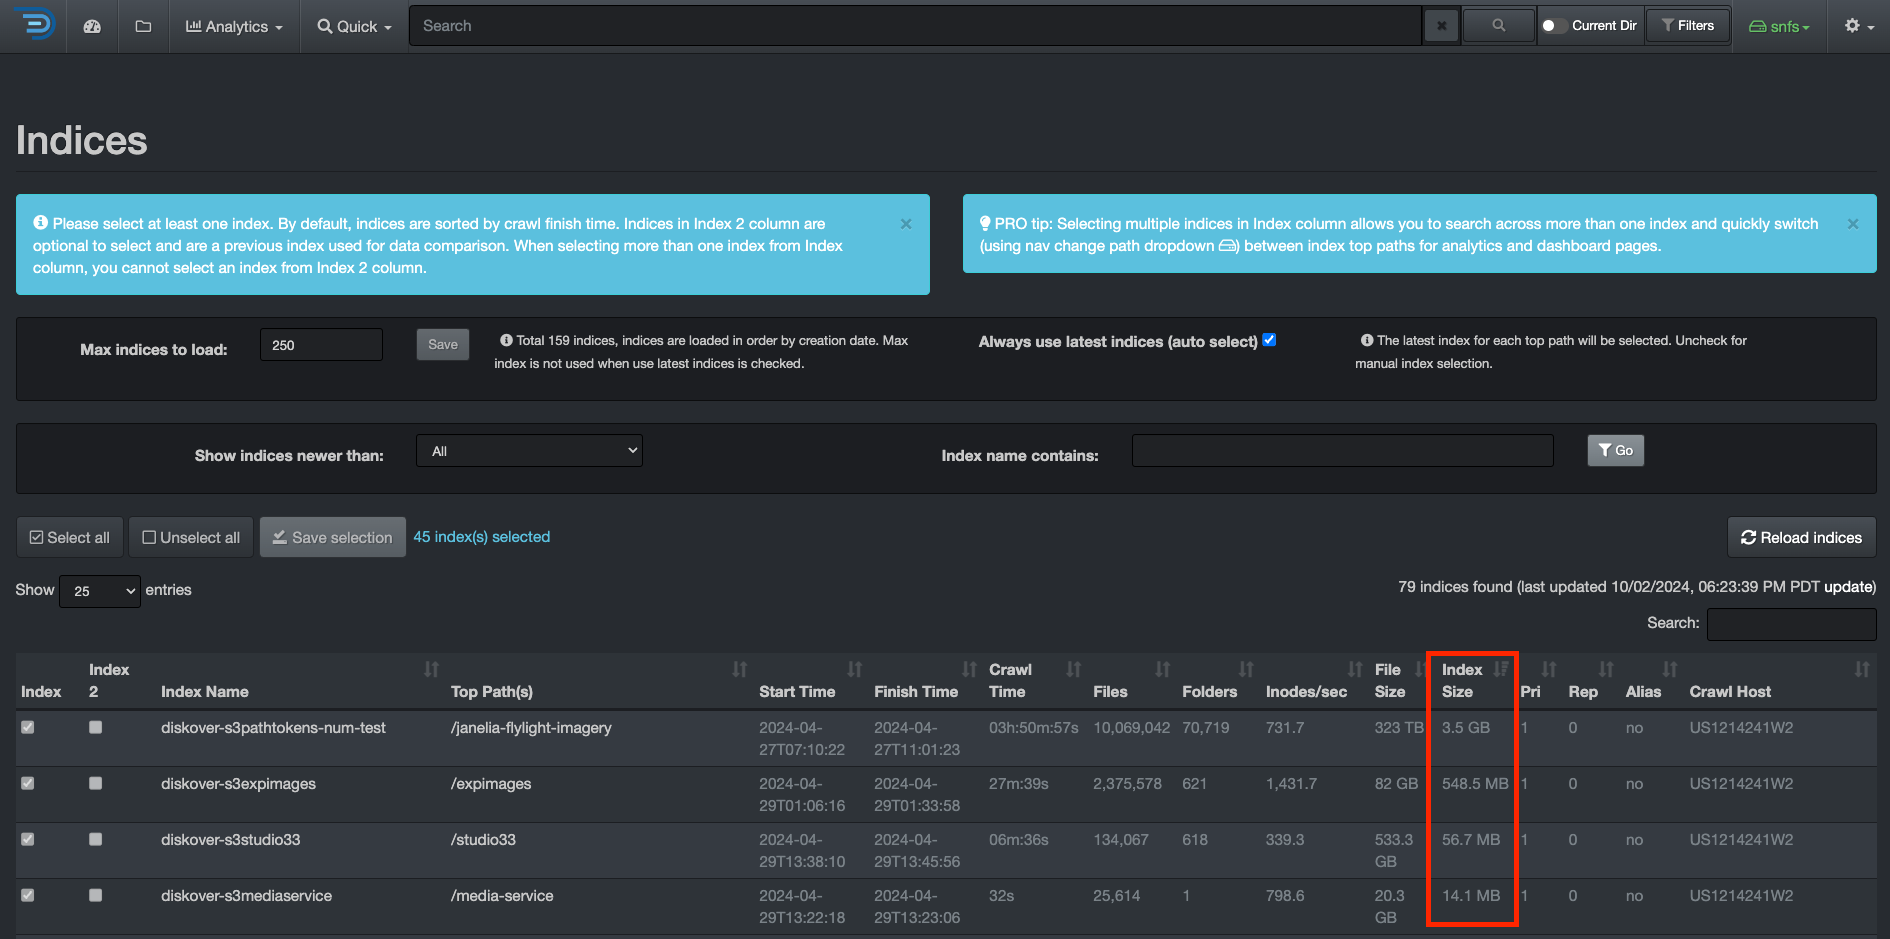 Click here for a full-screen view of this image.
Examples
- An index that is 60 GB in size: you will want to set shards to 3 and replicas* to 1 or 2 and spread across 3 ES nodes.
- An index that is 5 GB in size: you will want to set shards to 1 and replicas* to 1 or 2 and be on 1 ES node or spread across 3 ES nodes (recommended).
⚠️ Replicas help with search performance, redundancy and provide fault tolerance. When you change shard/replica numbers, you have to delete the index and re-scan.
Estimating Elasticsearch Storage Requirements
Individual Index Size
- 1 GB for every 5 million files/folders
- 20 GB for every 100 million files/folders
⚠️ The size of the files is not relevant.
Replicas/Shard Sizes
Replicas increase the size requirements by the number of replicas. For example, a 20 GB index with 2 replicas will require a total storage capacity of 60 GB since a copy of the index (all docs) is on other Elasticsearch nodes. Multiple shards do not increase the index size, as the index's docs are spread across the ES cluster nodes.
⚠️ The number of docs per share is limited to 2 billion, which is a hard Lucene limit.
Rolling Indices
- Each Diskover scan results in the creation of a new Elasticsearch index.
- Multiple indexes can be maintained to keep the history of storage indices.
- Elasticsearch overall storage requirements will depend on history index requirements.
- For rolling indices, you can multiply the amount of data generated for a storage index by the number of indices desired for retention period. For example, if you generate 2 GB for a day for a given storage index, and you want to keep 30 days of indices, 60 GB of storage is required to maintain a total of 30 indices.
Diskover-Web Server Requirements
The Diskover-Web HTML5 user interface requires a Web server platform. It provides visibility, analysis, workflows, and file actions from the indexes that reside on the Elasticsearch endpoint.
Requirements for POC and Deployment
| Proof of Concept | Production Deployment | |
|---|---|---|
| CPU | 8 to 32 cores | 8 to 32 cores |
| RAM | 8 to 16 GB | 8 to 16 GB |
| DISK | 100 GB of SSD storage (root 75 GB, home 25 GB) | 100 GB of SSD storage (root 75 GB, home 25 GB) |
Diskover Scanners Requirements
You can install Diskover scanners on a server or virtual machine. Multiple scanners can be run on a single machine or multiple machines for parallel crawling.
The scanning host uses a separate thread for each directory at level 1 of a top crawl directory. If you have many directories at level 1, you will want to increase the number of CPU cores and adjust max threads in the diskover config. This parameter, as well as many others, can be configured from the user interface, which contains help text to guide you.
Requirements for POC and Deployment
| Proof of Concept | Production Deployment | |
|---|---|---|
| CPU | 8 to 32 cores | 8 to 32 cores |
| RAM | 8 to 16 GB | 8 to 16 GB |
| DISK | 250 to 500 GB SSD | 500 GB (root 450 GB, home 25 GB) |
Skills and Knowledge Requirements
This document is intended for Service Professionals and System Administrators who install the Diskover software components. The installer should have strong familiarity with:
- Operating System on which on-premise Diskover scanner(s) are installed.
- Basic knowledge of:
- EC2 Operating System on which Diskover-Web HTML5 user interface is installed.
- Configuring a Web Server (Apache or NGINX).
⚠️ Attempting to install and configure Diskover without proper experience or training can affect system performance and security configuration.
⏱️ The initial install, configuration, and deployment of the Diskover are expected to take 1 to 3 hours, depending on the size of your environment and the time consumed with network connectivity.
Software Download
Community Edition
There are 2 ways to download the free Community Edition, the easiest being the first option.
Download from GitHub
🔴 From your GitHub account: https://github.com/diskoverdata/diskover-community/releases
🔴 Download the tar.gz/zip
Download from a Terminal
🔴 Install git on Centos:
yum install -y git
🔴 Install git on Ubuntu:
apt install git
🔴 Clone the Diskover Community Edition from the GitHub repository:
mkdir /tmp/diskover
git clone https://github.com/diskoverdata/diskover-community.git /tmp/diskover
cd /tmp/diskover
Annual Subscription Editions
We are currently moving to a new platform for software download. Meanwhile, please open a support ticket and we will send you a link, whether you need the OVA or the full version of Diskover.
Click these links for information on how to create an account and how to create a support ticket.
Elasticsearch Installation
Introduction
- Diskover is currently tested and deployed with Elasticsearch v8.x.
- Diskover can run on all Linux flavors, although only CentOS, RHEL, and Ubuntu are covered in this guide.
Install Elasticsearch for Linux CentOS and RHEL
🔴 Install CentOS 8.x or RHEL8.x
Disable SELinux (Optional)
🔴 Disabling SELinux is optional and not required to run Diskover, however, if you use SELinux you will need to adjust the SELinux policies to allow Diskover to run:
vi /etc/sysconfig/selinux
🔴 Change SELINUX to disabled:
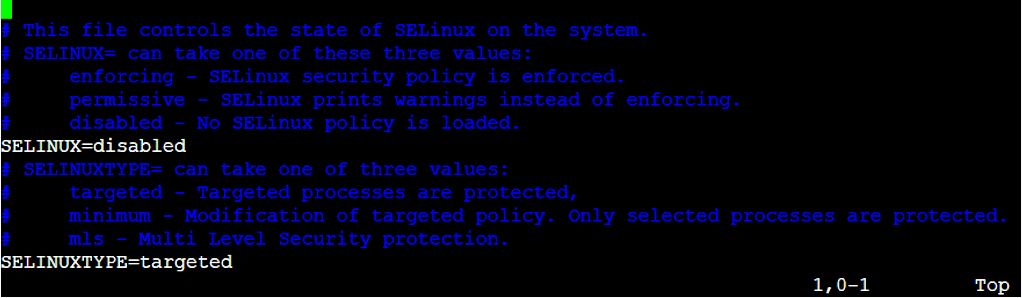
🔴 Reboot now.
Update Server
🔴 Update server:
yum -y update
Install Java 8
🔴 Install Java 8 JDK (OpenJDK) required for Elasticsearch:
yum -y install java-1.8.0-openjdk.x86_64
Install Elasticsearch 8.x:
The following section describes installing Elasticsearch on Linux CentOS and RHEL.
🔴 You can find the latest 8.x version on the Elasticsearch download page.
🔴 Install the latest version of Elasticsearch - you also need to keep up to date with patches, security enhancements, etc. as new versions are released:
yum install -y https://artifacts.elastic.co/downloads/elasticsearch/elasticsearch-8.15.1-x86_64.rpm
🔴 Configure Java JVM for Elasticsearch:
vi /etc/elasticsearch/jvm.options
🔴 Set the following memory heap size options to 50% of memory, up to 32g max:
-Xms8g
-Xmx8g
🔴 Update the Elasticsearch configuration file to define the desired Elasticsearch endpoint:
vi /etc/elasticsearch/elasticsearch.yml
🔴 Network host configuration:
network.host:
Note: Leave commented out for localhost (default) or uncomment and set to the ip you want to bind to, using 0.0.0.0 will bind to all ips.
🔴 Discovery seed host configuration:
discovery.seed_hosts:
Note: Leave commented out for [“127.0.0.1", "[::1]"] (default) or uncomment and set to ["
"] .
🔴 Configure the Elasticsearch storage locations to the path of desired fast storage devices (SSD or other fast disk):
path.data: /var/lib/elasticsearch
path.logs: /var/log/elasticsearch
Note: Change from default location below if desired.
🔴 Configure the Elasticsearch bootstrap memory variable to true:
bootstrap.memory_lock: true
🔴 Update Elasticsearch systemd service settings:
mkdir /etc/systemd/system/elasticsearch.service.d
🔴 Update the Elasticsearch service configuration file:
vi /etc/systemd/system/elasticsearch.service.d/elasticsearch.conf
🔴 Add the following text:
[Service]
LimitMEMLOCK=infinity
LimitNPROC=4096
LimitNOFILE=65536
Open Firewall Ports for Elasticsearch
🔴 Open firewall ports:
firewall-cmd --add-port=9200/tcp --permanent
firewall-cmd --reload
🔴 Start and enable Elasticsearch service:
systemctl enable elasticsearch.service
systemctl start elasticsearch.service
systemctl status elasticsearch.service
Check Elasticsearch Health
🔴 Check the health of the Elasticsearch cluster:
curl http://ip_address:9200/_cat/health?v

Install Elasticsearch for Linux Ubuntu
🔴 Install Ubuntu 20.x
Disable SELinux (Optional)
🔴 Disabling SELinux is optional and not required to run Diskover, however, if you use SELinux you will need to adjust the SELinux policies to allow Diskover to run:
vi /etc/sysconfig/selinux
🔴 Change SELINUX to disabled:
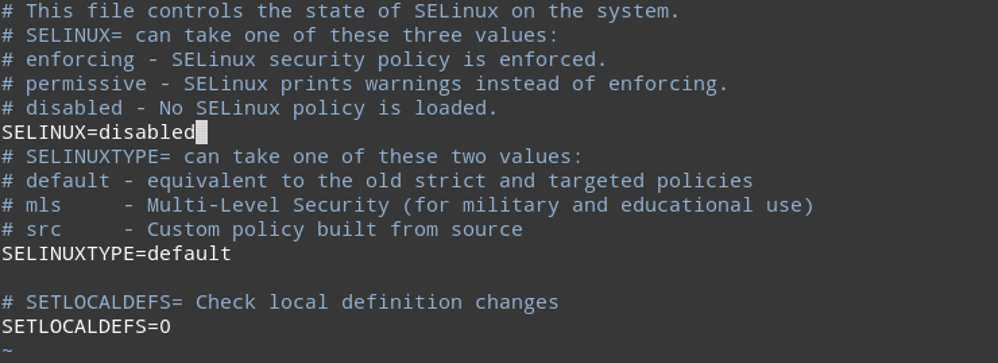
🔴 Reboot now.
🔴 Check Security Enhanced Linux status.
Update Server
🔴 Update Server:
apt-get update -y
apt-get upgrade -y
Add Elasticsearch Repository
🔴 Add the Elasticsearch Repository. By default, Elasticsearch is not available in the Ubuntu standard OS repository, so you will need to add the Elasticsearch repository to your system. First, install the required dependencies with the following command:
apt-get install apt-transport-https ca-certificates gnupg2 -y
🔴 Once all the dependencies are installed, import the GPG key with the following command:
wget -qO - https://artifacts.elastic.co/GPG-KEY-elasticsearch | apt-key add
🔴 Next, add the Elasticsearch repository with the following command:
sh -c 'echo "deb https://artifacts.elastic.co/packages/8.x/apt stable main" > /etc/apt/sources.list.d/elastic-8.x.list'
Once the repository is added, you can proceed and install Elasticsearch.
Install Elasticsearch 8.x:
The following section describes installing Elasticsearch on Linux Ubuntu.
🔴 Update the repository cache and install Elasticsearch with the following command:
apt-get update -y
apt-get install elasticsearch -y
🔴 Test Elasticsearch install status:
systemctl start elasticsearch
🔴 Install curl:
apt-get curl
apt install curl
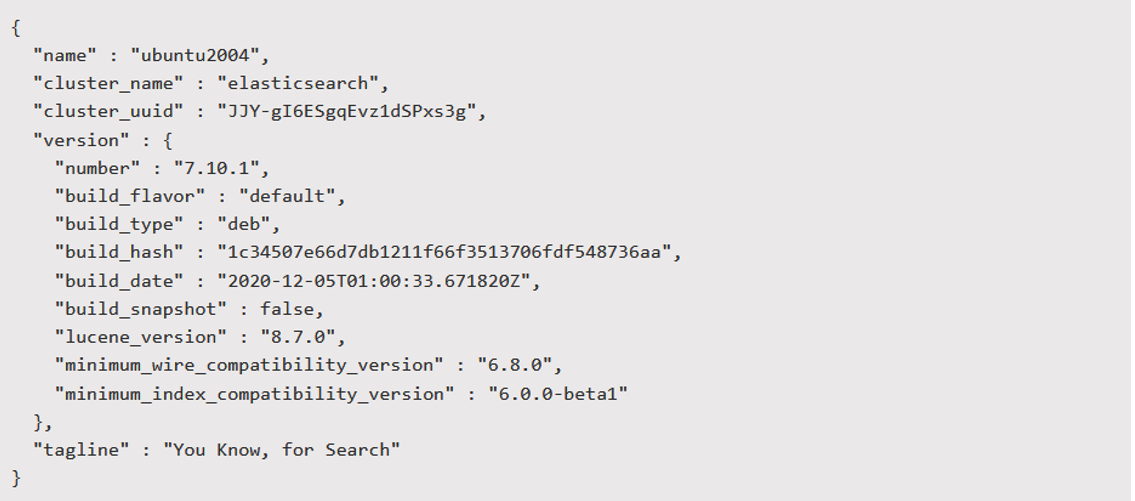
🔴 Test Elasticsearch endpoint:
curl -X GET "localhost:9200"
🔴 Configure Java JVM for Elasticsearch:
apt install vim
vim /etc/elasticsearch/jvm.options
🔴 Set the set the following memory heap size options to 50% of memory, up to 32g max:
-Xms8g
-Xmx8g
🔴 Update the Elasticsearch configuration file to define the desired Elasticsearch endpoint:
vi /etc/elasticsearch/elasticsearch.yml
🔴 Network host configuration:
network.host:
Note: Leave commented out for localhost (default) or uncomment and set to the ip you want to bind to, using 0.0.0.0 will bind to all ips.
🔴 Discovery seed host configuration:
discovery.seed_hosts:
Note: Leave commented out for [“127.0.0.1", "[::1]"] (default) or uncomment and set to ["
"] .
🔴 Configure the Elasticsearch storage locations to the path of desired fast storage devices (SSD or other fast disk):
path.data: /var/lib/elasticsearch
path.logs: /var/log/elasticsearch
Note: Change from default location below if desired.
🔴 Configure the Elasticsearch bootstrap memory variable to true:
bootstrap.memory_lock: true
🔴 Update Elasticsearch systemd service settings:
mkdir /etc/systemd/system/elasticsearch.service.d
🔴 Update the Elasticsearch service configuration file:
vi /etc/systemd/system/elasticsearch.service.d/elasticsearch.conf
🔴 Add the following text:
[Service]
LimitMEMLOCK=infinity
LimitNPROC=4096
LimitNOFILE=65536
Open Firewall Ports for Elasticsearch
🔴 Open firewall ports:
firewall-cmd --add-port=9200/tcp --permanent
firewall-cmd --reload
🔴 Start and enable Elasticsearch service:
systemctl stop elasticsearch.service
systemctl enable elasticsearch.service
systemctl start elasticsearch.service
systemctl status elasticsearch.service
Check Elasticsearch Health
🔴 Check the health of the Elasticsearch cluster:
curl http://ip_address:9200/_cat/health?v
Set up Elasticsearch Cluster for Linux
This section describes the steps to set up a 3-node Elasticsearch cluster on Linux. These instructions assume you have already installed the same version of Elasticsearch on 3 nodes. You will need to run the steps below on all 3 ES nodes.
🔴 Stop Elasticsearch if it's already running and not in use on ALL ES nodes:
systemctl status elasticsearch
systemctl stop elasticsearch
🔴 Change the settings on all nodes by editing the Elasticsearch config:
vi /etc/elasticsearch/elasticsearch.yml
🔴 Uncomment and change (any name you like) using the same cluster name on all nodes:
cluster.name: es-cluster-diskover
🔴 Uncomment and change to a different node name on each node:
node.name: esnode1
node.name: esnode2
node.name: esnode3
Note: By default
node.nameis set to the hostname.
🔴 Uncomment and change to the IP address you want your Elasticsearch to bind to on each ES node, for example:
network.host: 192.168.0.11
Note: To find the IP use
ip addrorifconfigcommands.
🔴 Set discovery by specifying all nodes IP addresses:
discovery.seed_hosts: ["192.168.0.11", "192.168.0.12", "192.168.0.13"]
🔴 Set the cluster initial master nodes by specifying all Nodes node names (node.name):
cluster.initial_master_nodes: ["esnode1", "esnode2", "esnode3"]
Note: After the cluster starts, comment this line out on each node.
🔴 If using a firewall, open the firewall ports for Elasticsearch:
firewall-cmd --add-port={9200/tcp,9300/tcp} --permanent
firewall-cmd --reload
🟨 Proceed with the next steps ONLY after all 3 ES nodes configurations are updated.
🔴 Start Elasticsearch on node 1, then 2 and 3 and enable service to start at boot if not already done:
systemctl daemon-reload
systemctl enable elasticsearch
systemctl start elasticsearch
🔴 Make sure ES node and cluster status is green:
curl http://<es host>:9200
curl http://<es host>:9200/_cluster/health?pretty
Modify Diskover Config Files for Cluster
After setting up the ES cluster, you will want to adjust your diskover config.yaml file from the default values.
🔴 Edit the diskover config file:
vi /root/.config/diskover/config.yaml
🔴 Change Elasticsearch host setting to include all 3 ES node hostnames (optional):
host: ['esnode1', 'esnode2', 'esnode3']
Note: This is optional. You can also set this to just a single node in the cluster.
🔴 Set index shards and replicas:
shards: 1
replicas: 2
Note: Shards can also be increased to 3 or more depending on the size of the ES index (number of docs). See Elasticsearch Requirements, Indices section for more info.
🔴 Edit diskover-web config file:
vi /var/www/diskover-web/src/diskover/Constants.php
🔴 Change Elasticsearch ES_HOSTS hosts setting to include all 3 ES node hostnames (optional):
const ES_HOSTS = [
    [
        'hosts' => ['esnode1', 'esnode2', 'esnode3'],
        ...
Note: This is optional. You can also set this to just a single node in the cluster.
Diskover-Web Installation
The Web server component, required to serve the Diskover-Web HTML5 user interface, can be configured to run on all flavors of Linux, although only CentOS, RHEL, and Ubuntu are covered in this guide.
Install Diskover-Web for Linux CentOS and RHEL
This section will cover how to configure Linux CentOS and RHEL to be a Web server.
Install NGINX
🔴 Install epel and remi repos on CentOS/RHEL 8.x:
yum -y install https://dl.fedoraproject.org/pub/epel/epel-release-latest-8.noarch.rpm
yum -y install https://rpms.remirepo.net/enterprise/remi-release-8.rpm
dnf install https://dl.fedoraproject.org/pub/epel/epel-release-latest-8.noarch.rpm
dnf install https://rpms.remirepo.net/enterprise/remi-release-8.rpm
🔴 Install the NGINX Web server application on CentOS/RHEL 8.x:
yum -y install nginx
dnf install nginx
🔴 For SELinux on CentOS/RHEL 8.x add the following to allow NGINX to start:
semanage permissive -a httpd_t
🔴 Enable NGINX to start at boot, start it now and check status:
systemctl enable nginx
systemctl start nginx
systemctl status nginx
Install PHP 7 and PHP-FPM (FastCGI)
Note: PHP 8.1 can also be used instead of PHP 7.4, replace php74/php7.4 with php81/php8.1
Centos/RHEL 8.x
🔴 Install epel and remi repos on CentOS/RHEL 8.x (if not already installed):
dnf install https://dl.fedoraproject.org/pub/epel/epel-release-latest-8.noarch.rpm
dnf install https://rpms.remirepo.net/enterprise/remi-release-8.rpm
🔴 Enable remi php 7.4:
dnf module enable php:remi-7.4
🔴 Install PHP and other PHP packages:
dnf install php php-common php-fpm php-opcache php-cli php-gd php-mysqlnd php-ldap php-pecl-zip php-xml php-xmlrpc php-mbstring php-json php-sqlite3
🔴 Copy php production ini file php.ini-production to php.ini file:
find / -mount -name php.ini-production
find / -mount -name php.ini
cp php.ini-production php.ini
Configure NGNIX
🔴 Set PHP configuration settings for NGINX:
vi /etc/php-fpm.d/www.conf
🔴 Set user and group to nginx user:
user = nginx
group = nginx
🔴 Uncomment and change listen owner and group to nginx user:
listen.owner = nginx
listen.group = nginx
🔴 Change the listen socket on Centos/RHEL 7.x:
listen = /var/run/php-fpm/php-fpm.sock
🔴 Change the listen socket on Centos/RHEL 8.x:
listen = /var/run/php-fpm/www.sock
🔴 Change directory ownership for nginx user:
chown -R root:nginx /var/lib/php
mkdir /var/run/php-fpm
chown -R nginx:nginx /var/run/php-fpm
🔴 Enable at boot and start PHP-FPM service:
systemctl enable php-fpm
systemctl start php-fpm
systemctl status php-fpm
Install Diskover-Web
🔴 Copy Diskover-Web files:
cp -a diskover-web /var/www/
🔴 Edit the Diskover-Web configuration file Constants.php to authenticate against your Elasticsearch endpoint:
cd /var/www/diskover-web/src/diskover
cp Constants.php.sample Constants.php
vi Constants.php
🔴 Set your Elasticsearch (ES) host(s), port, username, password, etc:
Community Edition (ce):
const ES_HOST = 'localhost';
const ES_PORT = 9200;
const ES_USER = 'strong_username';
const ES_PASS = 'strong_password';
Essential +:
const ES_HOSTS = [
    [
        'hosts' => ['localhost'],
        'port' => 9200,
        'user' => 'strong_username',
        'pass' => 'strong_password',
        'https' => FALSE
    ]
Note: Diskover-Web Essential+ uses a number of txt and json files to store some settings and task data. The default install has sample files, but not the actual files. The following will copy the sample files and create default starting point files. Skip the next 3 steps for Community Edition.
🔴 Create actual files from the sample files filename.txt.sample:
cd /var/www/diskover-web/public
for f in *.txt.sample; do cp $f "${f%.*}"; done
chmod 660 *.txt
🔴 Create actual task files from the sample task files filename.json.sample:
cd /var/www/diskover-web/public/tasks/
🔴 Copy default/sample JSON files:
for f in *.json.sample; do cp $f "${f%.*}"; done
chmod 660 *.json
🔴 Set the proper ownership on the default starting point files:
chown -R nginx:nginx /var/www/diskover-web
🔴 Configure the NGINX Web server with diskover-web configuration file:
vi /etc/nginx/conf.d/diskover-web.conf
🔴 Add the following to the /etc/nginx/conf.d/diskover-web.conf file:
server {
        listen   8000;
        server_name  diskover-web;
        root   /var/www/diskover-web/public;
        index  index.php index.html index.htm;
        error_log  /var/log/nginx/error.log;
        access_log /var/log/nginx/access.log;
        location / {
            try_files $uri $uri/ /index.php?$args =404;
        }
        location ~ \.php(/|$) {
            fastcgi_split_path_info ^(.+\.php)(/.+)$;
            set $path_info $fastcgi_path_info;
            fastcgi_param PATH_INFO $path_info;
            try_files $fastcgi_script_name =404;
            fastcgi_pass unix:/var/run/php-fpm/php-fpm.sock;
            #fastcgi_pass 127.0.0.1:9000;
            fastcgi_index index.php;
            include fastcgi_params;
            fastcgi_param SCRIPT_FILENAME $document_root$fastcgi_script_name;
            include fastcgi_params;
            fastcgi_read_timeout 900;
            fastcgi_buffers 16 16k;
            fastcgi_buffer_size 32k;
        }
}
NGINX Changes Required for CentOS/RHEL 8
🔴 Change fastcgi_pass in /etc/nginx/conf.d/diskover-web.conf file:
fastcgi_pass unix:/var/run/php-fpm/www.sock;
🔴 If IPV6 is not in use or disabled comment out the following line in the /etc/nginx/nginx.conf file:
# listen [::]:80 default_server;
🔴 Restart NGINX:
systemctl restart nginx
OS Security Changes Required for CentOS/RHEL 8
🔴 Update crypto policies to allow for sha1 rsa keys:
update-crypto-policies --show
update-crypto-policies --set DEFAULT:SHA1
🔴 Reboot
Open Firewall Ports for Diskover-Web
🔴 Diskover-Web listens on port 8000 by default. To open the firewall for ports required by Diskover-Web:
firewall-cmd --add-port=8000/tcp --permanent
firewall-cmd --reload
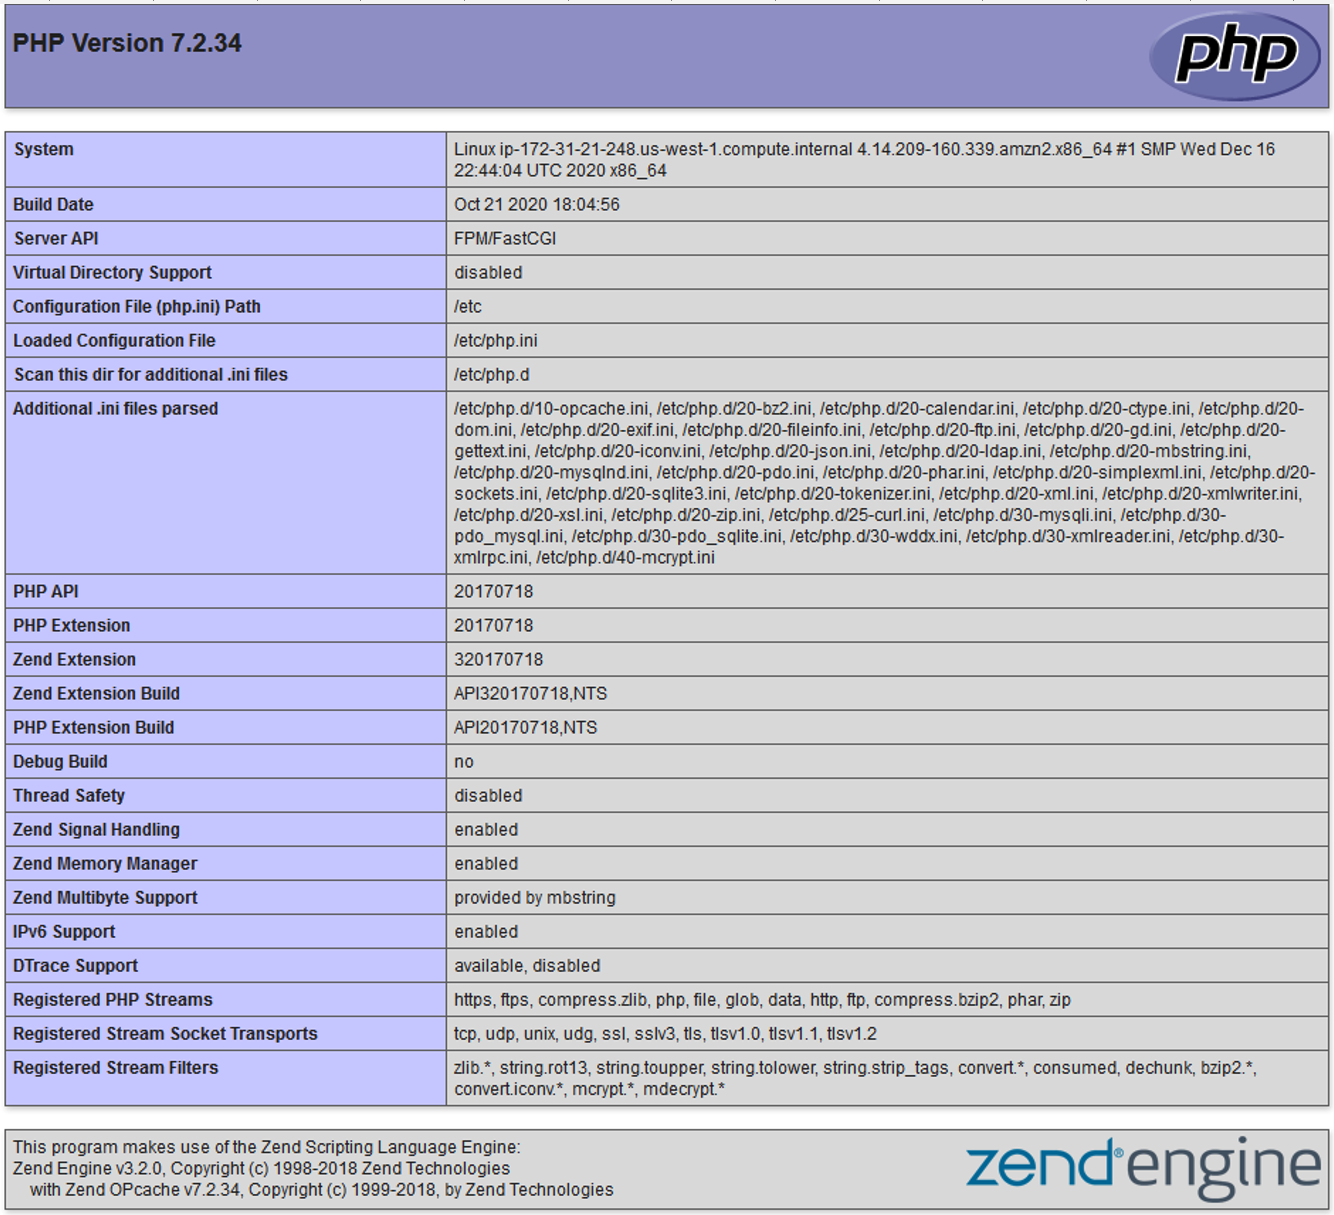
Create a Test Web Page to Verify NGINX Configuration for Linux
🔴 The following will create a test page to verify if the NGINX Web server configuration is properly configured (independent of the Diskover-Web application):
vi /var/www/diskover-web/public/info.php
🔴 Insert the following text:
<?php
phpinfo();
🔴 For CentOS 8.x / RHEL insert the following text:
<?php
phpinfo();
phpinfo(INFO_MODULES);
?>
🔴 Open a test page:
http://< diskover_web_host_ip >:8000/info.php
Install Diskover-Web for Linux Ubuntu
This section will cover how to configure Linux Ubuntu to be a Web server.
Install NGINX
🔴 The following will install the NGINX Web server application:
apt install nginx
systemctl enable nginx
systemctl start nginx
systemctl status nginx
Install PHP 7 and PHP-FPM (FastCGI)
Note: PHP 8.1 can also be used instead of PHP 7.4, replace php74/php7.4 with php81/php8.1
🔴 Configure a repository on your system to add PHP PPA. Run the following command to add ondrej PHP repository to your Ubuntu system:
apt install software-properties-common
add-apt-repository ppa:ondrej/php
🔴 Install PHP:
apt update
apt install -y php7.4
🔴 Check the current active PHP version by running the following command:
php -v
🔴 Install PHP modules required for Diskover-Web
apt install -y php7.4-common php7.4-fpm php7.4-mysql php7.4-cli php7.4-gd php7.4-ldap php7.4-zip php7.4-xml php7.4-xmlrpc php7.4-mbstring php7.4-json php7.4-curl php7.4-sqlite3
🔴 Set PHP-FPM configuration settings:
vim /etc/php/7.4/fpm/pool.d/www.conf
🔴 Set the PHP-FPM listen socket:
listen = /var/run/php/php7.4-fpm.sock
🔴 Copy php production ini file to php.ini file:
find / -mount -name php.ini-production
find / -mount -name php.ini
cp php.ini-production php.ini
🔴 Set timezone to UTC in php.ini:
vim /etc/php/7.4/fpm/php.ini
date.timezone = "UTC"
🔴 Enable and start PHP-FPM service:
systemctl enable php7.4-fpm
systemctl start php7.4-fpm
systemctl status php7.4-fpm
Install Diskover-Web
🔴 Copy Diskover-Web files:
cp -a diskover-web /var/www/
🔴 Edit the Diskover-Web configuration file Constants.php to authenticate against your Elasticsearch endpoint:
cd /var/www/diskover-web/src/diskover
cp Constants.php.sample Constants.php
vi Constants.php
🔴 Set your Elasticsearch (ES) host(s), port, username, password, etc:
Community Edition (ce):
const ES_HOST = 'localhost';
const ES_PORT = 9200;
const ES_USER = 'strong_username';
const ES_PASS = 'strong_password';
Essential +:
const ES_HOSTS = [
    [
        'hosts' => ['localhost'],
        'port' => 9200,
        'user' => 'strong_username',
        'pass' => 'strong_password',
        'https' => FALSE
    ]
Note: Diskover-Web, for all editions except the Community Edition, uses a number of txt and json files to store some settings and task data. The default install has sample files, but not the actual files. The following will copy the sample files and create default starting point files. Skip the next 3 steps for Community Edition.
🔴 Create actual files from the sample files filename.txt.sample:
cd /var/www/diskover-web/public
for f in *.txt.sample; do cp $f "${f%.*}"; done
chmod 660 *.txt
🔴 Create actual task files from the sample task files filename.json.sample:
cd /var/www/diskover-web/public/tasks/
🔴 Copy default/sample JSON files:
for f in *.json.sample; do cp $f "${f%.*}"; done
chmod 660 *.json
🔴 Set ownership for www-data user and group:
chown -R www-data:www-data /var/www/diskover-web
🔴 Configure the NGINX Web server with diskover-web configuration file:
vi /etc/nginx/conf.d/diskover-web.conf
🔴 Add the following to the /etc/nginx/conf.d/diskover-web.conf file:
server {
        listen   8000;
        server_name  diskover-web;
        root   /var/www/diskover-web/public;
        index  index.php index.html index.htm;
        error_log  /var/log/nginx/error.log;
        access_log /var/log/nginx/access.log;
        location / {
            try_files $uri $uri/ /index.php?$args =404;
        }
        location ~ \.php(/|$) {
            fastcgi_split_path_info ^(.+\.php)(/.+)$;
            set $path_info $fastcgi_path_info;
            fastcgi_param PATH_INFO $path_info;
            try_files $fastcgi_script_name =404;
            fastcgi_pass unix:/var/run/php/php7.4-fpm.sock;
            #fastcgi_pass 127.0.0.1:9000;
            fastcgi_index index.php;
            include fastcgi_params;
            fastcgi_param SCRIPT_FILENAME $document_root$fastcgi_script_name;
            include fastcgi_params;
            fastcgi_read_timeout 900;
            fastcgi_buffers 16 16k;
            fastcgi_buffer_size 32k;
        }
}
Open Firewall Ports for Diskover-Web
🔴 Diskover-Web listens on port 8000 by default. To open the firewall for ports required by Diskover-Web:
firewall-cmd --add-port=8000/tcp --permanent
firewall-cmd --reload
Create a Test Web Page to Verify NGINX Configuration for Linux
🔴 The following will create a test page to verify if the NGINX Web server configuration is properly configured (independent of the Diskover-Web application):
vi /var/www/diskover-web/public/info.php
🔴 Insert the following text:
<?php
phpinfo();
🔴 Open a test page:
http://< diskover_web_host_ip >:8000/info.php
Launch Diskover-Web
Login to Diskover:
🔴 Open Diskover-Web page: http://localhost:8000
http://<diskover_web_host_ip>:8000/
🔴 Use the default username and password or set new ones in the Constants.php config file as described in this chapter for Linux or Windows:
Default username: admin
Default password: darkdata
![]()
Secure Diskover-Web
User Roles and Authentication
For more information about user roles and authentication for diskover-web and api, please see the doc User Roles and Authentication.
Configuring NGINX HTTPS SSL
For securing communication to diskover-web and the api, it is recommended to configure nginx to use https using a ssl certificate. More information about configuring HTTP server in nginx can be found in the nginx docs below:
https://nginx.org/en/docs/http/configuring_https_servers.html
https://docs.nginx.com/nginx/admin-guide/security-controls/terminating-ssl-http/
Diskover On-Premise Indexers Installation
The Diskover indexers are often distributed to index on-premise storage systems. The following section outlines installing the Diskover indexer component.
Diskover can run on all flavors of Linux, although only CentOS, RHEL, and Ubuntu are covered in this guide.
At time of installation, the config file is located in:
- Linux:
~/.config/diskover/config.yaml - Windows:
%APPDATA%\diskover\config.yaml - MacOS:
~/Library/Application Support/diskover/config.yaml
Create Diskover Logs Directory
By default all log files when logToFile is set to True are stored in /var/log/diskover/ directory. This directory can be changed by setting logDirectory in config file. For Windows you will want to change this directory to for example C:\Program Files\diskover\logs.
🔴 Create Diskover logs directory:
mkdir /var/log/diskover
Note: Check that the user running Diskover has proper permissions to read and write to the log directory.
Install Diskover Indexers for Linux CentOS and RHEL
The following outlines installing the Diskover indexer on Linux CentOS and RHEL.
Install Python 3.x, pip and Development Tools
🔴 Check Python version - most factory versions come with Python pre-installed, check your version of Python:
python --version
🔴 Install Python and pip:
yum -y install python3 python3-devel gcc
python3 -V
pip3 -V
Install Diskover Indexer
🔴 Extract diskover compressed file (from ftp server) - replace <version number> with only the number, do not use the <>:
mkdir /tmp/diskover-v<version number>
tar -zxvf diskover-v<version number>.tar.gz -C /tmp/diskover-v<version number>/
cd /tmp/diskover-v<version number>
🔴 Copy diskover files to opt:
cp -a diskover /opt/
cd /opt/diskover
🔴 Install required Python dependencies:
pip3 install -r requirements.txt
🔴 If indexing to AWS Elasticsearch run:
pip3 install -r requirements-aws.txt
🔴 Copy default/sample configs:
for d in configs_sample/*; do d=`basename $d` && mkdir -p ~/.config/$d && cp configs_sample/$d/config.yaml ~/.config/$d/; done
🔴 Edit Diskover config file:
vi ~/.config/diskover/config.yaml
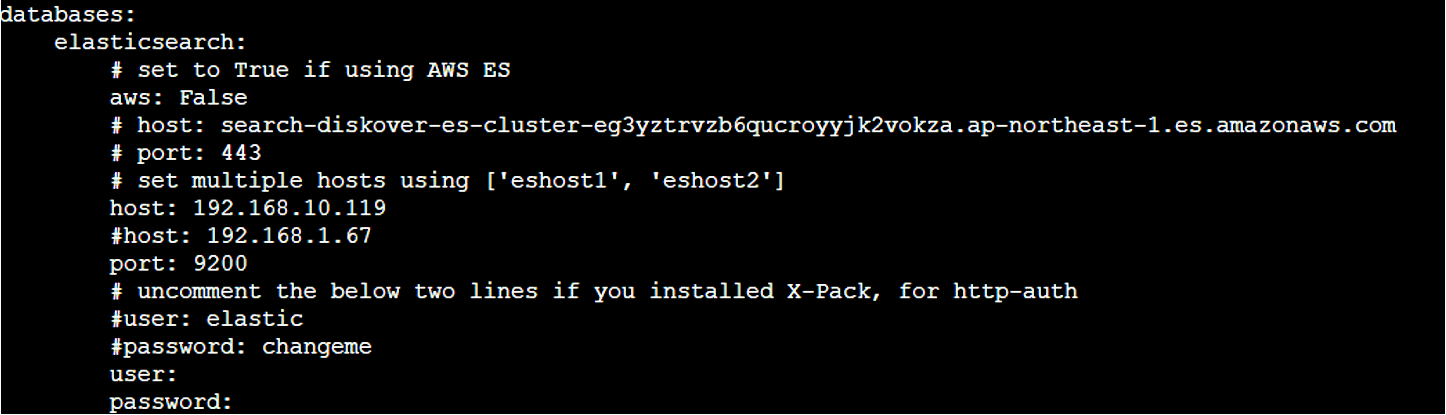
🔴 Configure indexer to create indexes in your Elasticsearch endpoint in the following section of the config.yaml file:
databases:
    elasticsearch:
🔴 Generate your hardware ID to obtain and install the license key.
Mount File Systems
🔴 NFS mount:
yum -y install nfs-utils
mkdir /mnt/nfsstor1
mount -t nfs -o ro,noatime,nodiratime server_name:/export_name /mnt/nfsstor1
🔴 Windows SMB/CIFS mount:
yum -y install cifs-utils
mkdir /mnt/smbstor1
mount -t cifs -o username=user_name //server_name/share_name /mnt/smbstor1
Create Index of File System
🔴 To run the Diskover indexing process from a shell prompt:
cd /opt/diskover
🔴 Install your license files as explained in the software activation chapter.
🔴 Start your first crawl:
python3 diskover.py -i diskover-<indexname> <storage_top_dir>
Clone Existing RHEL/CentOS Task Worker
The following outlines how to clone an existing task worker to a new machine.
🔴 Login to the existing task worker.
🔴 Copy the program files and license:
rsync -avz --exclude=__dircache__* /opt/diskover/ root@ip_address:/opt/diskover/
🔴 Copy the Diskover config files:
rsync -avz /root/.config/diskover* root@ip_address:/root/.config/
🔴 Copy the Diskover task worker:
rsync -avz /etc/systemd/system/diskoverd.service
root@ip_address:/etc/systemd/system/
🔴 Login to the new task worker.
🔴 Create the error log directory for the diskover task worker:
mkdir /var/log/diskover
🔴 Install python:
yum -y install python3 python3-devel gcc
🔴 Install the python modules required by Diskover:
cd /opt/diskover
pip3 install -r requirements-aws.txt
🔴 Set permission on task worker service:
sudo chmod 644 /etc/systemd/system/diskoverd.service

sudo systemctl daemon-reload
sudo systemctl enable diskoverd.service
sudo systemctl start diskoverd.service
sudo systemctl status diskoverd.service
Install Diskover Indexers for Linux Ubuntu
The following outlines installing the Diskover indexer on Linux Ubuntu.
Install Python 3.x, pip, and Development Tools
🔴 Check Python version - most factory versions come with Python pre-installed, check your version of Python:
python --version
🔴 Install Python and pip:
apt-get update -y
apt-get install -y python3-dev
python3 -V
apt install python3-pip
pip3 -V
Install Diskover Indexer
🔴 Extract diskover compressed file (from ftp server) - replace <version number> with only the number, do not use the <>:
mkdir /tmp/diskover-v<version number>
tar -zxvf diskover-v<version number>.tar.gz -C /tmp/diskover-v<version number>/
cd /tmp/diskover-v<version number>
🔴 Copy diskover files to opt:
cp -a diskover /opt/
cd /opt/diskover
🔴 Install required Python dependencies:
pip3 install -r requirements.txt
🔴 If indexing to AWS Elasticsearch run:
pip3 install -r requirements-aws.txt
🔴 Copy default/sample configs:
for d in configs_sample/*; do d=`basename $d` && mkdir -p ~/.config/$d && cp configs_sample/$d/config.yaml ~/.config/$d/; done
🔴 Edit Diskover config file:
vi ~/.config/diskover/config.yaml
🔴 Configure indexer to create indexes in your Elasticsearch endpoint in the following section of the config.yaml file:
databases:
    elasticsearch:
🔴 Generate your hardware ID to obtain and install the license key.
Mount File Systems
🔴 NFS mount:
yum -y install nfs-utils
mkdir /mnt/nfsstor1
mount -t nfs -o ro,noatime,nodiratime server_name:/export_name /mnt/nfsstor1
🔴 Windows SMB/CIFS mount:
yum -y install cifs-utils
mkdir /mnt/smbstor1
mount -t cifs -o username=user_name //server_name/share_name /mnt/smbstor1
Create Index of File System
🔴 To run the Diskover indexing process from a shell prompt:
cd /opt/diskover
🔴 Install your license files as explained in the software activation chapter.
🔴 Start your first crawl:
python3 diskover.py -i diskover-<indexname> <storage_top_dir>
Install Diskover Indexers for Windows
The following outlines installing the Diskover indexer on Windows.
Install Python
🔴 Download Python 3.7 or greater from Windows Store or python.org and install.
Install Diskover Indexer
🔴 Extract diskover tar.gz or zip archive.
🔴 Copy diskover folder to Program Files:
mkdir "C:\Program Files\diskover"
Xcopy C:\tmp\diskover "C:\Program Files\diskover" /E /H /C /I
🔴 Install Python dependencies required by Diskover. Open a command prompt and run as administrator:
cd "C:\Program Files\diskover"
pip3 install -r requirements-win.txt
🔴 Create logs directory. Open a command prompt and run as administrator:
mkdir "C:\Program Files\diskover\logs"
🔴 Create config directories for Diskover, you will need to create a separate config folder for each folder in diskover\configs_sample\ folder.
For diskover config:
mkdir %APPDATA%\diskover\
copy "C:\Program Files\diskover\configs_sample\diskover\config.yaml" %APPDATA%\diskover\
For diskover auto tag:
mkdir %APPDATA%\diskover_autotag\
copy "C:\Program Files\diskover\configs_sample\diskover_autotag\config.yaml" %APPDATA%\diskover_autotag\
For diskover dupes finder:
mkdir %APPDATA%\diskover_dupesfinder\
copy "C:\Program Files\diskover\configs_sample\diskover_dupesfinder\config.yaml" %APPDATA%\diskover_dupesfinder\
Continue same steps for the other folders in diskover\configs_sample\
🔴 Setup Diskover configuration file. Use Notepad to open the following configuration file:
%APPDATA%\diskover\config.yaml
🔴 Set log directory path:
logDirectory: C:\Program Files\diskover\logs
🔴 Setup Elasticsearch host information:
host: localhost
🔴 Set Elasticsearch port information:
port: 9200
🔴 Configure username:
user: myusername
🔴 Configure password:
password: changeme
🔴 Set replace paths in Windows to True:
replace: True
🔴 Generate your hardware ID to obtain and install the license key.
🔴 Enable long paths to allow for long paths. After enabling long paths, reboot Windows.
🔴 Generate an index/scan. Open command prompt or Windows PowerShell as administrator:
cd 'C:\Program Files\diskover\'
python3 diskover.py -i diskover-vols-2021011501 C:\Users\someuser
Tips for Windows Drive Mapping
Windows drive map letters and unc paths can also be scanned.
If you open a command shell or PowerShell as administrator and the mounted filesystems are not present.
🔴 To mount them:
PS C:\Windows\system32> net use p: \\172.19.19.6\SMBshare
The command completed successfully.
PS C:\Windows\system32> net use x: \\172.19.19.6\P01_S99
The command completed successfully.
PS C:\Windows\system32> net use
New connections will be remembered.
Status  Local   Remote                  Network
-------------------------------------------------------------------------------
OK      P:      \\172.19.19.6/SMBshare  Microsoft Windows Network
OK      X:      \\172.19.19.6/P01_S99   Microsoft Windows Network
OK              \\172.19.19.6\SMBshare  Microsoft Windows Network
                \\TSCLIENT\C            Microsoft Terminal Services
The command completed successfully.
Verify Index Creation
🔴 Open a Web browser to: http://localhost:9200/_cat/indices

Install Diskover Indexers for Mac | Manual Install
The following outlines installing the Diskover indexer on MacOS.
Install Python 3.x on MacOS
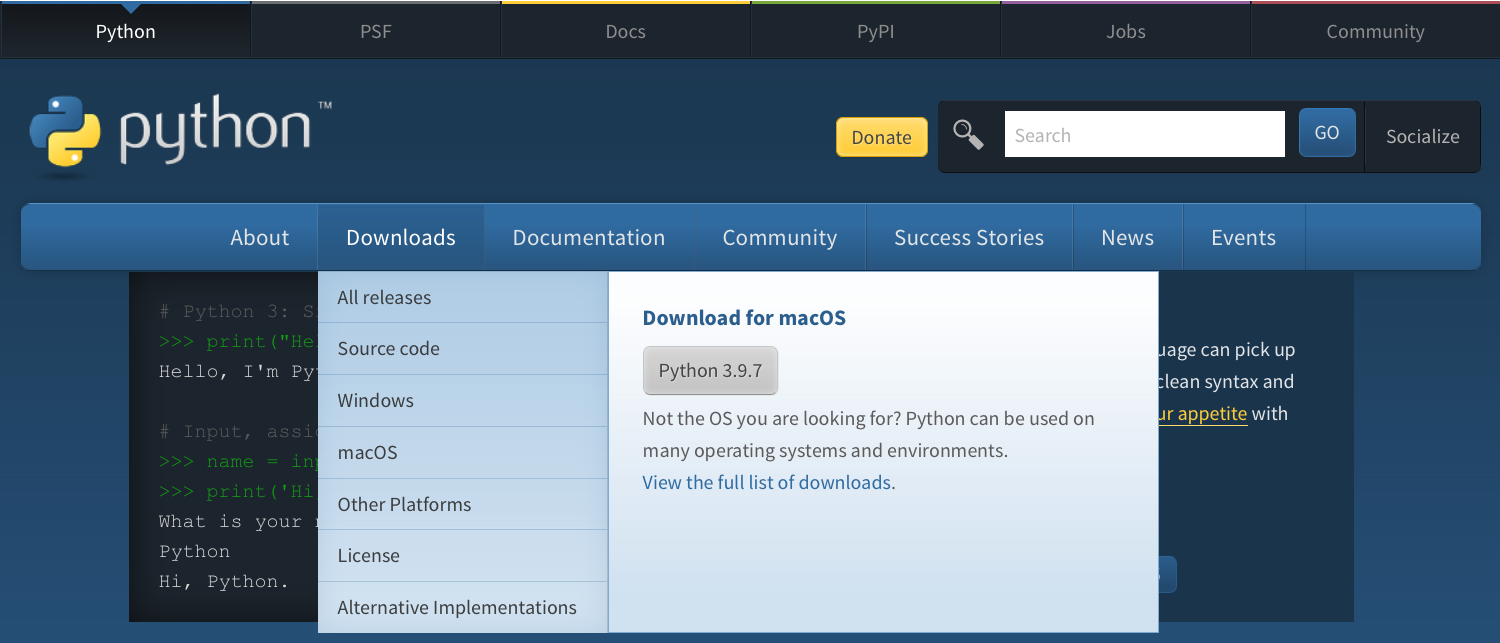
🔴 Go to https://www.python.org/
🔴 Select the Downloads menu.
🔴 Click the Python 3.x download button.
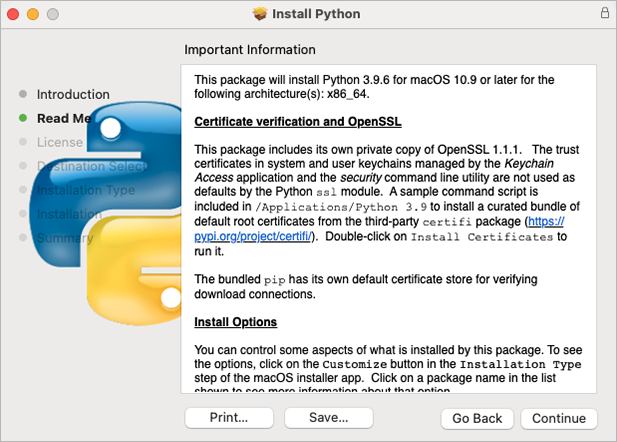
🔴 Launch the installer – Welcome Introduction - click Continue:

🔴 Read Me - click Continue:
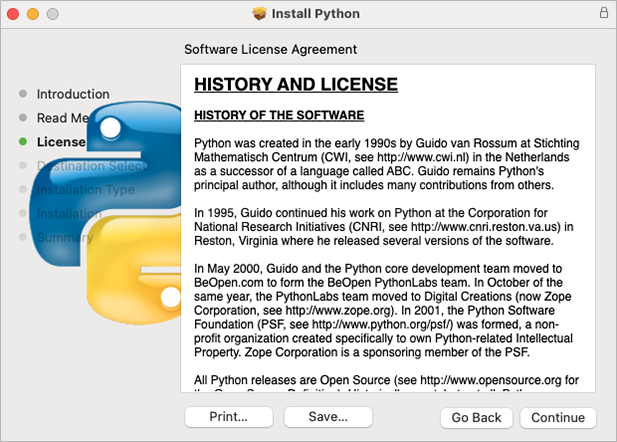
🔴 History and License - click Continue:
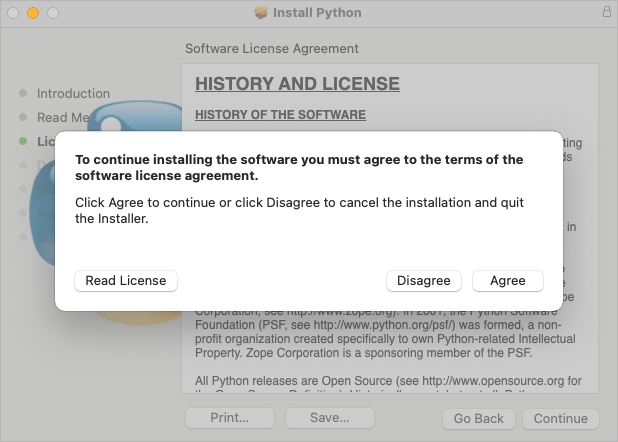
🔴 Python license – click Agree:
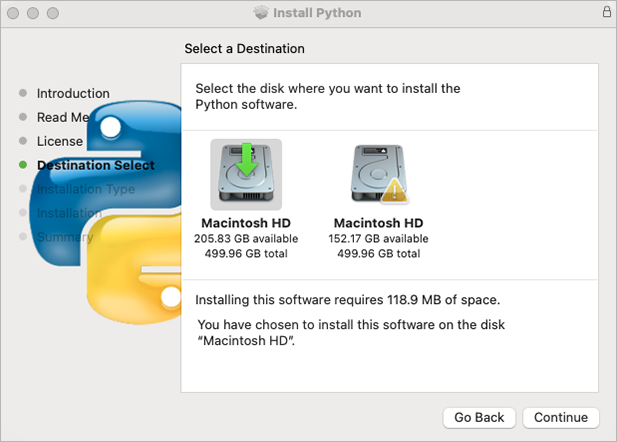
🔴 Select the destination if prompted – click Continue:
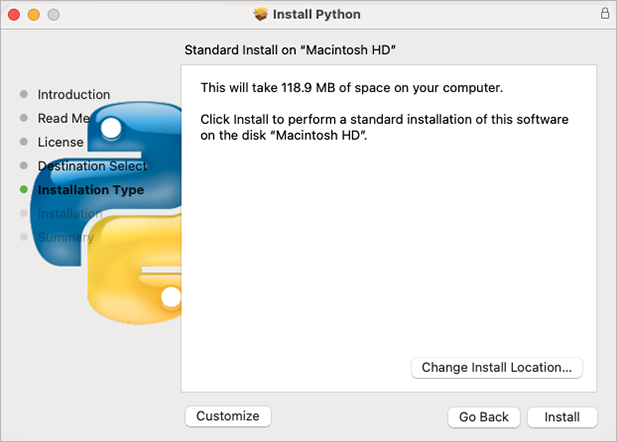
🔴 Begin the installation by clicking Install:
🔴 Installation successfully completed acknowledgement – click Close:
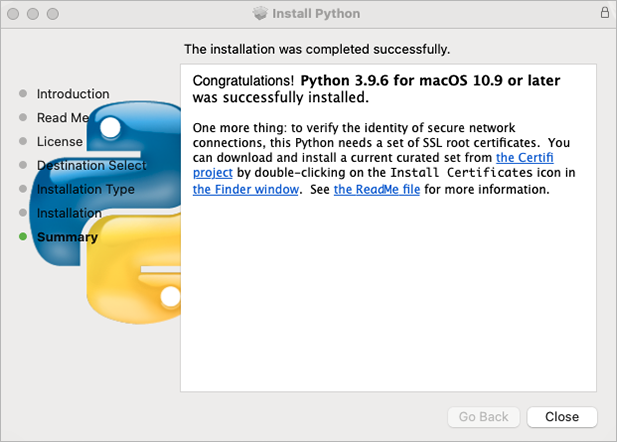
🔴 Open your Applications and select Phython 3.x folder.
Python will be installed in /usr/bin/python3
🔴 A new folder is created under /Applications/Python 3.x change that with your exact version number, ex: 3.9:
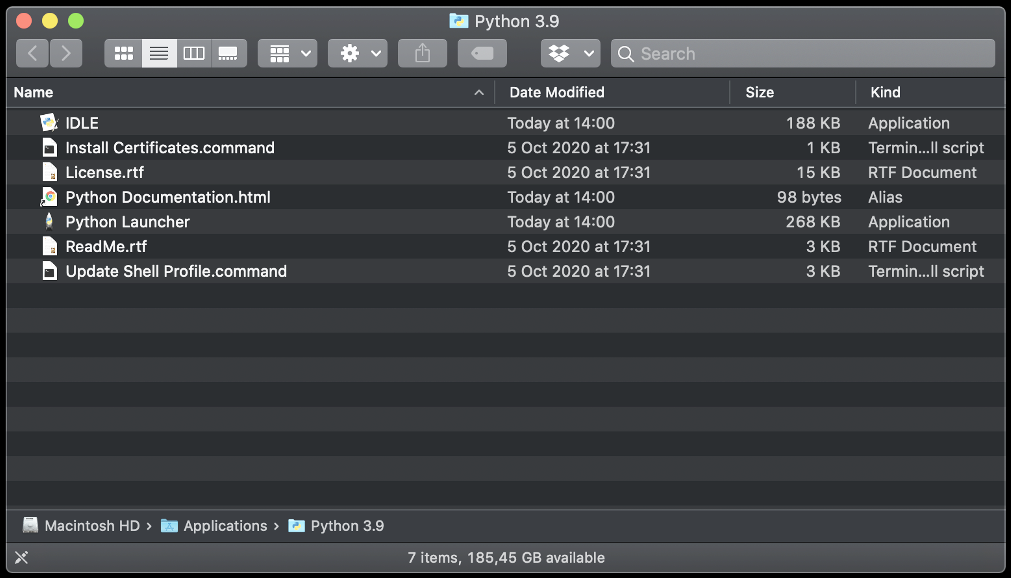
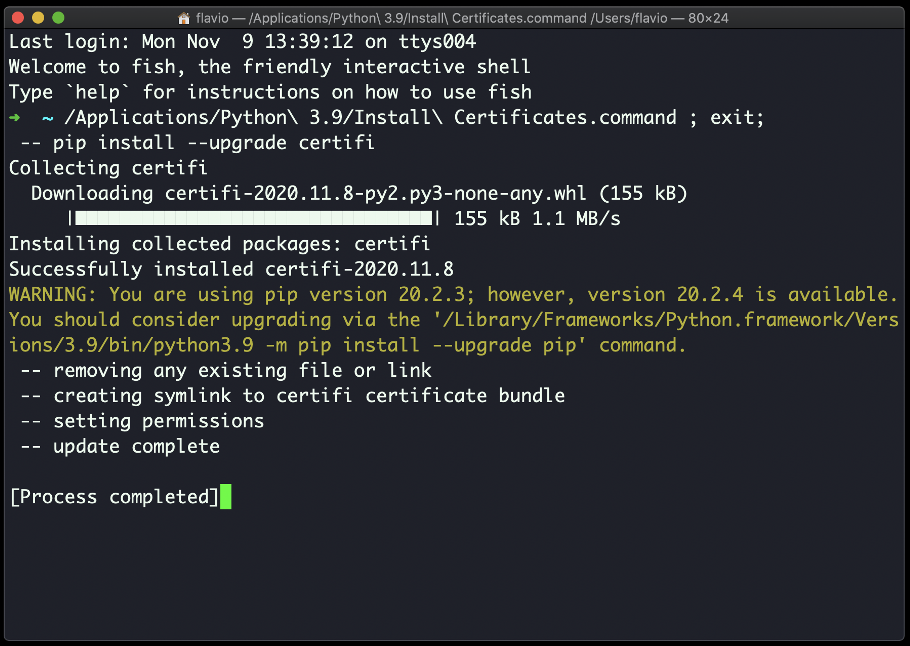
🔴 As the instructions said in the last installation panel, you need to run the Install Certificates.command to install the SSL certificates needed by Python.
🔴 Double-click on Install Certificates.command to run:
Install Diskover Indexer
🔴 Copy diskover file to /tmp
🔴 Extract diskover folder.
🔴 Copy diskover folder to /Applications/Diskover.app/Contents/MacOS/
cp -R diskover /Applications/Diskover.app/Contents/MacOS/
🔴 Change directory to diskover location:
cd /Applications/Diskover.app/Contents/MacOS/diskover/
🔴 Install Python dependencies required by Diskover indexer:
python3 -m pip install -r requirements.txt
🔴 Copy default/sample configs to ~/.config/
cd /Applications/Diskover.app/Contents/MacOS/diskover/configs_sample
cp -R diskover* ~/.config/
🔴 Edit diskover config file:
vi ~/.config/diskover/config.yaml
🔴 Configure indexer to create indexes in your Elasticsearch endpoint in the following section of the config.yaml file:
databases:
    elasticsearch:
🔴 Generate your hardware ID to obtain and install the license key.
Create Index of File System
🔴 To run the Diskover indexing process from a shell prompt:
cd /Applications/Diskover.app/Contents/MacOS/diskover/
python3 diskover.py -i diskover-<indexname> <storage_top_dir>
Install Diskover Indexers for Mac | Using Installer 🚧
🚧 NOT AVAILABLE YET
The following outlines:
- Installing the dependencies for the Diskover indexer on MacOS using an installer.
- How to get/install the license
- Launching your first scan using the Diskover web Indexing Tool.
Download the Installation Package
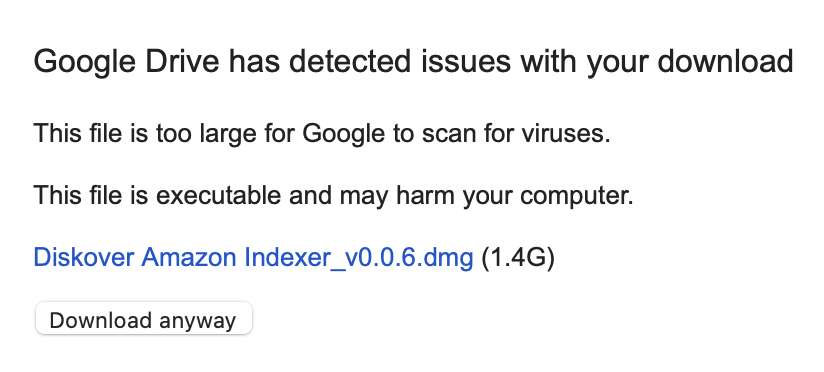
🔴 Use the url link you received to download the Diskover Amazon Indexer_vx.dmg package > click on the url link and it will open a tab in your default browser, then click Download:
🔴 If you get the following message, select Download anyway:
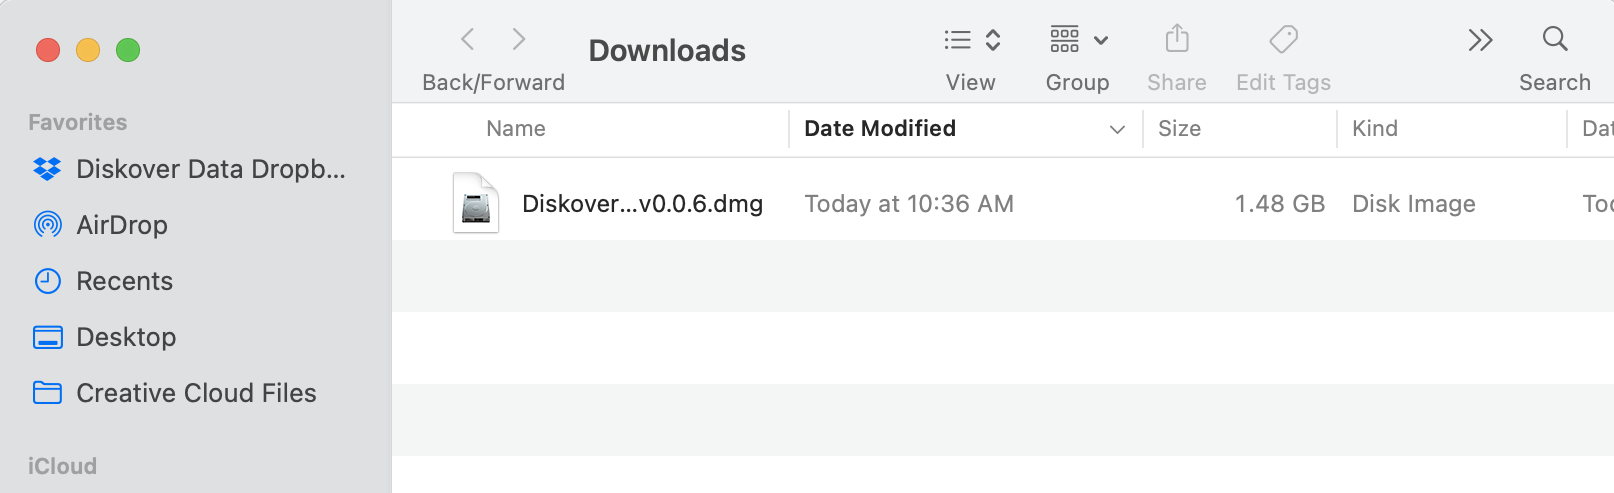
🔴 The Diskover Amazon Indexer_vx.dmg package will go to your Downloads folder. Wait for the file to finish downloading and then double-click the icon/file to launch the Diskover Mac Installer:
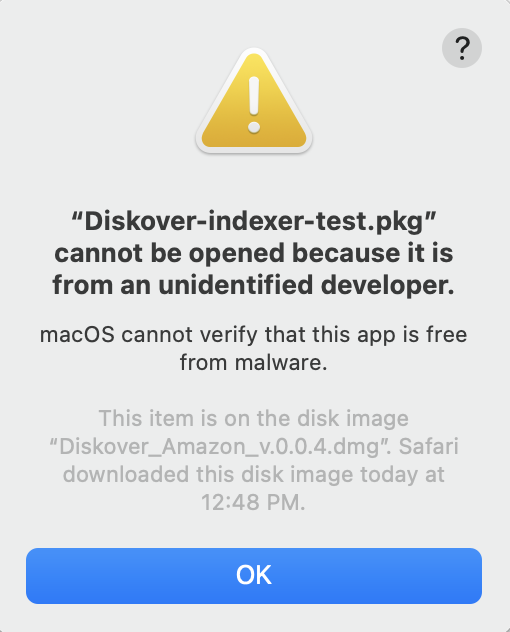
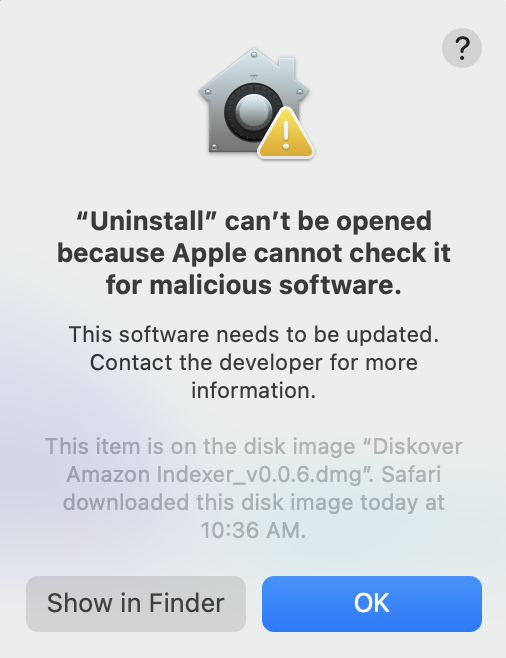
⚠️ Possible Security Warnings
Note: These security warnings are more common for older MacOS installations.
🔴 If the following safety message appears, click OK:
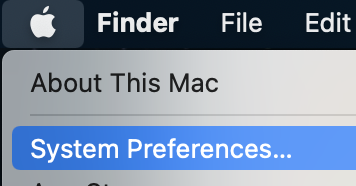
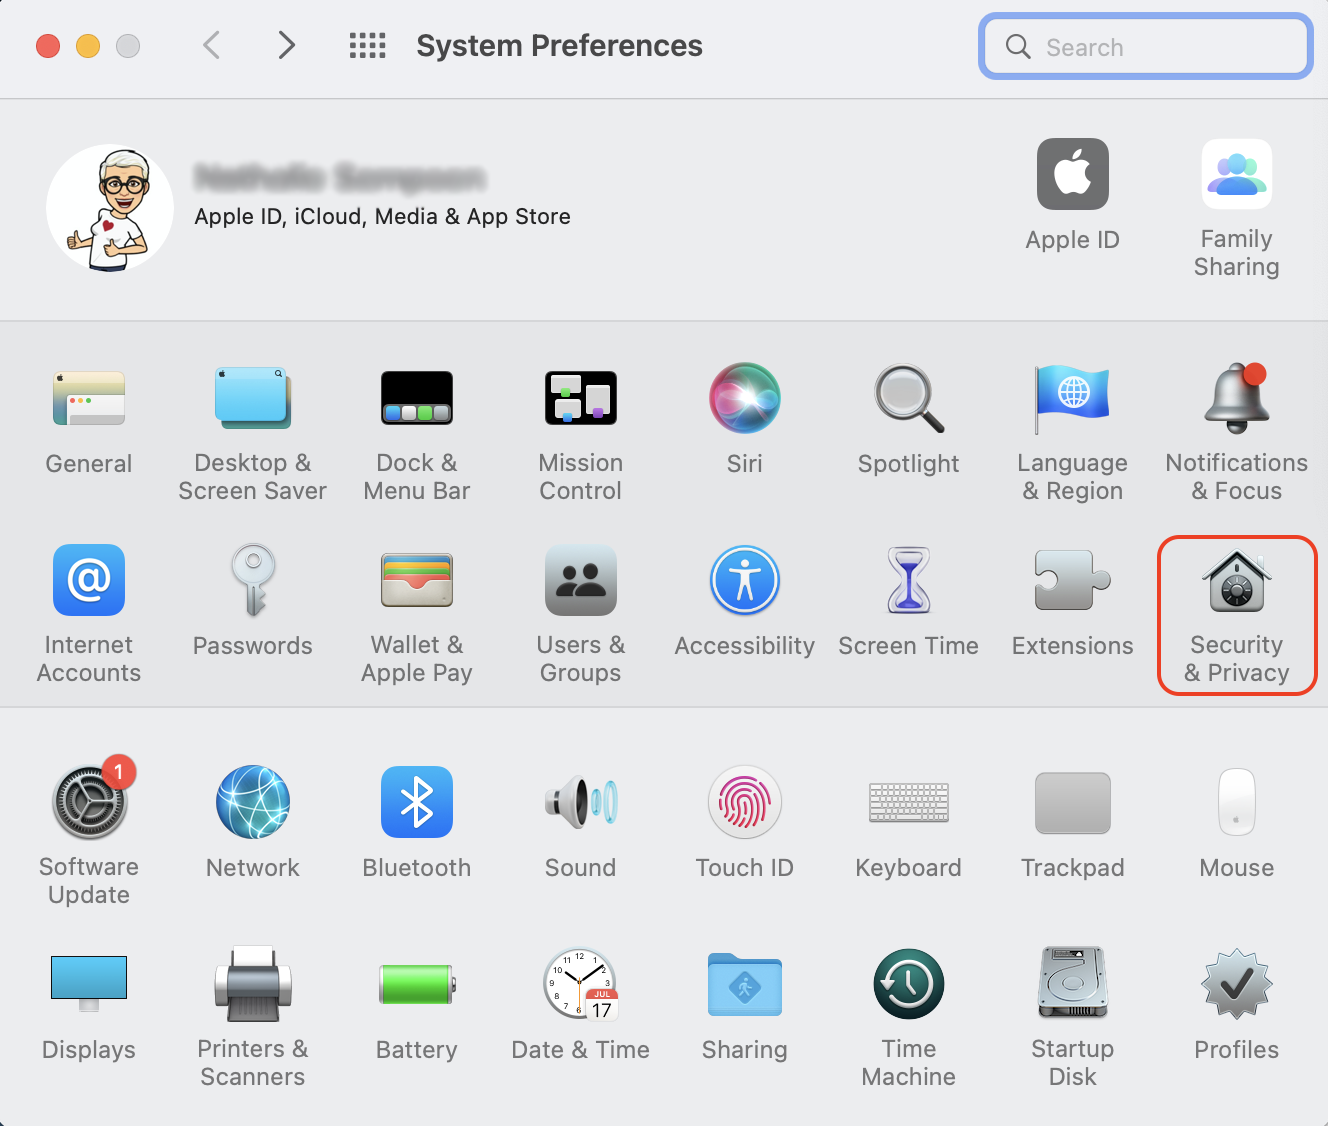
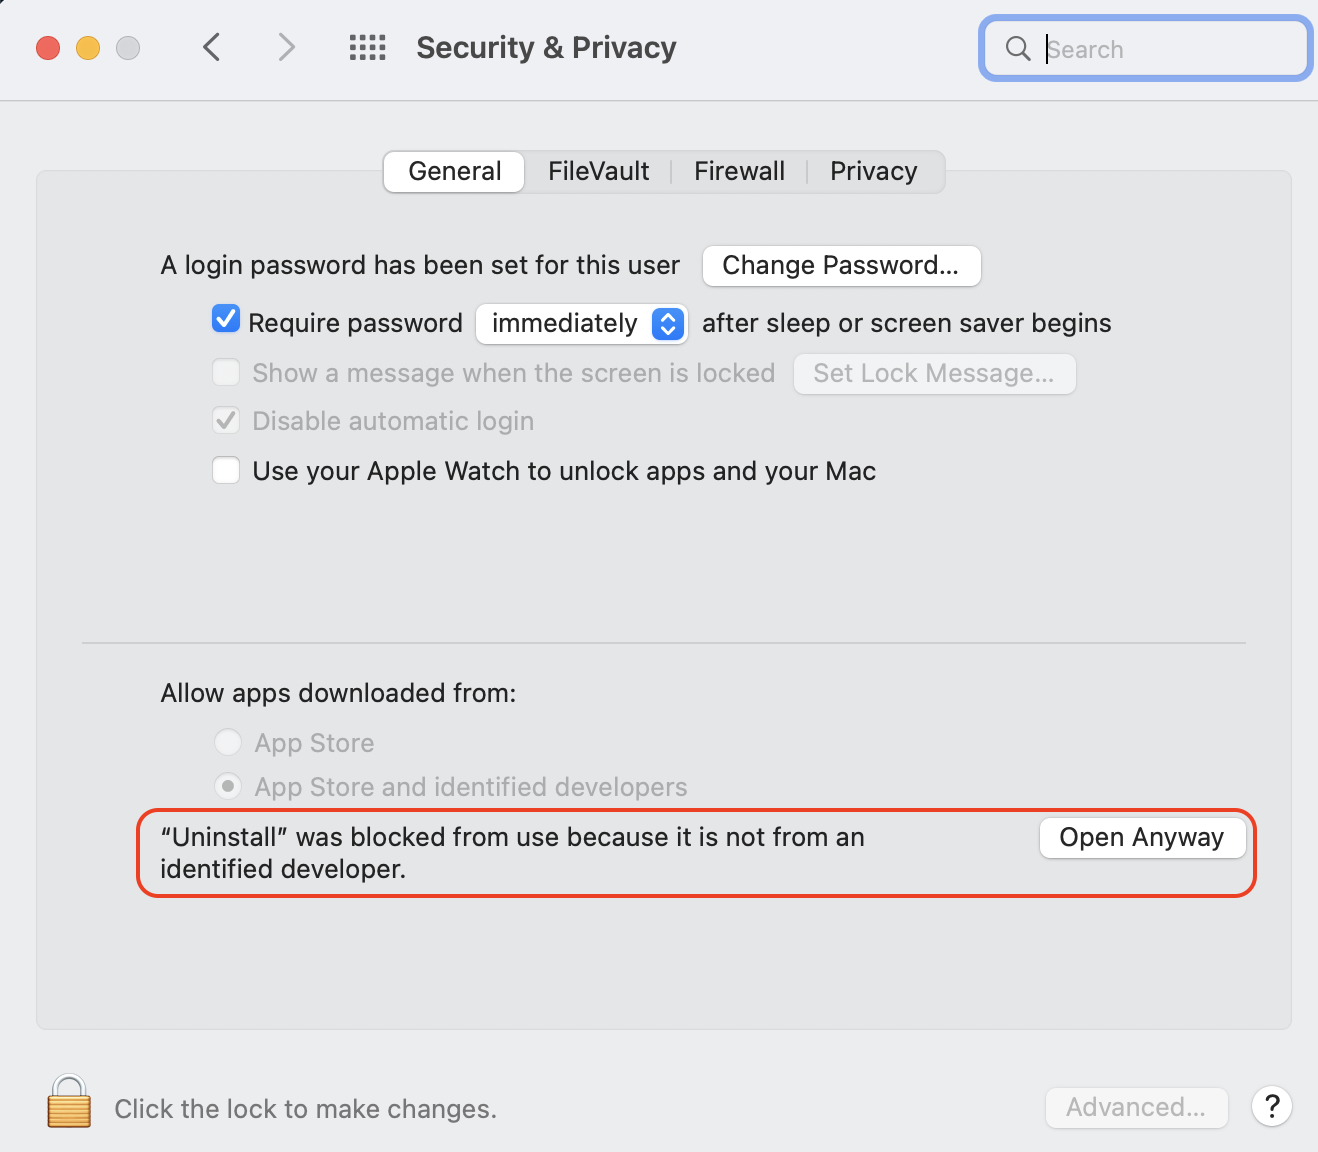
🔴 Open Apple > System Preferences:
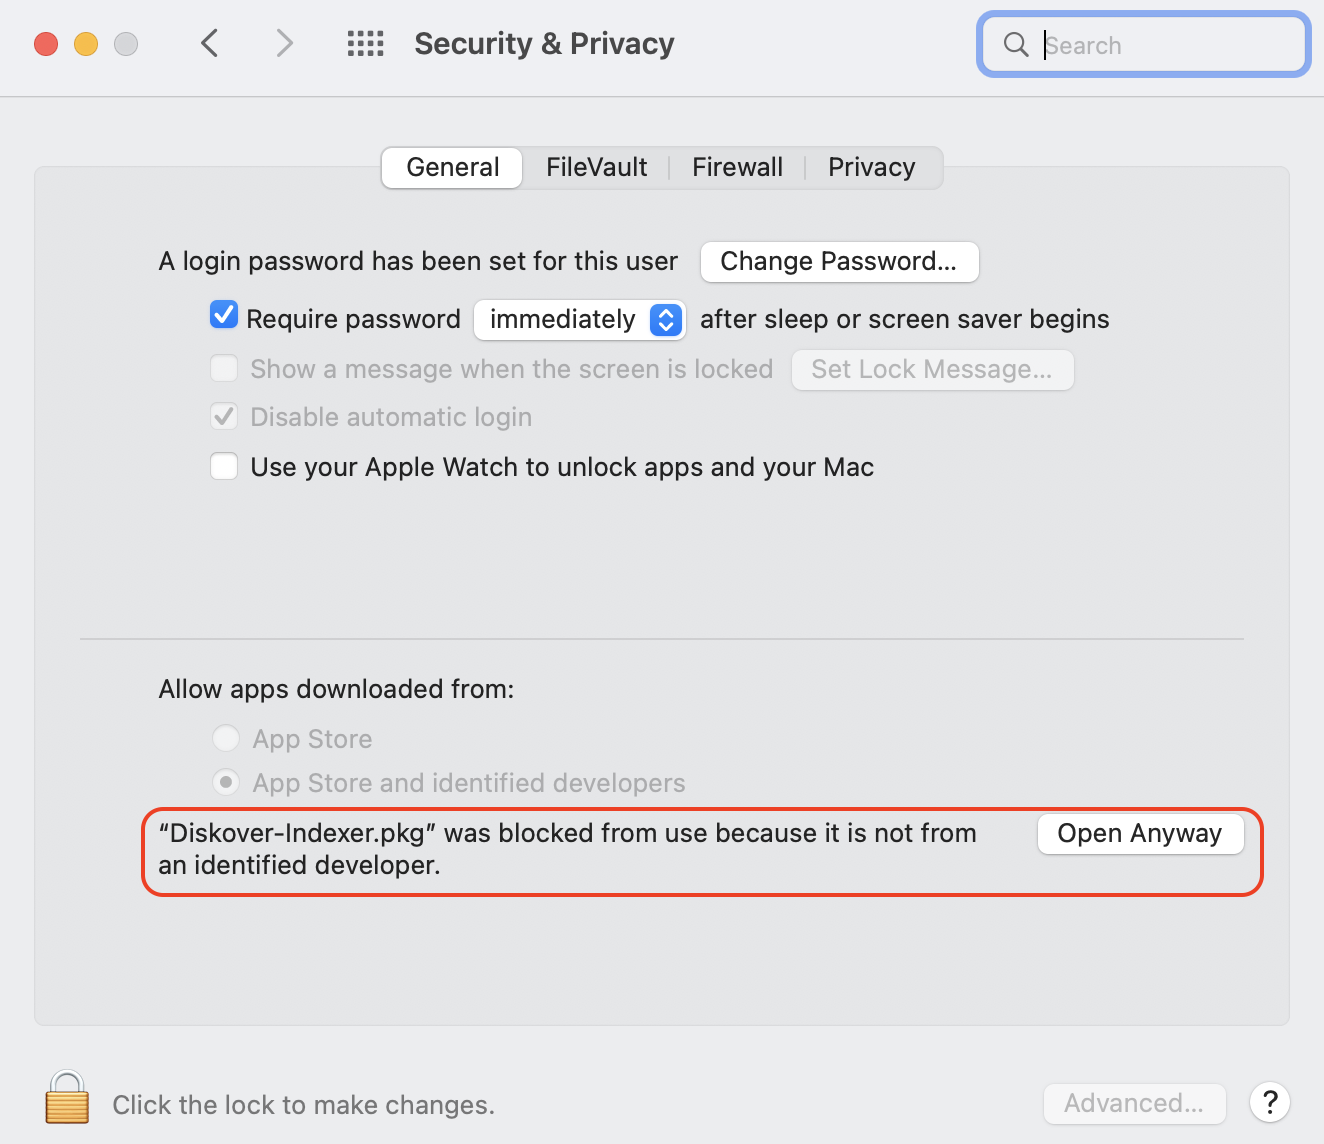
🔴 Select Security & Privacy:
🔴 Click Open Anyway:
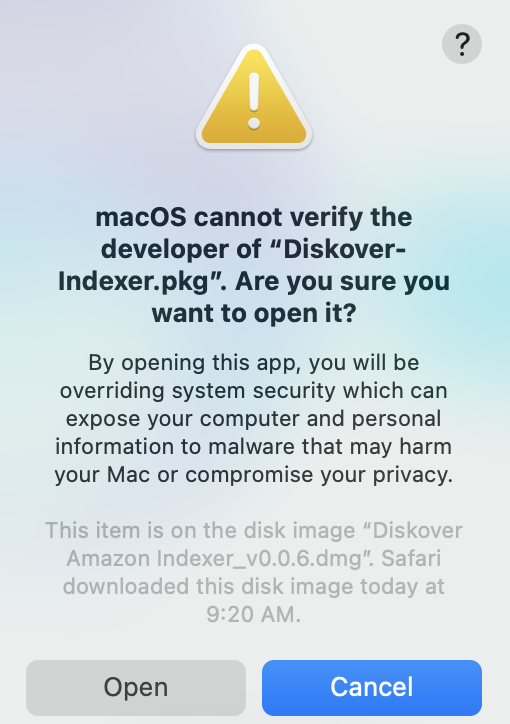
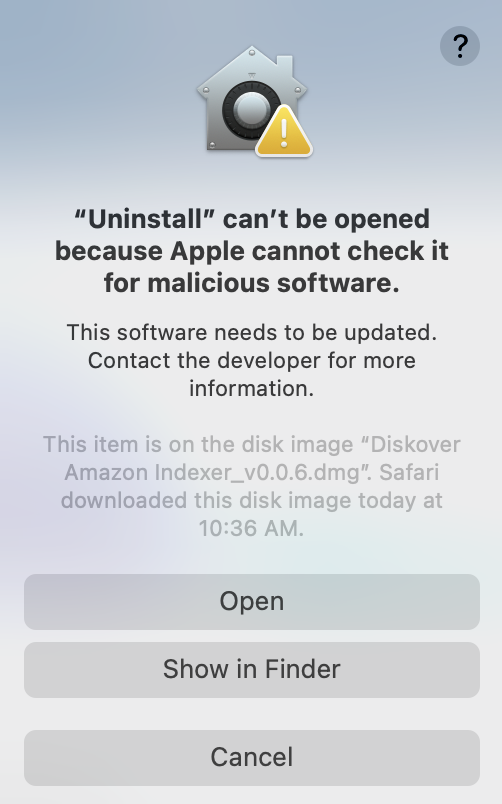
🔴 If you get this final security warning, click Open:
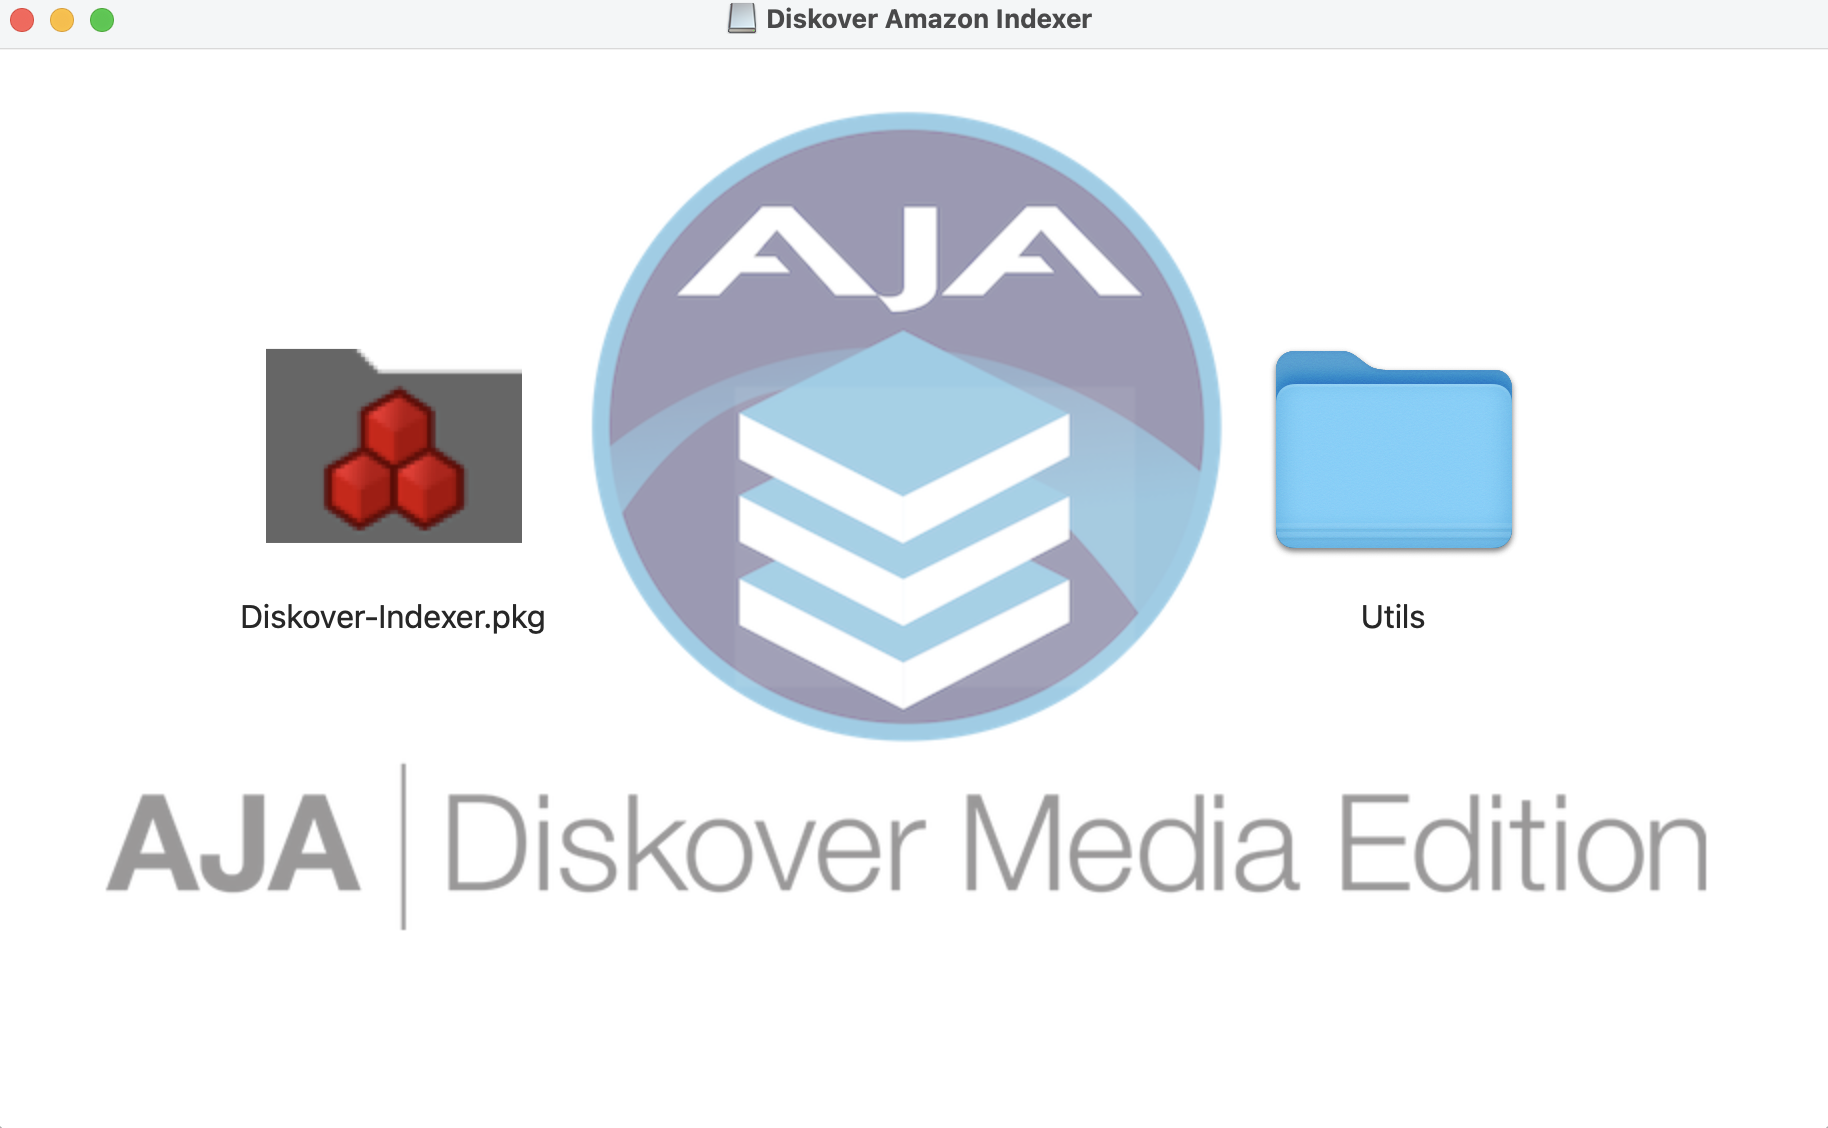
🔴 The following window will open with the installer Diskover-Indexer.pkg and a utilities folder Utils. Click on the Diskover-Indexer.pkg to launch the installer:
Dependencies Installation
Note: You can print and/or save the text content at each step of the installation using the Print and Save buttons located at the bottom of the installation window. You can also go back one step at a time by clicking the Go Back button.
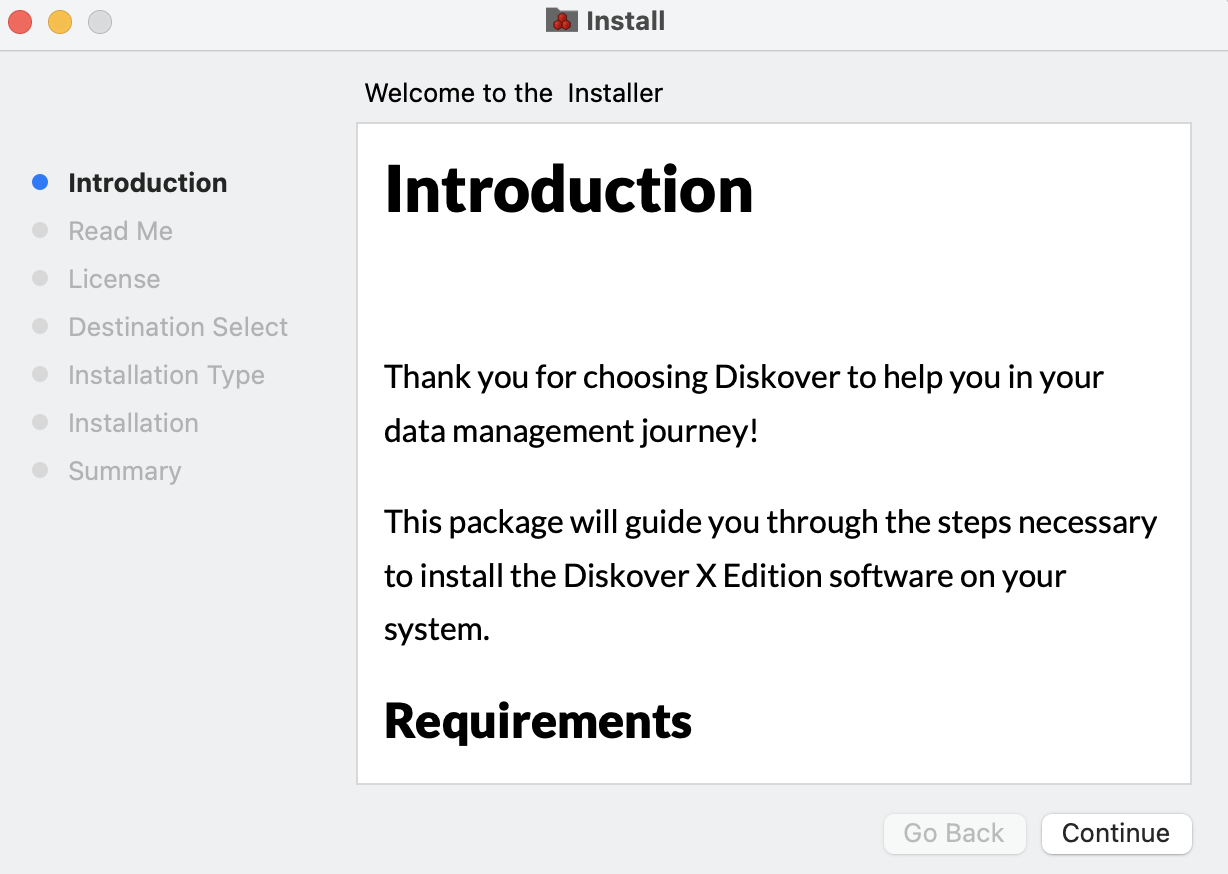
Introduction
🔴 Click Continue:
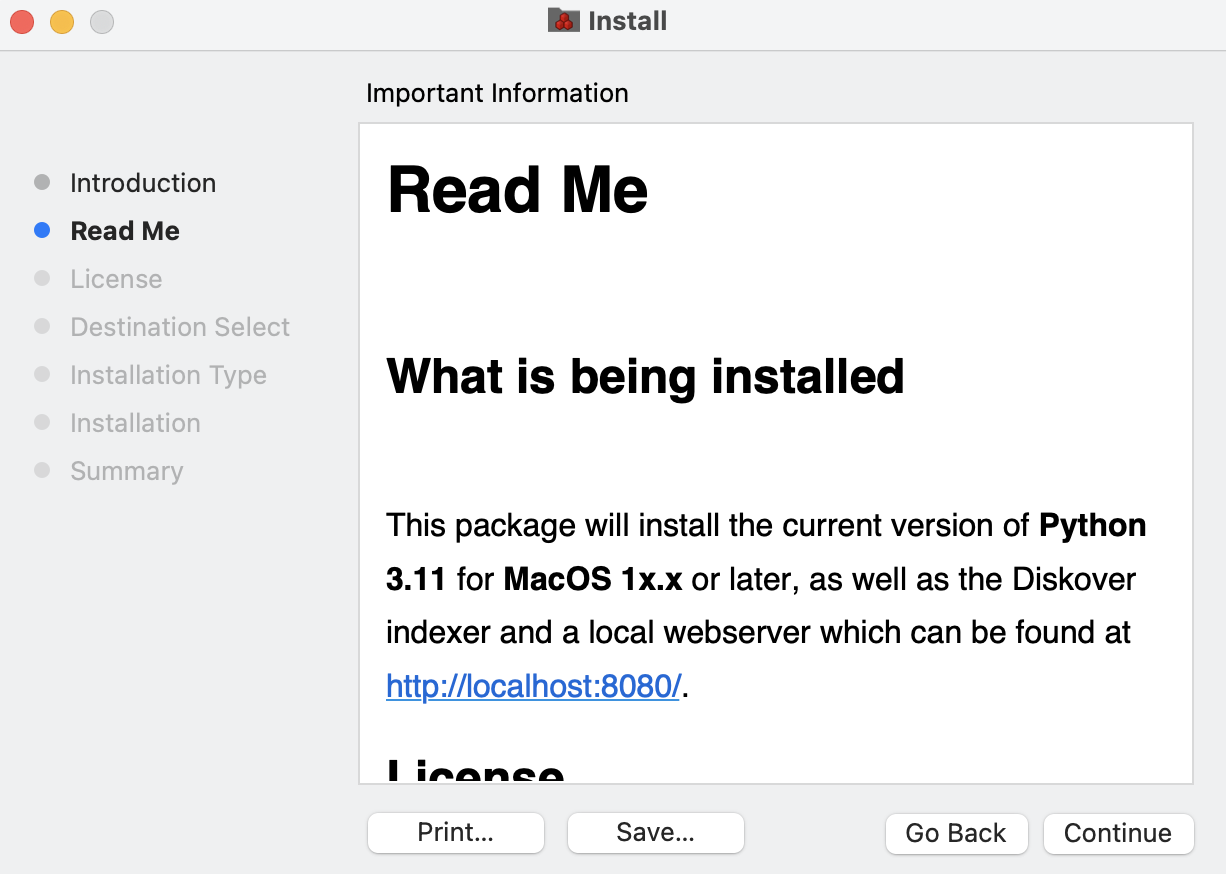
Read Me
🔴 Take the time to read this basic information, plus you might want to save or print for future reference, then click Continue:
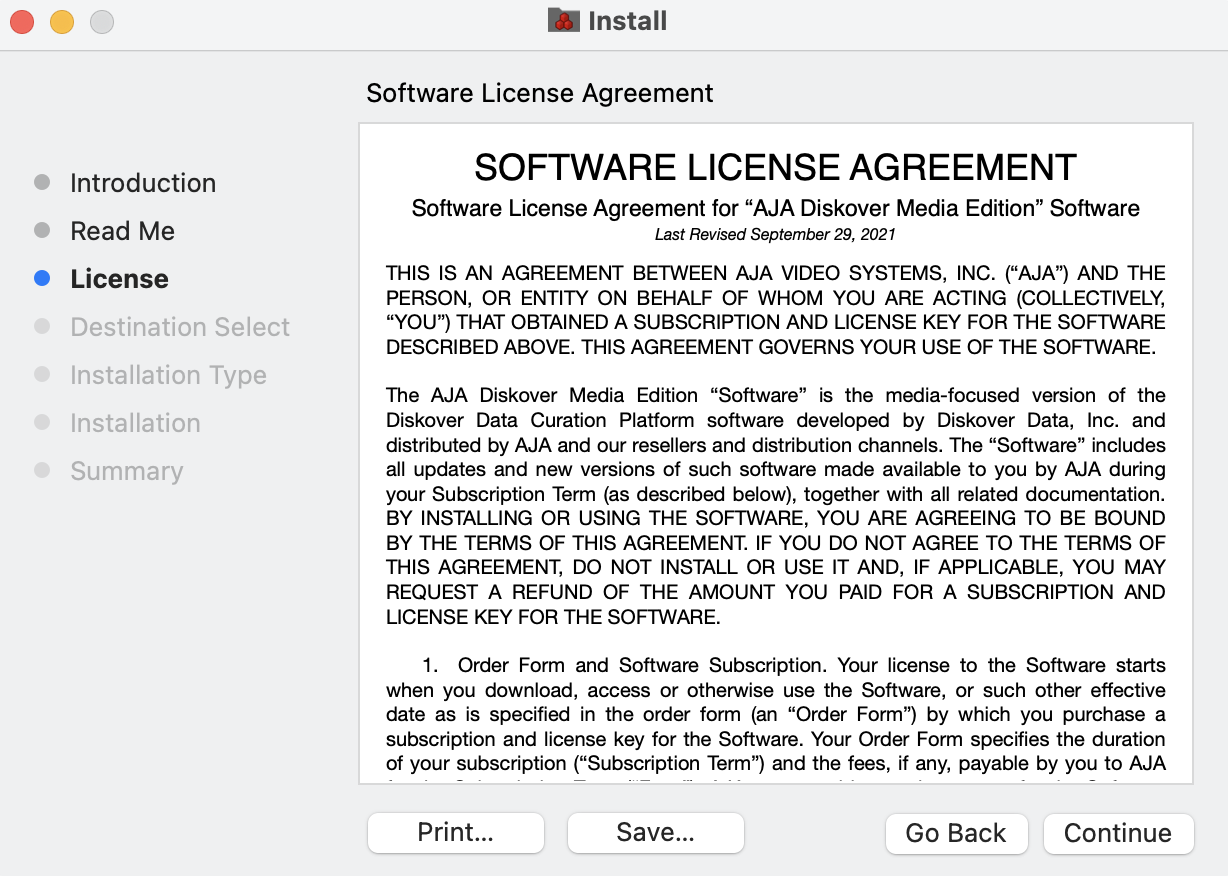
License
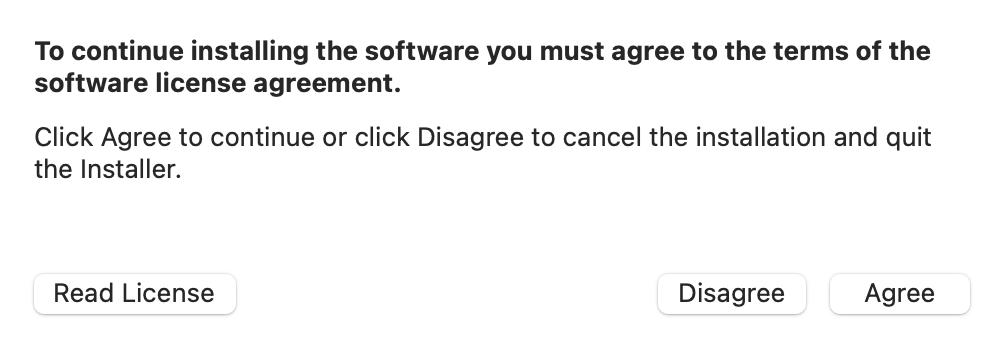
🔴 Read, save, and/or print the license agreement, then click Continue:
🔴 You will be prompted to Agree to resume the installation. If you select Disagree, the installation process will stop before any files are installed:
Destination Selection
🔴 Select the disk/volume for the installation of the files and then click Continue:

Installation Type
🔴 This step will confirm the space required and the disk/volume you selected for the installation. If you want to change the selection by default, either select Change Install Location or Go Back. Once you are satisfied with your selection, click Install to launch the final step of the process:
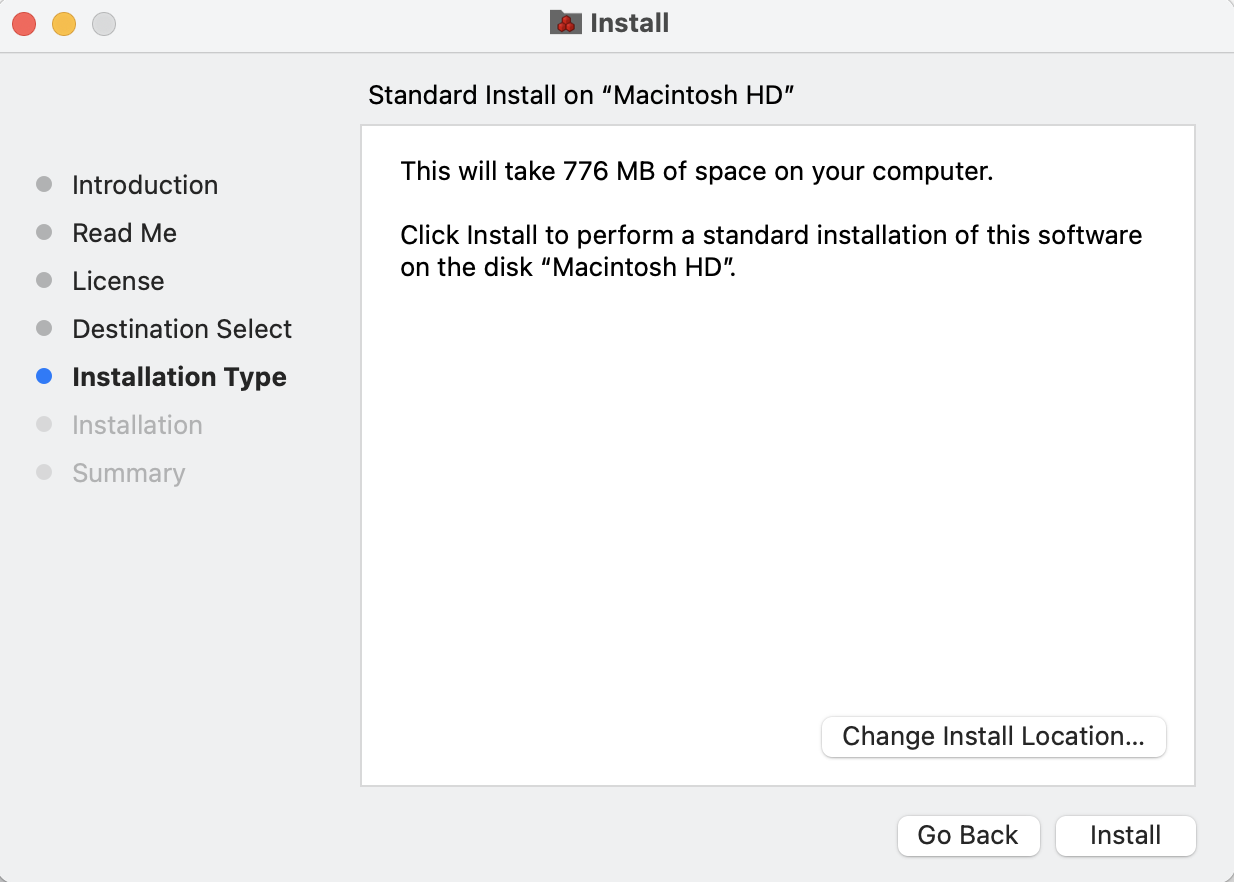
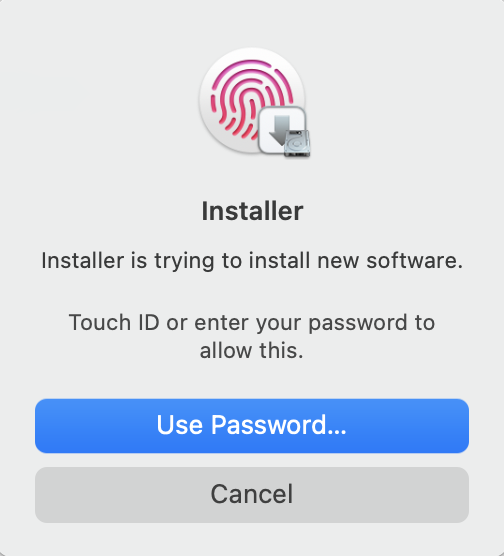
🔴 Depending on your Mac settings, you may be requested to type your password or use your Touch ID.
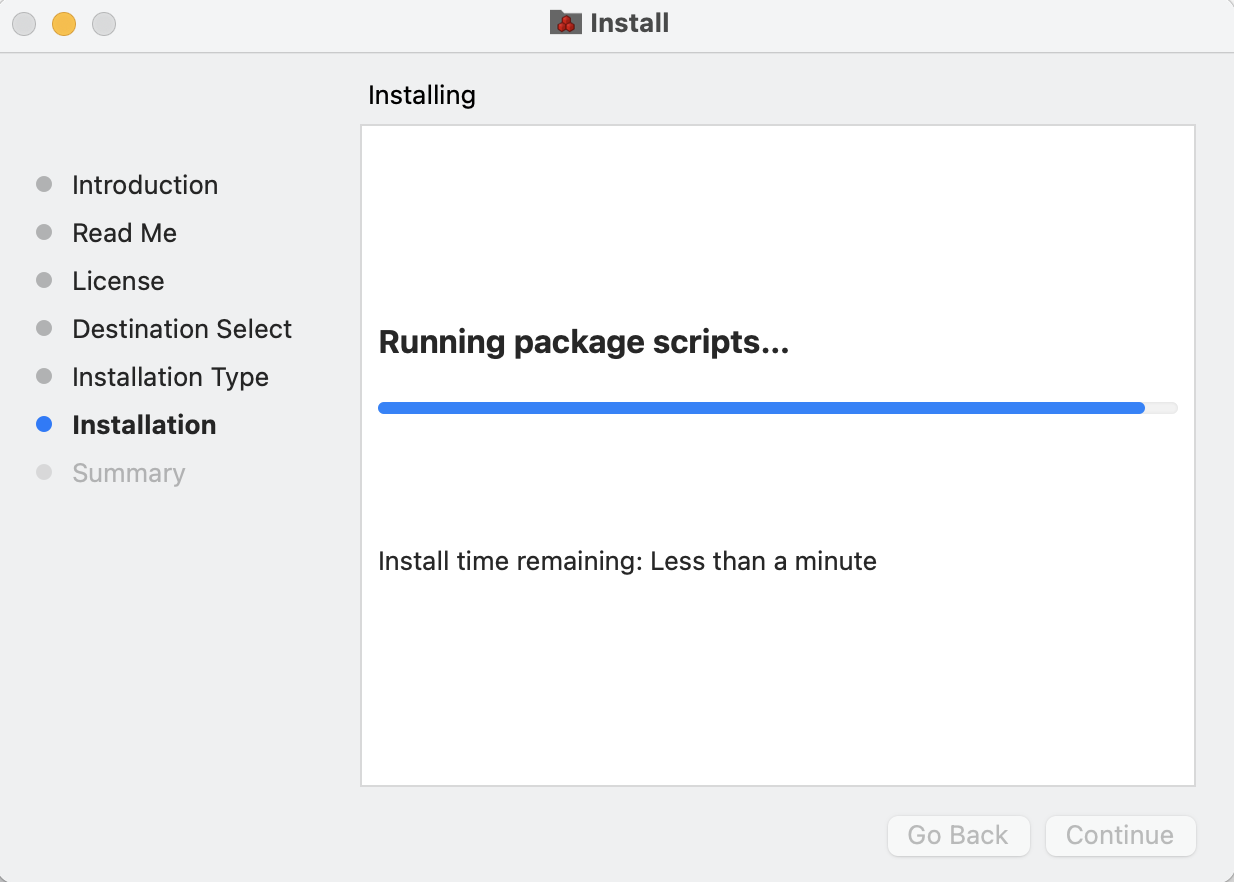
Installation
🔴 You can see the status of the installation via the progress bar. This process takes about 6 minutes in general depending on your hardware and MacOS:
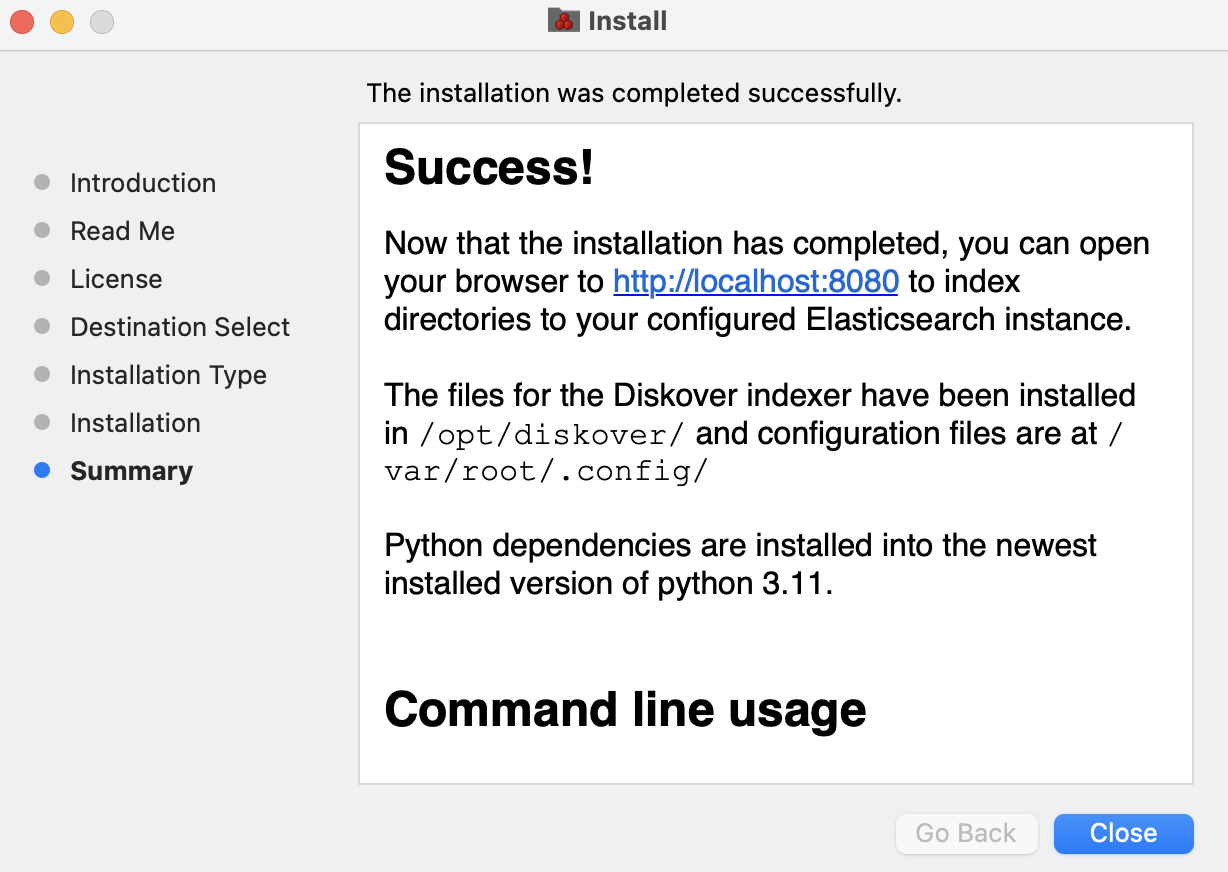
Summary
🔴 You should see Success! At this point, a web browser should open automatically with the Diskover Indexing Tool. If it doesn't, copy this address http://localhost:8080/index/ and paste it in a browser of your choice OR click the following link http://localhost:8080/index/ to open the Diskover Indexing Tool in your default browser:
⚠️ If you get the message The installation failed, please consider these possible issues:
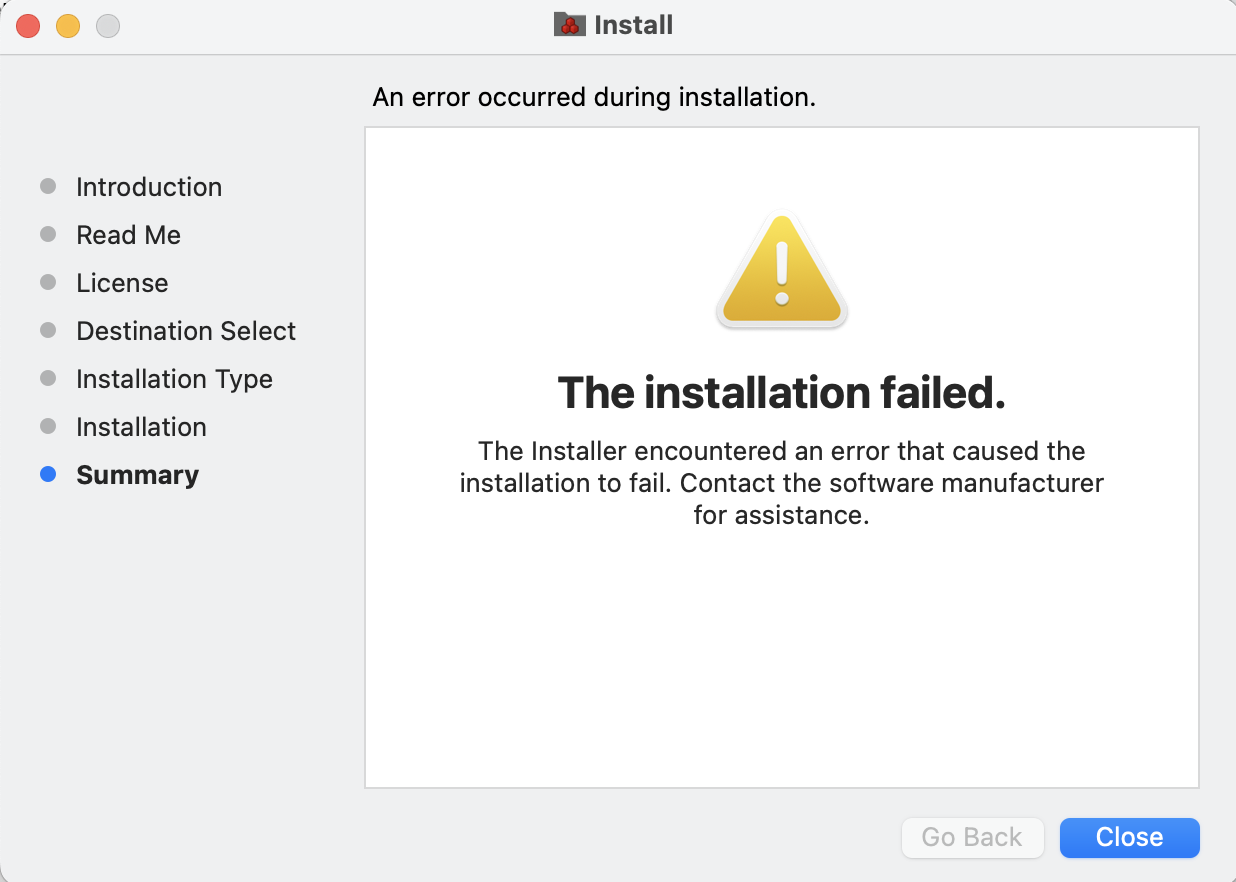
- The selected disk might be full.
- The installer package Diskover Amazon Indexer_vx.dmg was moved from the Downloads folder to another location during the installation.
- The installer package Diskover Amazon Indexer_vx.dmg was deleted during the installation.
-
If none of the above issues apply to your situation:
- Go back to your finder with the Utils folder:
- Double-click the Utils folder:
- A new finder window will open, double-click on GatherLogs.command

- This will create a zip file on your desktop diskover-tools-logs-time stamp.zip
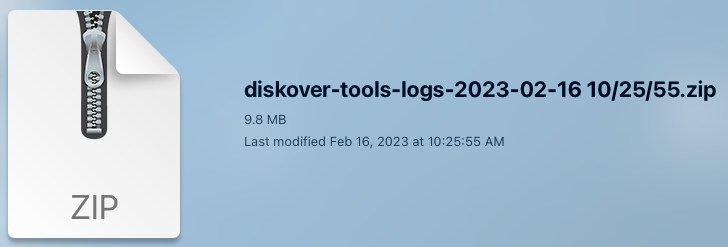
- Email that zip file to support@diskoverdata.com with a description of your problem.
- For any other questions, please contact the Diskover support team.
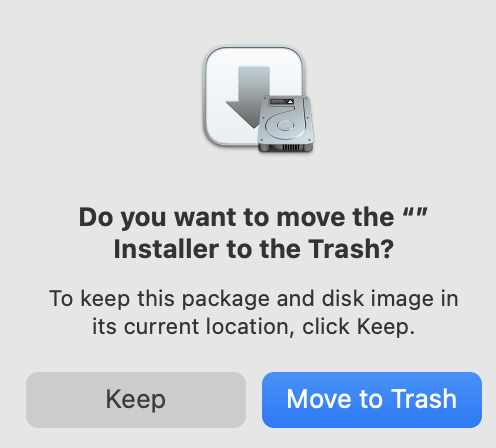
Closing of the installer
🔴 When closing the installer, you'll be prompted to either Keep the installation package or Move to Trash. We recommend you Keep the installer in case you need
Diskover Indexing Tool
Open The Diskover Indexing Tool in a Browser
🔴 If a web browser didn't open automatically with the Diskover Indexing Tool as described in the last section, copy this address and paste it in a browser:
http://localhost:8080/index/
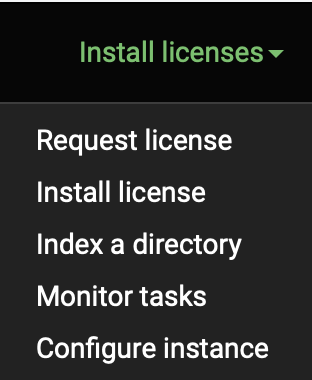
The following sections will discuss each of these options in the drop-down list located at the top right corner:
Request License
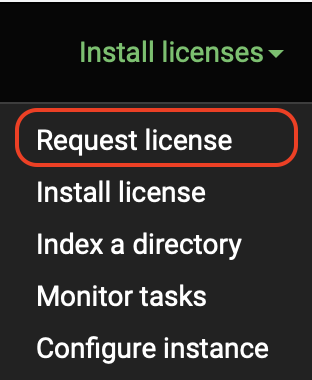
The very first thing you need to do is request a license and then install the license file in order to index your first directory.
🔴 Select Request license in the drop-down list menu.
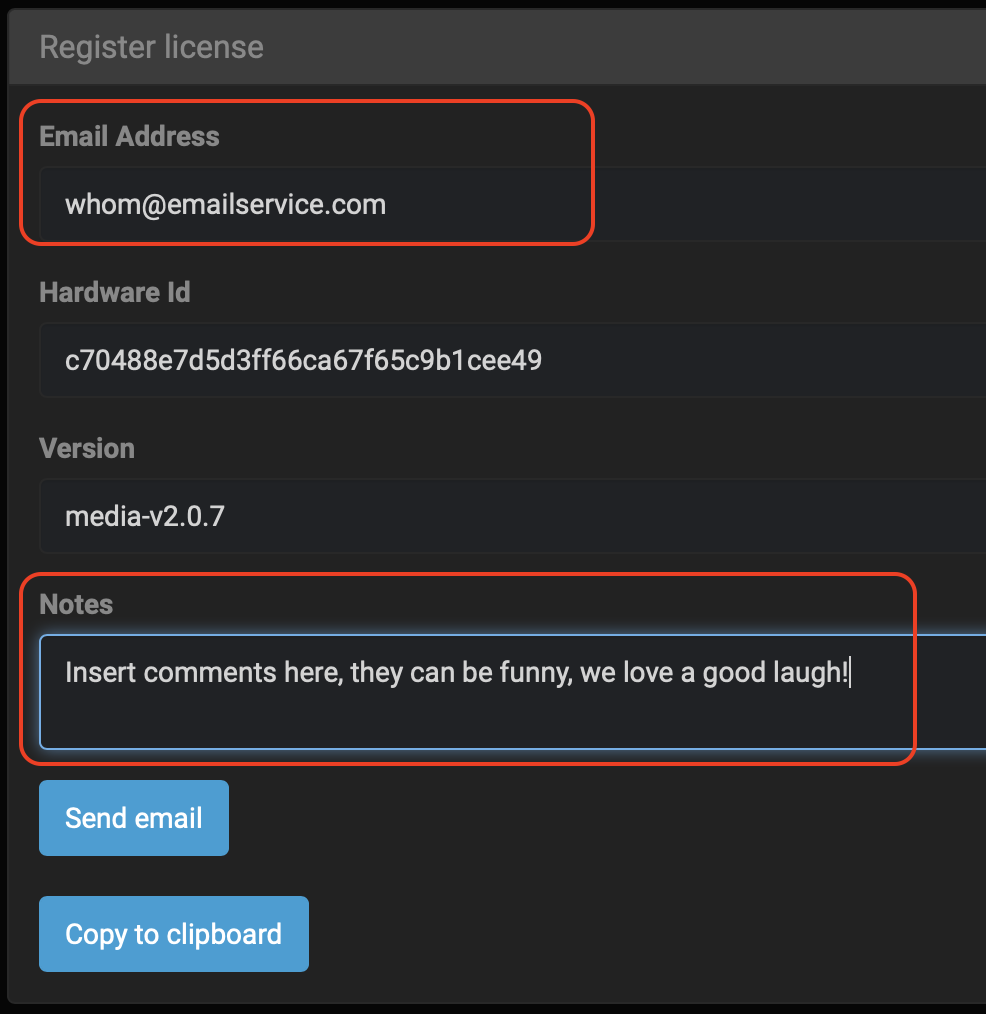
🔴 Click Get hardware ID and installed version to automatically pre-populate these fields:
![]()
🔴 Fill out your Email Address and add Notes if desired, then click Send email. You can also copy your Hardware ID for future references by clicking Copy to clipboard and then paste in a safe location:
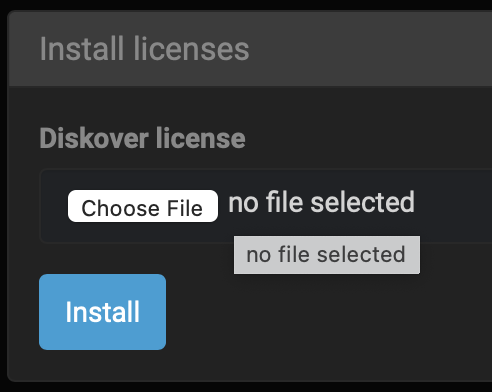
Install License
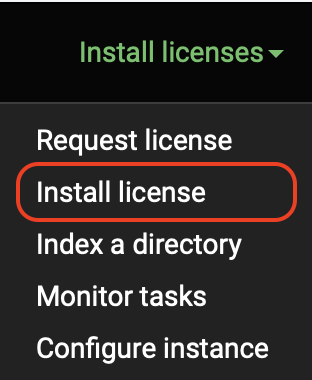
🔴 You will receive your license key via email, the file name will be diskover.lic. Save that file on your system. Go back to the Diskover Indexing Tool and select Install license in the drop-down list.
🔴 Click Choose File and select the diskover.lic file on your system, and then click Install:
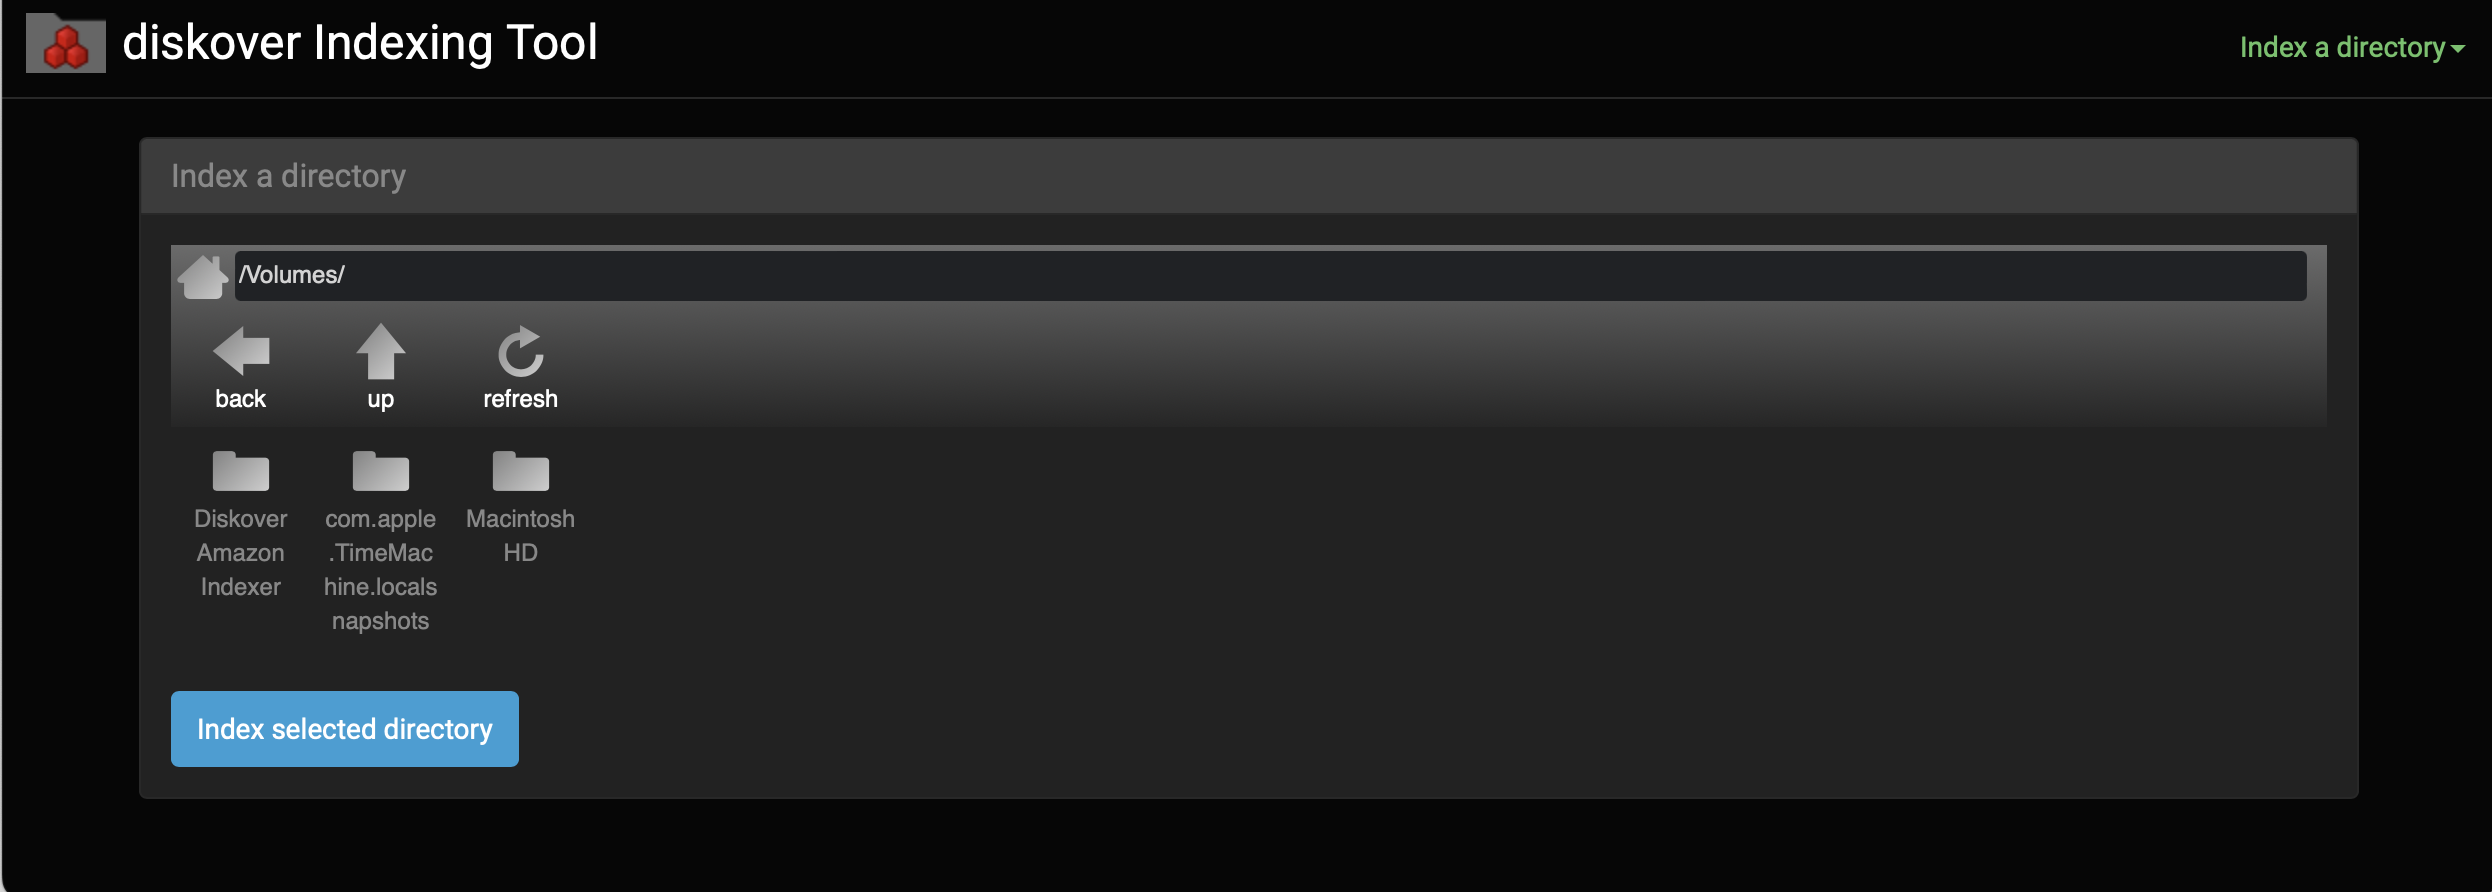
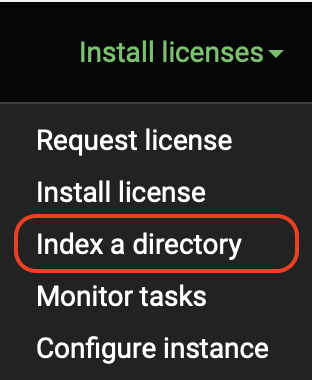
Index a Directory
After the license is installed, you are now ready to index/scan your first directory/volume.
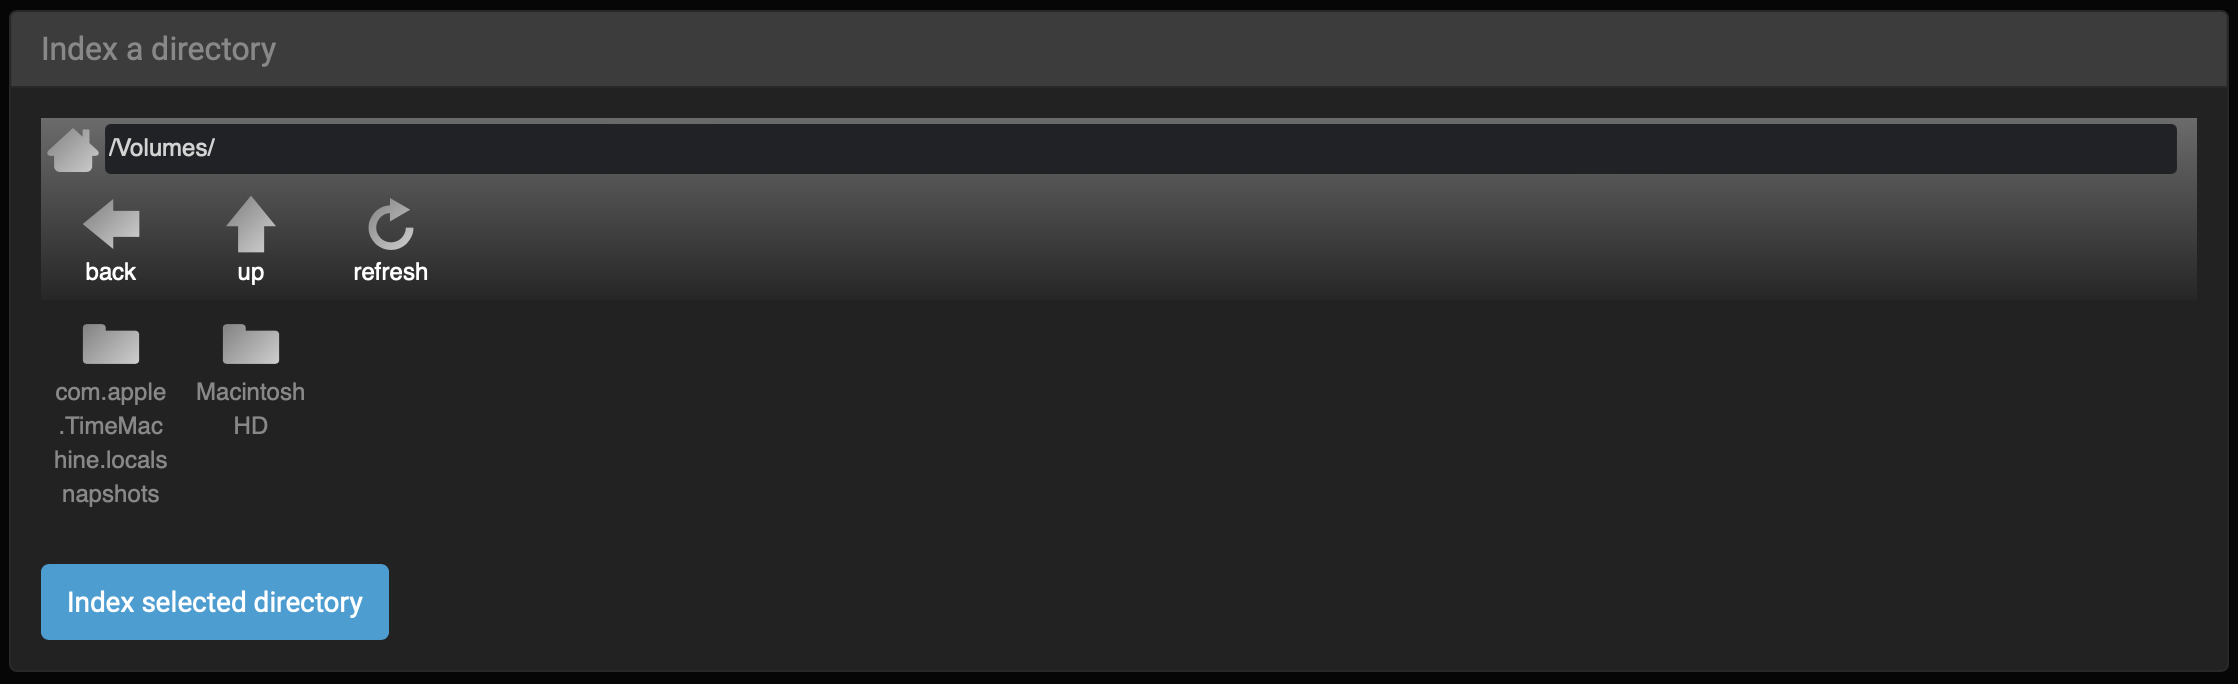
🔴 Select Index a directory from the drop-down list:
🔴 Select your root volume or browse to index a particular directory, then click Index selected directory.
- Redo this step as many times as needed to index/scan all your desired directories.
- Diskover scans in parallel, so you don't have to wait for a scan to be finished to start another one.
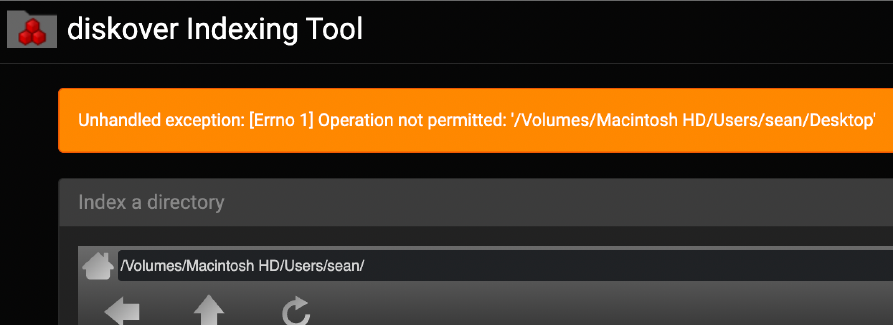
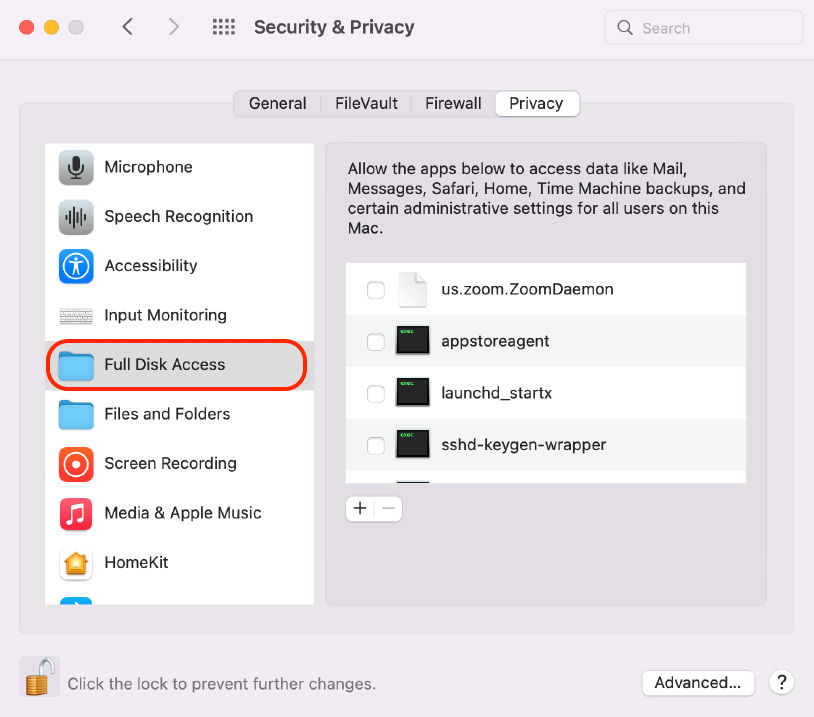
⚠️ If you see the following error message when trying to browse to a directory to index, it means that the installed version of Python needs to be given Full Disk Access in System Preferences.
🔴 Start by opening System Preferences to the Security & Privacy tab and select Full Disk Access in the left pane.
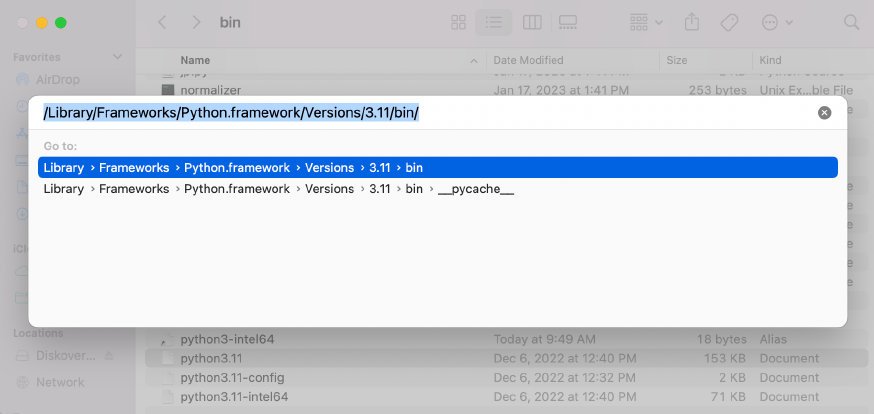
🔴 Open the Finder application by clicking on the icon in the dock OR just click anywhere on your desktop and hit COMMAND + SHIFT + G:
🔴 This will open a Finder window with a bar on it which you can paste a path into. Click on a bar to edit it and paste the following path into that bar and hit return. The finder window will then change to that directory:
/Library/Frameworks/Python.framework/Versions/3.11/bin
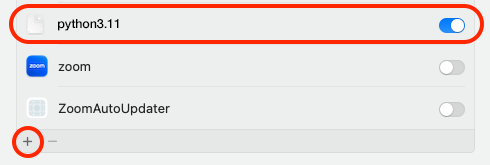
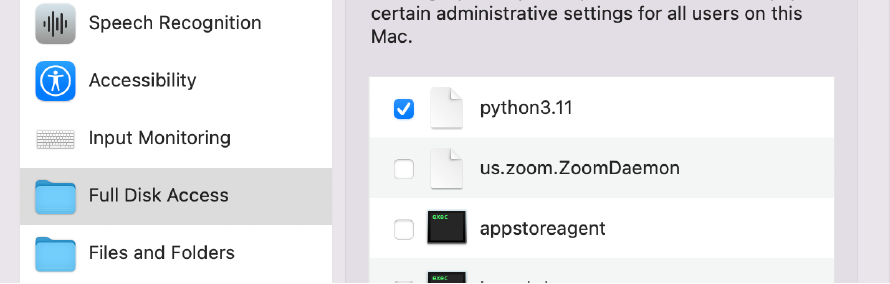
🔴 If you are running the latest OS version: Go back to your System Preferences and Privacy & Security. Click the + at the bottom of the window, you may need to type your desktop password. A finder window will open, select the directory Library > Frameworks > Python.fremework > Versions > 3.11 > bin, then select python3.11 which will then be added to your Full Disk Access list. Toggle the button on to allow full access.
🔴 If you are running an older OS version: Locate the file in that directory named python3.11 and drag it into Full Disk Access window on System Preferences as shown below where it says Allow the applications below…. Make sure there is a check mark next to it so it is enabled.
🔴 Now you can either restart your computer, or for the more technically inclined users you can execute the two following commands.
sudo systemctl unload /Library/LaunchDaemons/com.diskoverdata.diskover-tools.plist
sudo systemctl load -w /Library/LaunchDaemons/com.diskoverdata.diskover-tools.plist
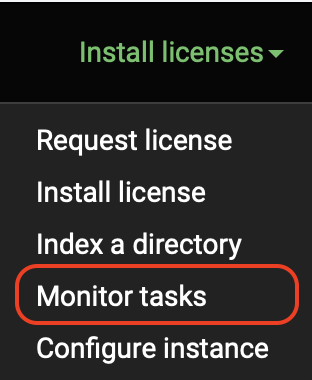
🔴 The diskover indexer will start scanning in the background. This might take a few seconds to some minutes depending on the amount of data contained in that directory. You can monitor the status of a scan by selecting Monitor tasks in the drop-down list:
🔴 Check the Status column for the result of your scan(s):
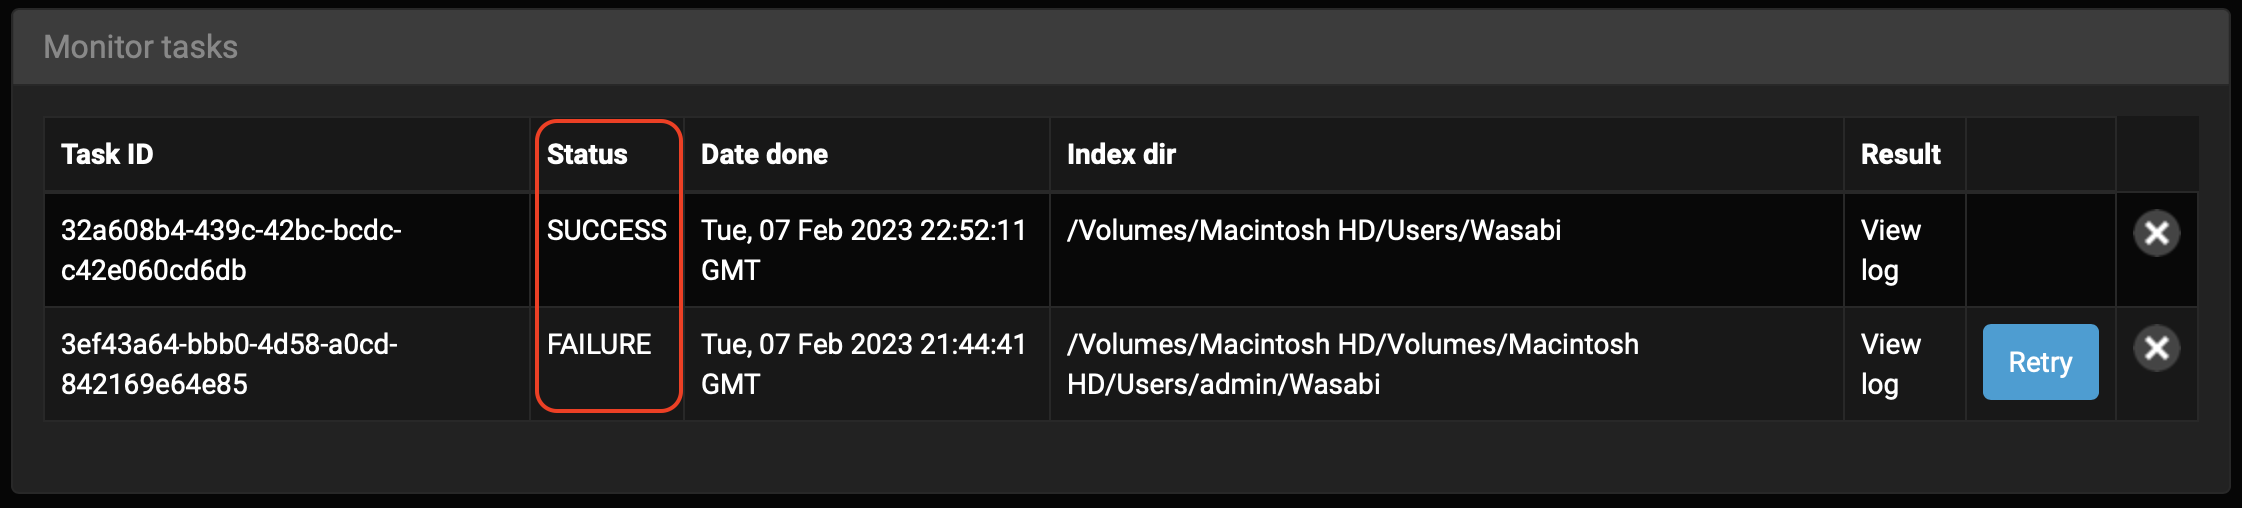
If you get a FAILURE status, please consider these possible issues:
- Did you install the license before launching your first index?
- Did you move the directory being indexed while the indexing task what still running?
- If none of the above issues apply to your situation:
- From the Monitor tasks window above, click on View log in line with the failed indexing job.
- From your browser's top menu, select File, Save As and choose a readable/shareable Format.
- Email that output file to support@diskoverdata.com with a description of your problem.
- For any other questions, please contact the Diskover support team.
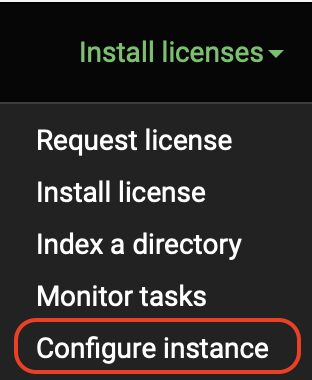
Configure Instance
🔴 You can configure the Elasticsearch host by selecting Configure instance in the drop-down list.
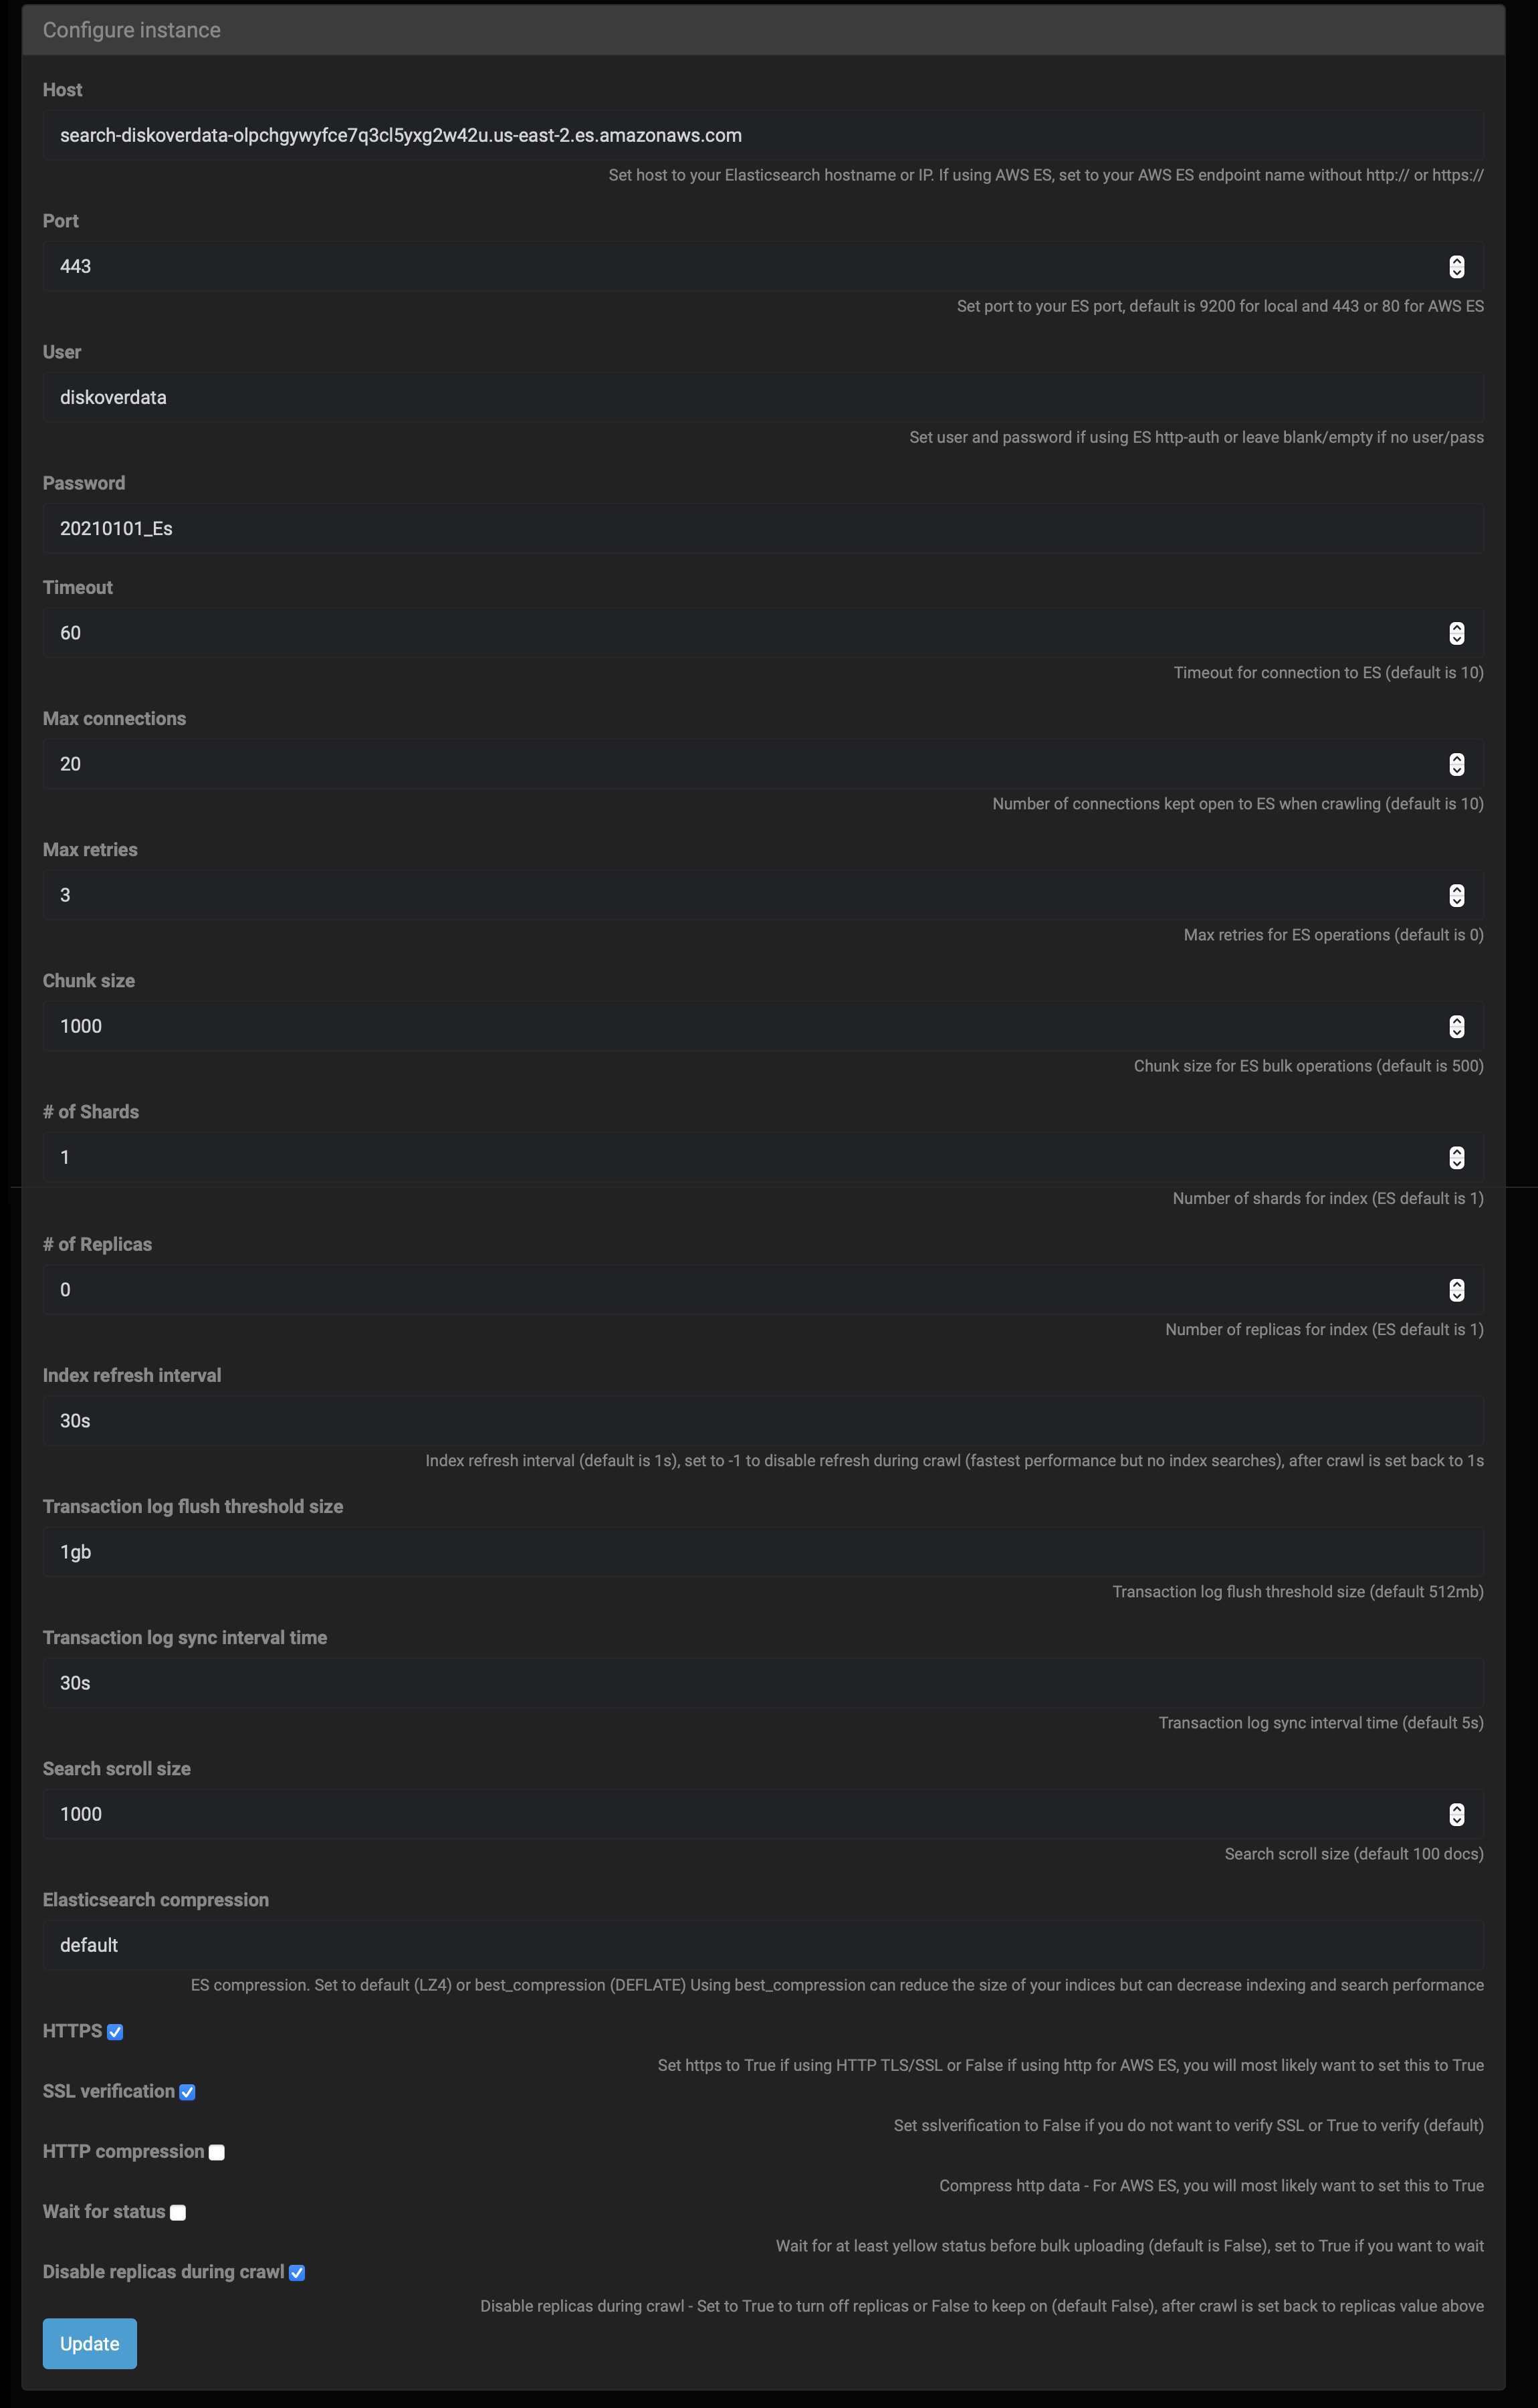
🔴 Note that changing most of these parameters can have serious negative effects on Diskover running smoothly. All the fields are explained after the image.
Note: Elasticsearch is abbreviated to ES below.
| FIELD | COMMENTS |
|---|---|
| Host | The host address should be automatically populated, if not, set host to your ES hostname or IP, when using AWS ES, set to your endpoint name without http:// or https:// |
| Port | The port should be automatically populated and this allows access to remote host, if field is empty, set port to your ES port, default is 9200 for local and 443 or 80 for AWS ES. You need to check SSL verification at the bottom of this page if port 443 is used |
| User | Modify the username as needed using ES http auth or leave blank/empty if no user |
| Password | Modify the password as needed using ES http auth or leave blank/empty if no user |
| Timeout | Timeout for connection to ES > 60 seconds recommended > format to use in field is 60 (original default is 10) |
| Max connections | Number of connections kept open to ES when crawling > 20 is recommended > format to use in field is 20 (original default is 10) |
| Max retries | Maximum retries for ES operations > 3 is recommended > format to use in field is 3 (original default is 0) |
| Chunk size | Chunk size for ES bulk operations > 1,000 is recommended > format to use in field is 1000 (original default is 500) |
| # of Shards | Number of shards for index > 1 is recommended > format to use in field is 1 (original default is 1) |
| # of Replicas | Number of replicas for index > 0 is recommended > format to use in field is 0 (original default is 1) |
The following settings are to optimize ES for crawling.
| FIELD | COMMENTS |
|---|---|
| Index refresh interval | Index refresh interval > 30 seconds is recommended > format to use in field is 30s (original default is 1s, set to -1 to disable refresh during crawl - fastest performance but no index searches - after crawl is set back to 1s) |
| Transaction log flush threshold size | Transaction log flush threshold size > 1 GB is recommended > format to use in field is 1gb (original default is 512mb) |
| Transaction log sync interval time | Transaction log sync interval time > 30 seconds is recommended > format to use in field is 30s (original default is 5s) |
| Search scroll size | Search scroll size > 1,000 docs is recommended > format to use in field is 1000 (original default is 100) |
| Elasticsearch compression | ES compression > use default (set to default (LZ4) or best_compression (DEFLATE), using best_compression can reduce the size of your indices but can decrease indexing and search performance) |
For the following fields: True = Checked ✅ and False = Unchecked ⬛️
| FIELD | COMMENTS |
|---|---|
| HTTPS | Set to true if using HTTP TLS/SSL or false if using http for AWS ES, you will most likely want to set this to true |
| SSL verification | Set to false if you do not want to verify SSL or true to verify (default is true) |
| HTTP compression | Compress HTTP data > for AWS ES, you will most likely want to set this to true |
| Wait for status | Wait for at least yellow status before bulk uploading > set to true if you want to wait (default is false) |
| Disable replicas during crawl | Disable replicas during crawl > set to true to turn off replicas or false to keep on, after crawl is set back to replicas value above (default is false |
🔴 Click Update if you've made any changes to this page.
See Directory/ies in Diskover Software
🔴 Once you get a successful scan, load up the Diskover software by using the url link you were given.
🔴 Your indexed directory should now be visible and ready to use within the Diskover software.
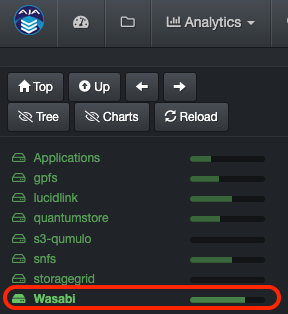
🔴 You can also see and uniquely select the desired indices by clicking on the gear icon at the top right corner, then select Indices.
🔴 You can schedule regular scans of your index/indices as well as other parameters by clicking on the gear icon at the top right corner, then select Task Panel, then follow these configuration instructions.
Configure Your Indices
Please refer to the Diskover Configuration and Administration Guide to configure and maintain Diskover once installed.
Software Updates for Mac
Please refer to our Software Update Installation for Mac chapter.
Uninstall Diskover for Mac
🔴 Open the Utils folder:
🔴 Double-click on Uninstall:

⚠️ Possible Security Warnings
You may get the following message, click OK:
🔴 Open Apple > System Preferences:
🔴 Select Security & Privacy:
🔴 Click Open Anyway:
🔴 If you get this final security warning, click Open:
🔴 You will be prompted to enter your password:
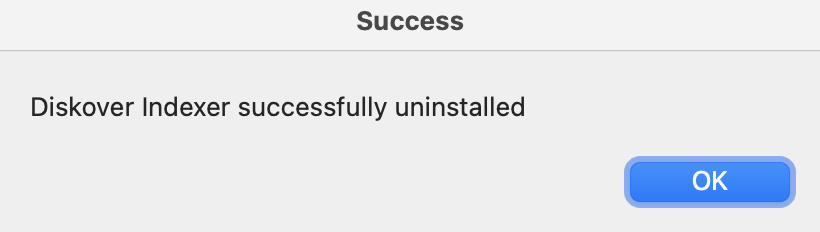
🔴 You will receive a confirmation message:
Diskover Alternate Indexers Installation
The Diskover indexer can add alternate scanners besides the default scandir Python module. The scanner's directory is the location of the alternate Python modules for alternate scanners.
Alternate Indexer | Directory Cache
The DirCache alternate scanner can be used to speed up subsequent crawls when indexing slower network-mounted storage.
DirCache alternate scanner uses the Diskover cache module diskover_cache, which uses SQLite database to store a local cache of directory mtimes (modified times), directory file lists, and file stat attributes.
On subsequent crawls, when a directory mtime is the same as in cache, the directory list and all file stat attributes can be retrieved from the cache rather than over the network mount.
Note: When a file gets modified in a directory, the directory's mtime does not get updated. Because of this, when using dircache, the file stat attributes for each file in the directory retrieved from cache may not be the same as on the storage.
Note: The first crawl for each top path can take longer as the cache is being built. Each top path has its own cache db file stored in __dircache__/ directory.
🔴 To use the dircache alternate scanner, first copy the default/sample config:
mkdir ~/.config/diskover_scandir_dircache
cd /opt/diskover/configs_sample/diskover_scandir_dircache
cp config.yaml ~/.config/diskover_scandir_dircache
🔴 load_db_mem setting can be set to True to load the SQLite db into memory when crawl starts. This can sometimes help to improve db performance. Depending on disk speed and amount of RAM for disk cache, this may not help performance or even decrease performance. It is recommended to leave this set to False.
Warning! Setting this to True can cause the SQLite db file to occasionally become corrupt (see below). Keeping this setting at the default False is advised as it usually does not provide much performance improvement. If you do enable this, check db file size before loading into memory to ensure you don't run out of memory on the indexing host.
🔴 Scan and index using dircache using an auto-index name:
cd /opt/diskover
python3 diskover.py --altscanner scandir_dircache /toppath
Corrupt SQLite Database
If you see this traceback error when starting a scan, the SQLite database has become corrupt. This can happen if previous scans got interrupted abruptly, did not close, and write out the database successfully to disk.
sqlite3.DatabaseError: file is encrypted or is not a database
If you see this error message, you need to delete the SQLite database file. Refer to the scan log lines (example below) to find the DB file to delete.
2022-03-29 10:28:55,397 - diskover_cache - INFO - Using cache DB __dircache__/eac817f78756a24821316430009bb0c2/cache_database.db (160.73 MB)
2022-03-29 10:28:55,397 - diskover_cache - INFO - Loading cache DB __dircache__/eac817f78756a24821316430009bb0c2/cache_database.db into memory...
Delete the database directory and file:
cd /opt/diskover/__dircache__
rm -rf eac817f78756a24821316430009bb0c2
Alternate Indexer | S3 Bucket
Included in the alt scanners directory is a Python module scandir_s3 for scanning AWS S3 buckets using the Boto3 API.
Note: If you want to install Diskover on an existing AWS infrastructure, please refer to our Diskover AWS Customer Deployment Guide.
🔴 To use the S3 alternate scanner, first install the Boto3 Python module:
pip3 install boto3
🔴 After, you will need to set up and configure AWS credentials, etc. for Boto3:
https://boto3.amazonaws.com/v1/documentation/api/latest/guide/quickstart.html
https://boto3.amazonaws.com/v1/documentation/api/latest/guide/configuration.html
Using Different Endpoints URLs (Other than AWS)
This section describes how to use S3 endpoints different than AWS.
🔴 Add credentials to default location for AWS S3 credentials:
cd /root/.aws
vi credentials
Example:
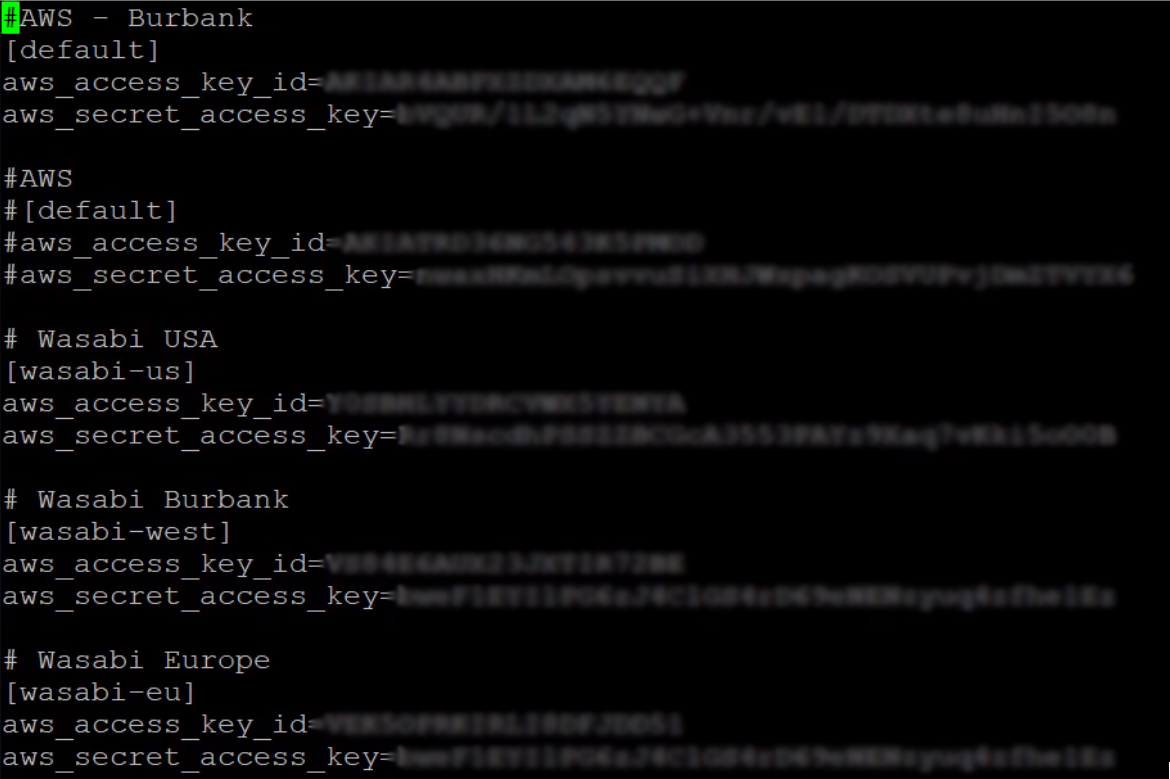
🔴 To use a different S3 endpoint URL (Wasabi, etc.), set the AWS_PROFILE and the S3_ENDPOINT_URL environment variables before running the crawl.
🔴 To export variables via the command line, for example:
export AWS_PROFILE=wasabi-eu
export S3_ENDPOINT_URL=https://<endpoint>
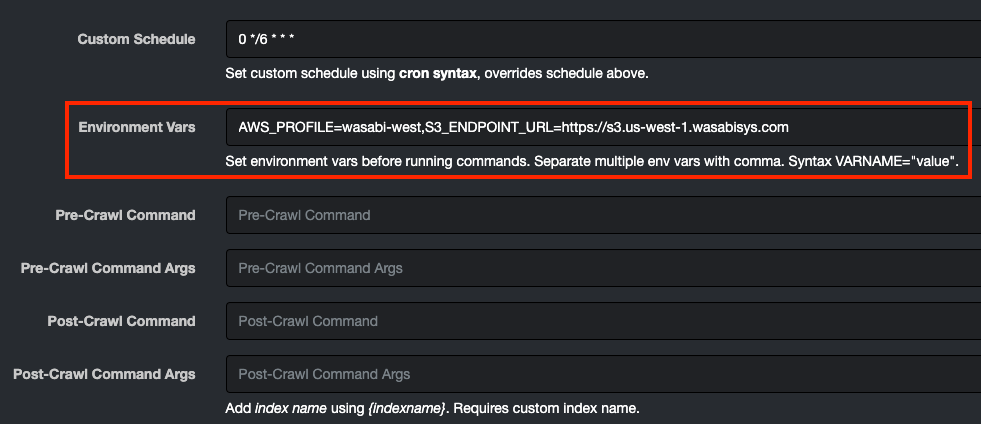
🔴 To add an S3 endpoint via the Diskover-Web task panel, select gear icon > Task Panel:

🔴 Click Info then Edit task in line with the index you want to modify.
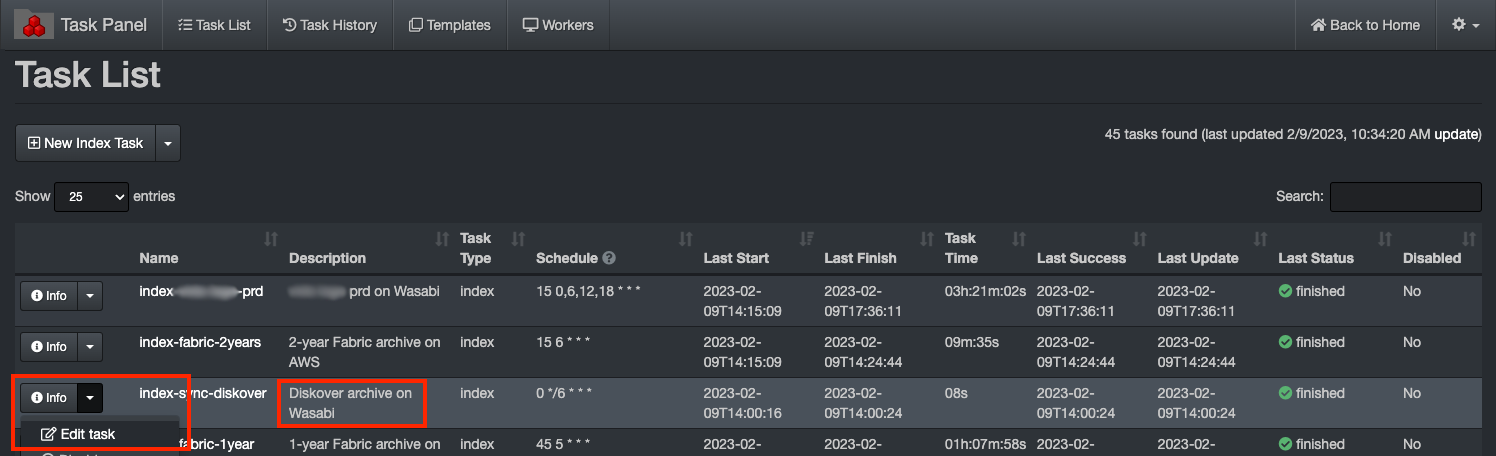
🔴 Go down to Environment Vars and insert your endpoint in the dialog box for the task, for example:
AWS_PROFILE=wasabi-west,S3_ENDPOINT_URL=https://s3.us-west-1.wasabisys.com
SSL Certificate Verification
🔴 To not use SSL and/or to not verify SSL certificates, set the S3_USE_SSL and the S3_VERIFY environment variables before running the crawl:
export S3_USE_SSL=false
export S3_VERIFY=false
🔴 Scan and index a s3 bucket bucketname using an auto-index name:
cd /opt/diskover
python3 diskover.py --altscanner scandir_s3 s3://bucketname
Note: bucketname is optional, you can scan all buckets using s3://
🔴 Create an S3 index with index name diskover-s3-bucketname:
cd /opt/diskover
python3 diskover.py -i diskover-s3-bucketname --altscanner scandir_s3 s3://bucketname
Additional S3 Index Fields
🔴 Additional Elasticsearch index fields (keywords) are added for S3 and can be added to Diskover-Web's config file to EXTRA_FIELDS settings:
 const EXTRA_FIELDS = [
     's3 tier' => 's3_storageclass',
     's3 etag' => 's3_etag'
];
Create an Index of an Azure Storage Blob
Included in the alt scanners directory is a Python module scandir_azure for scanning Microsoft Azure Storage Blobs using the Azure Python client libraries.
🔴 To use the azure alternate scanner, first install the azure Python modules:
pip3 install azure-storage-blob azure-identity
🔴 Copy azure alt scanner default/sample config file:
cd /opt/diskover/configs_sample/diskover_scandir_azure
mkdir ~/.config/diskover_scandir_azure
cp config.yaml ~/.config/diskover_scandir_azure/
🔴 Edit azure alt scanner config file:
vim ~/.config/diskover_scandir_azure/config.yaml
🔴 Scan and index a azure container containername using an auto-index name:
cd /opt/diskover
python3 diskover.py --altscanner scandir_azure az://containername
Note: containername is optional, you can scan all containers in the storage account using az://
🔴 Create an azure index with index name diskover-azure-containername:
cd /opt/diskover
python3 diskover.py -i diskover-azure-containername --altscanner scandir_azure az://containername
Additional Azure Blob Index Fields
🔴 Additional ES index fields (keywords) are added for Azure blobs and can be added to diskover-web's config file to EXTRA_FIELDS setting:
 const EXTRA_FIELDS = [
     'Azure tier' => 'azure_tier',
     'Azure etag' => 'azure_etag'
];
Alternate Indexer | Dropbox
The Dropbox alternate scanner modules can be installed in the alternate scanners directory and are two Python modules used for scanning Dropbox. The following outlines installing the Diskover Dropbox alternate scanner on Linux.
Dropbox Modules Installation
🔴 Extract diskover-dropbox-scanner-master to /tmp:
cd /tmp
unzip diskover-dropbox-scanner-master.zip
cd diskover-dropbox-scanner-master
🔴 Install Python 3.x and required modules, then check the version after the install:
yum -y install python3 python3-devel gcc
python3 -V
pip3 -V
🔴 Install the Dropbox alt scanner dependecies:
pip3 install dropbox
pip3 install -r requirements.txt
🔴 Move the Dropbox modules to their proper location:
cp dropbox_client.py /opt/diskover/scanners
cp scandir_dropbox.py /opt/diskover/scanners
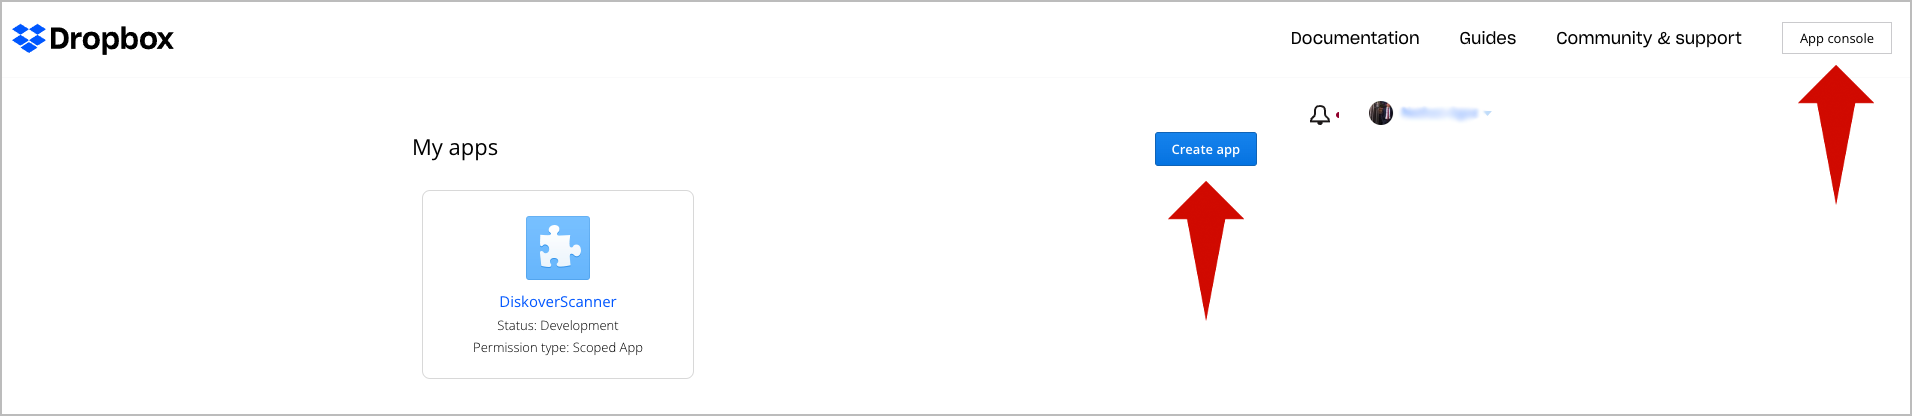
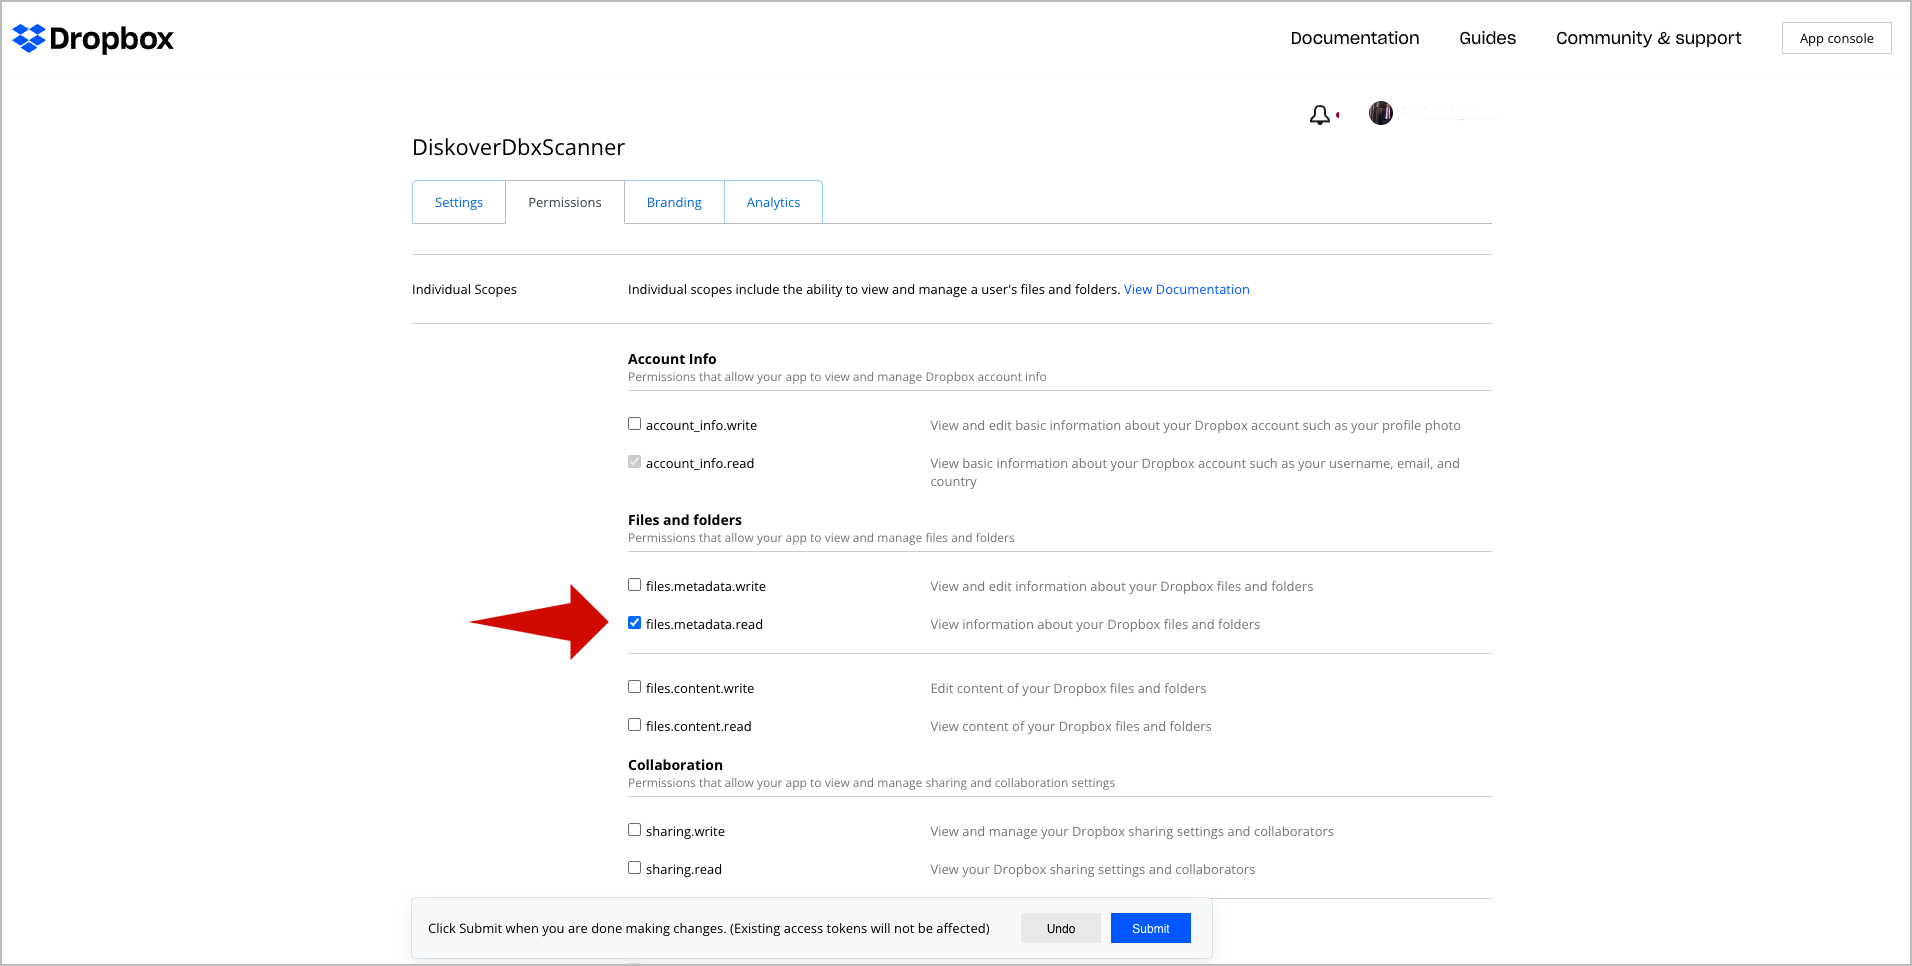
🔴 Create a new Dropbox Application:
- Go to https://www.dropbox.com/developers/
- Select App console in the top menu.
- Select Create App.
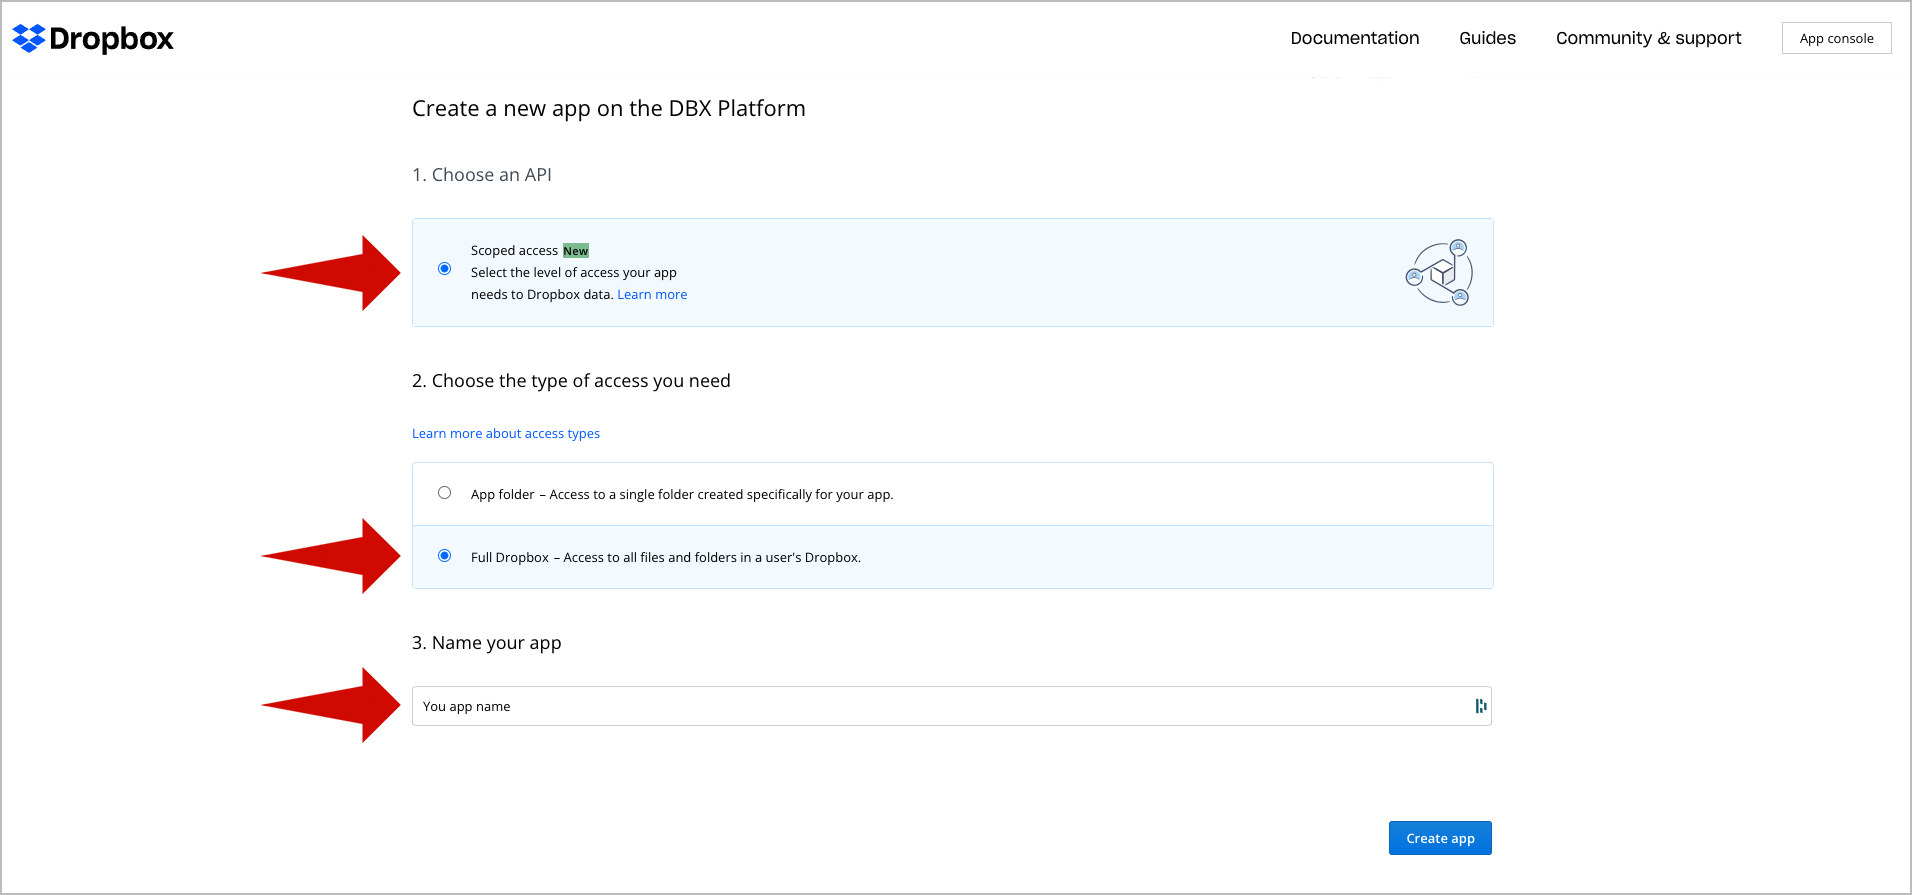
🔴 Configure the application:
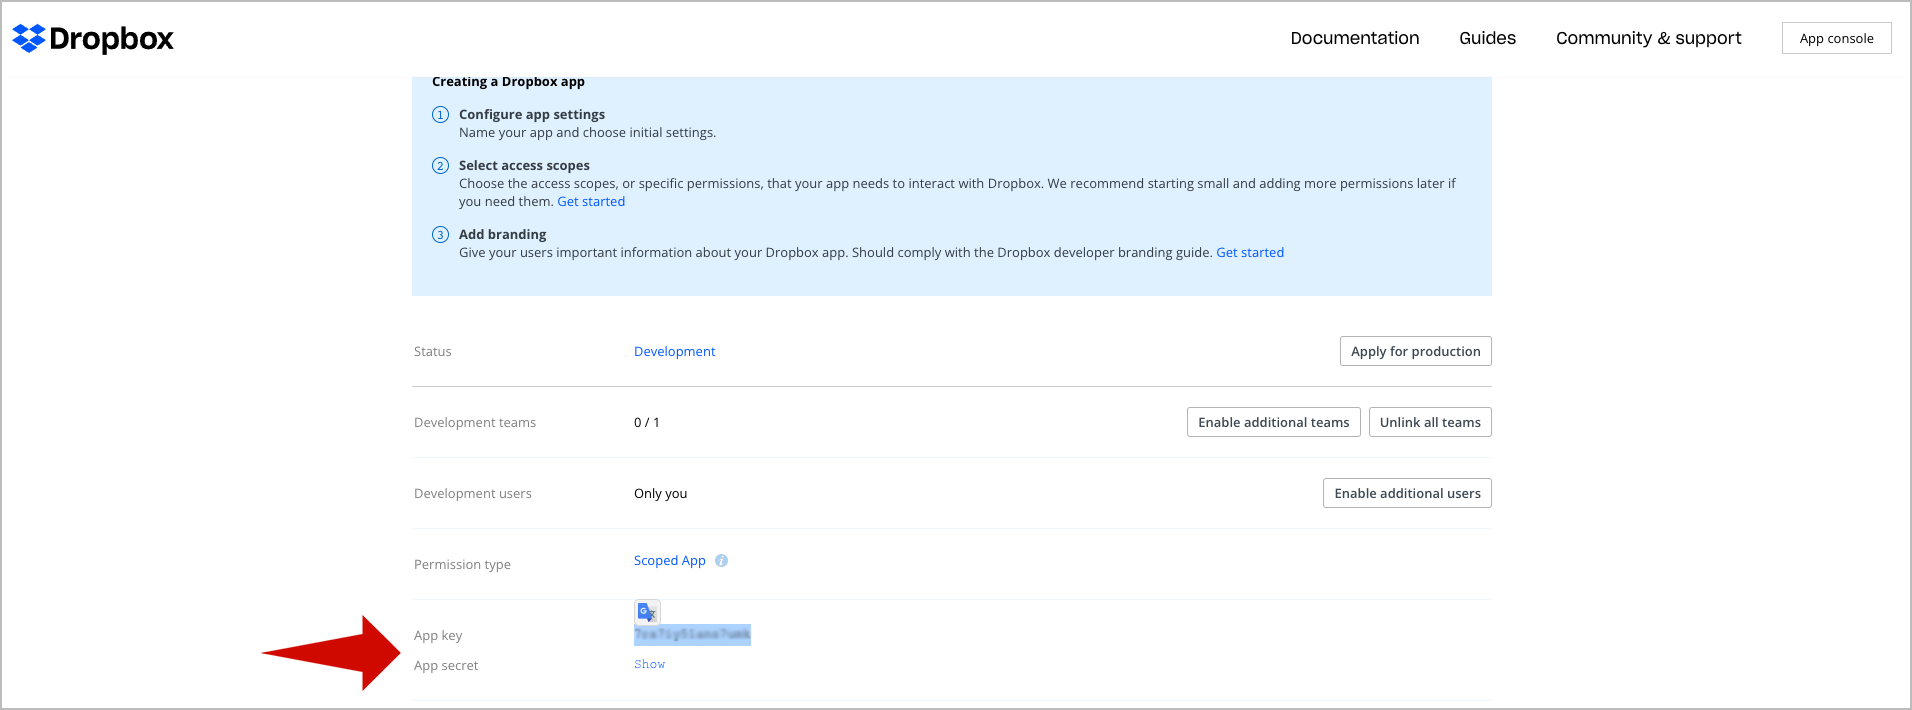
🔴 Review your settings via the application overview:
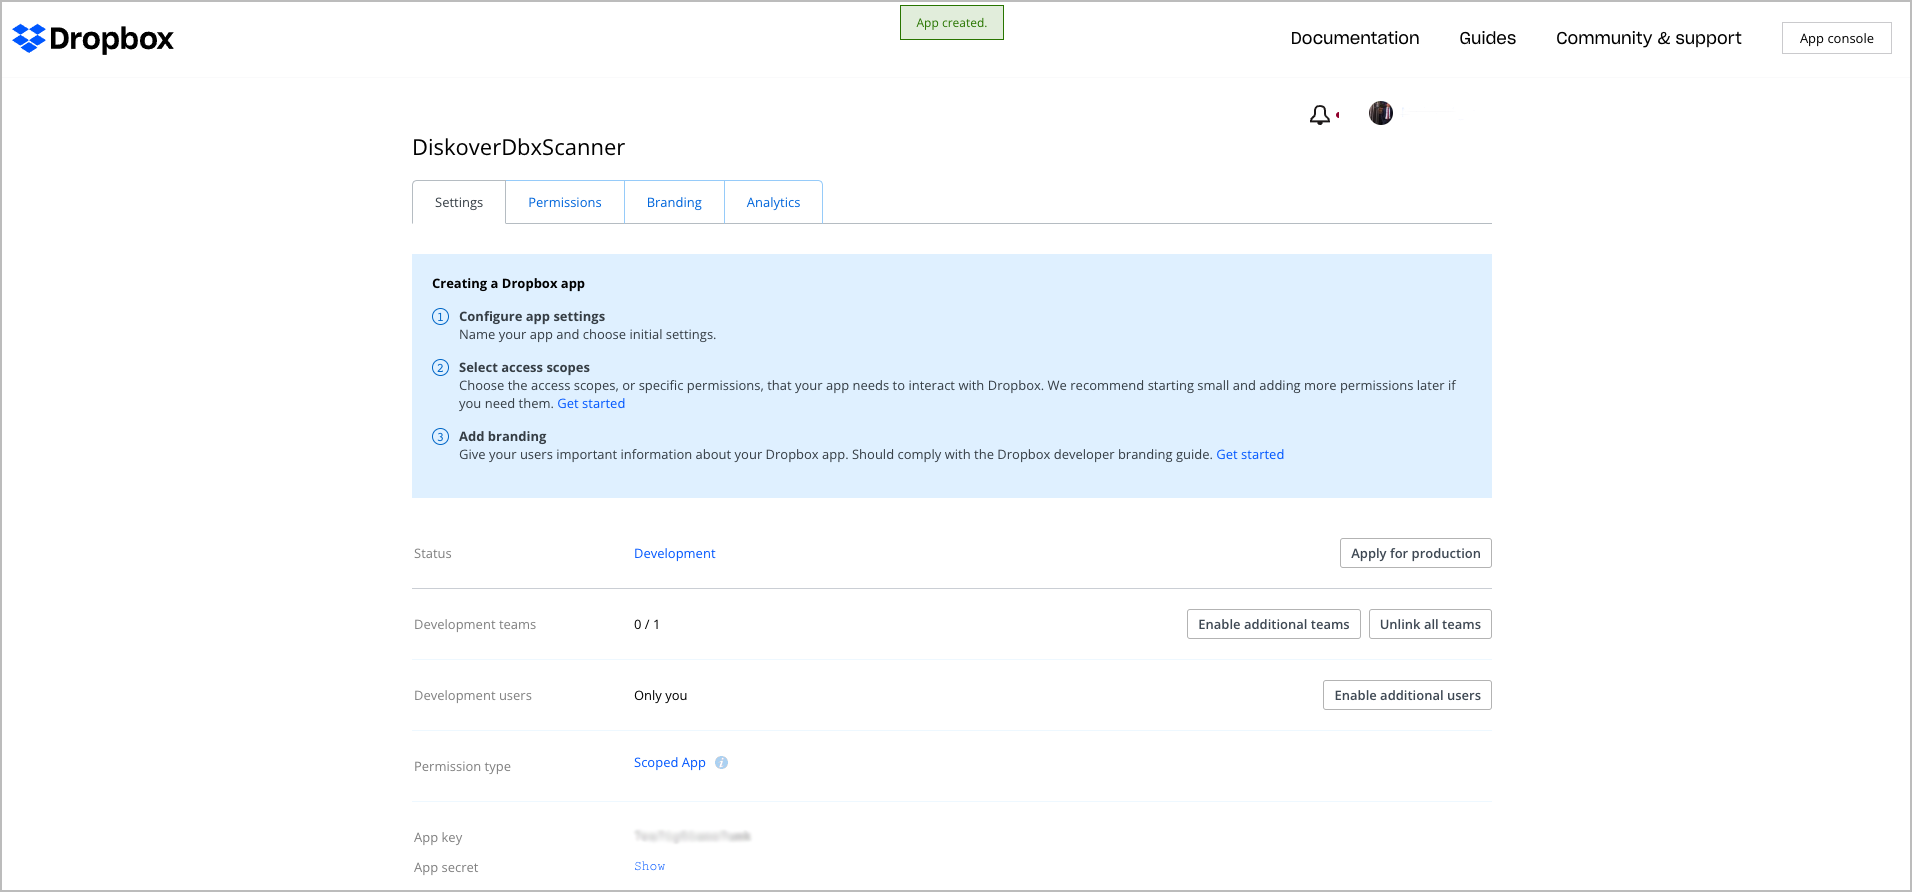
🔴 Enable permissions by checking files.metadata.read:
🔴 Copy the Dropbox app access key and secret:
🔴 Generate the Dropbox Access token:
chmod +x dropbox_oauth.py
./dropbox_oauth.py

Run the Crawler
🔴 Index the Dropbox folder:
export DROPBOX_TOKEN=<your_token>
🔴 If you want to crawl a specific folder:
cd /opt/diskover
python3 diskover.py --altscanner scandir_dropbox /<your_folder_path>
🔴 If you want to crawl from the root of your dropbox account:
cd /opt/diskover
python3 diskover.py --altscanner scandir_dropbox /root
Alternate Indexers | Develop Your Own
Please refer to the Diskover SDK and API Guide for detailed instructions.
Third-Party Analytics
You can optionally use third-party analytical tools, such as Kibana, Tableau, Grafana, PowerBI, and others, to read the Elasticsearch metadata library besides Diskover-Web. Diskover does not technically support these optional tools, and only the installation of Kibana is described in this section.
Kibana
- Note that only Kibana v8 can be used with Elasticsearch v8.
- Additional information on installating Kibava v8 via RPM repository.
- For securing Elasticsearch and Kibana, follow this user guide to set up security, as by default, Elasticsearch has no security enabled:
🔴 Get Kibana:
name=Kibana repository for 8.x packages
baseurl=https://artifacts.elastic.co/packages/8.x/yum
gpgcheck=1
gpgkey=https://artifacts.elastic.co/GPG-KEY-elasticsearch
enabled=1
autorefresh=1
type=rpm-md
🔴 Create the above kibana.repo file in:
/etc/yum.repos.d/
🔴 Install Kibana:
yum install kibana
Kibana UI Access
http://kibanaHost:5601
Diskover Task Worker Daemon (DiskoverD) Installation
Install Task Worker for Linux
Set diskoverd Configuration File
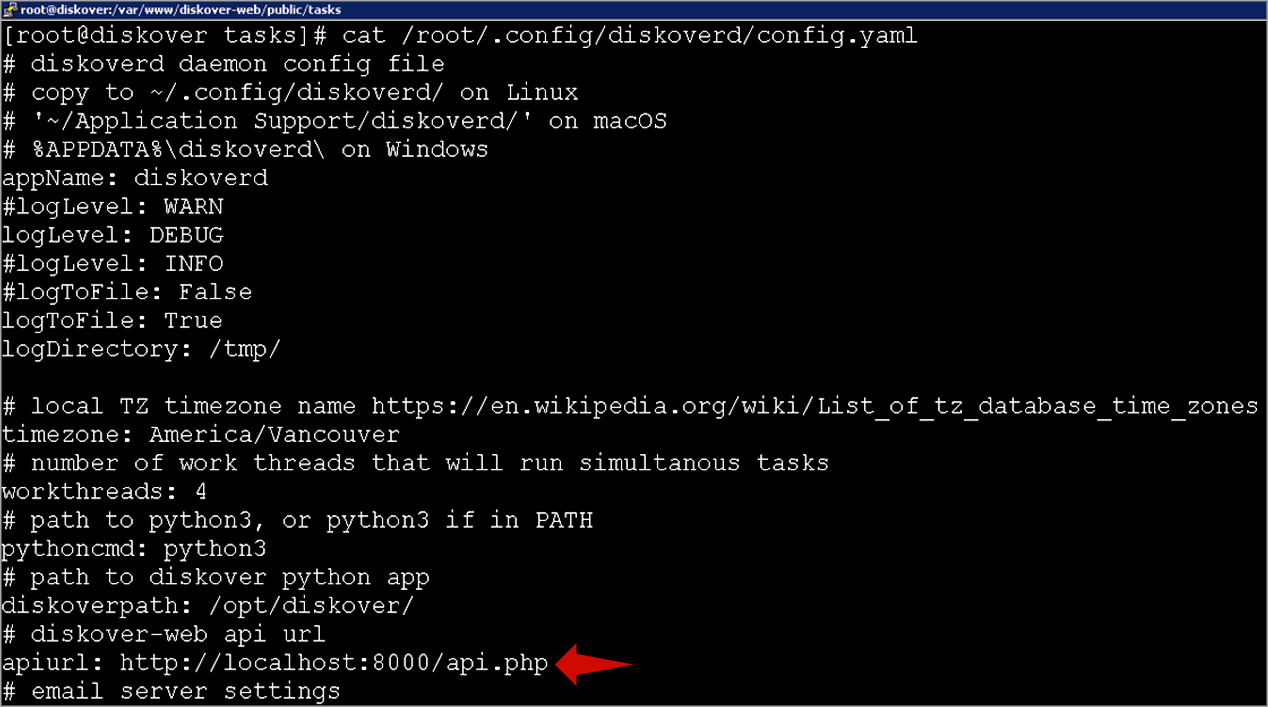
The configuration file for each worker must be configured to point to the Diskover-Web API.
🔴 Change the apiurl to the Diskover-Web location.
vi /root/.config/diskoverd/config.yaml
Configure diskoverd Task Worker to Run as a Service
Setting up diskoverd task worker daemon as a service in CentOS 8.
🔴 First, we need to enable logging to a file in diskoverd config file(s) by setting the logToFile setting to True for every worker node that is running tasks.
🔴 Second, we need to set up the diskoverd service by creating the below service file for every worker node that is running tasks:
sudo vi /etc/systemd/system/diskoverd.service
[Unit]
Description=diskoverd task worker daemon
After=network.target

[Service]
Type=simple
User=root
WorkingDirectory=/opt/diskover/
ExecStart=/usr/bin/python3 /opt/diskover/diskoverd.py -n worker-%H
Restart=always

[Install]
WantedBy=multi-user.target
🔴 Set permissions, enable and start the diskoverd service:
sudo chmod 644 /etc/systemd/system/diskoverd.service
sudo systemctl daemon-reload
sudo systemctl enable diskoverd.service
sudo systemctl start diskoverd.service
sudo systemctl status diskoverd.service
🔴 Now you should have a diskoverd task service running and ready to work on tasks.
🔴 Starting, stopping, and seeing the status of diskoverd service:
sudo systemctl stop diskoverd.service
sudo systemctl start diskoverd.service
sudo systemctl restart diskoverd.service
sudo systemctl status diskoverd.service
🔴 Accessing logs for diskoverd service:
journalctl -u diskoverd
Additional log files for diskoverd can be found in the directory set in diskoverd config files logDirectory setting.
Invoking diskoverd from the Command Line
🔴 To start up a diskoverd worker run:
python3 diskoverd.py
With no cli options, diskoverd uses a unique worker name hostname + unique id each time it is started.
🔴 To see all cli options, such as setting a worker name, use -h:
python3 diskoverd.py -h
To enable logging to a file and set log level, edit the config and set logLevel, logToFile and logDirectory and stop and restart diskoverd.
sudo systemctl stop diskoverd.service
sudo systemctl restart diskoverd.service
After diskoverd has started, it will appear in the Diskover-Web Tasks Panel on the workers page. From there, you can see the health of the worker (online/offline), disable the worker, etc. A worker will show as offline if it does not send a hearbeat for 10 min. diskoverd tries to send a heartbeat every 2 minutes to the Diskover-Web API.
Install Task Worker for Windows
If you want to run diskoverd task worker as a Windows service you can use NSSM to create the service. This application allows you to easily create a service using python and diskoverd.py that gets treated as a proper Windows service that you can manage the diskoverd Windows service by running services.msc or by going to the Services tab from the Task Manager.
🔴 Copy diskoverd sample config file to config directory:
mkdir %APPDATA%\diskoverd
copy "C:\Program Files\diskover\configs_sample\diskoverd\config.yaml" %APPDATA%\diskoverd\
notepad %APPDATA%\diskoverd\config.yaml
🔴 Set in config:
logDirectory: C:\Program Files\diskover\logs
pythoncmd: python
diskoverpath: C:\\Program\ Files\\diskover\\
🔴 Create logs directory:
mkdir "C:\Program Files\diskover\logs"
🔴 Download nssm:
Download nssm and extract nssm.exe. NSSM is a single file nssm.exe that does not need any special installation.
For convenience, you may want to place the file inside a directory in your %PATH% environment variable, otherwise you will need to execute it using the full path.
🔴 Create and edit .bat file for service:
notepad "C:\Program Files\diskover\diskoverd-win-service.bat"
🔴 In the .bat file add:
python diskoverd.py -n <worker_name>
Note: Replace
<worker_name>with a unique name to identify the task worker in diskover-web.
🔴 Run nssm to install service:
nssm.exe install diskoverdService "C:\Program Files\diskover\diskoverd-win-service.bat"
IMPORTANT: When running nssm commands, you need to run the Command Prompt as an Adminstrator. Right click on Command Prompt and choose Run as Administrator.
You should see a message that says something like:
Service "diskoverdService" installed successfully!
It will default to have Startup type: Automatic. This means it will start automatically when the computer restarts.
🔴 Set Windows user account with Administrator access for service:
nssm set diskoverdService ObjectName <username> <password>
🔴 Start and stop your custom service
You can use the normal Services manager services.msc or you can use NSSM from the Command Prompt. You can start and stop the service like this:
nssm.exe start diskoverdService
nssm.exe stop diskoverdService
nssm.exe restart diskoverdService
🔴 Delete the service If you no longer want the service you can remove it with the following command:
nssm.exe remove diskoverdService
🔴 Edit more service settings:
nssm.exe edit diskoverdService
Setting Time Zones
OS Date/Time
It is important that all hosts running Elasticsearch, Diskover, Diskover-web, etc. have their OS date/time configured correctly and NTP (network time protocol) set up to ensure times are set correct. Please check your OS time is set up correctly after install.
Time Zone Settings for Diskover
Diskover can be configured for local time zones, since Diskover is a distributed, scale out architecture, the time zone will need to be configured for each distributed component.
Use the official TZ database name options for Diskover that can be found here:
https://en.wikipedia.org/wiki/List_of_tz_database_time_zones
Time Zone Setting for diskoverd Task Daemon(s)
🔴 For each distributed task worker, edit the time zone value here:
/root/.config/diskoverd/config.yaml
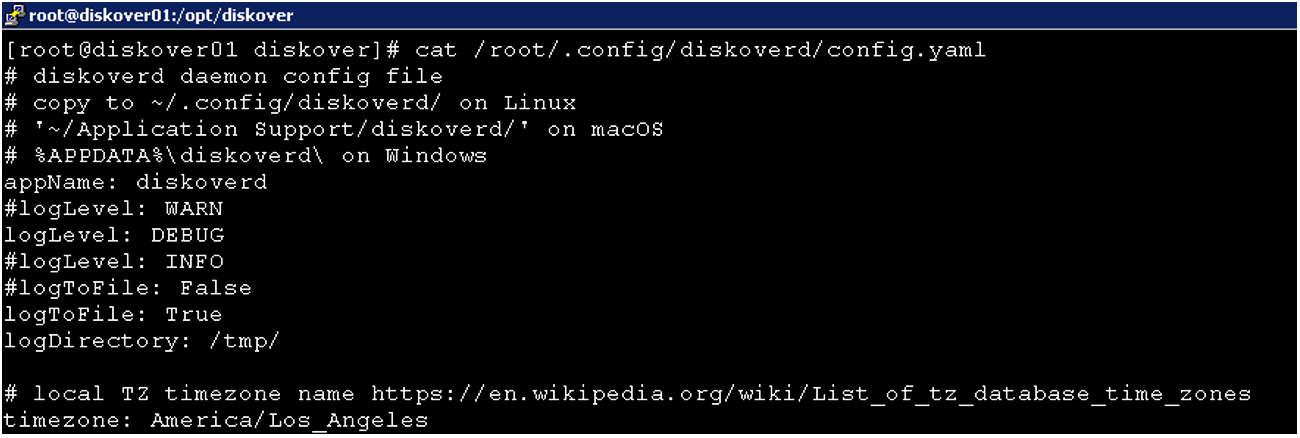
Default Time Zone Setting for Diskover-Web
🔴 The Diskover-Web default time zone value is configured here:
vi /var/www/diskover-web//src/diskover/Constants.php
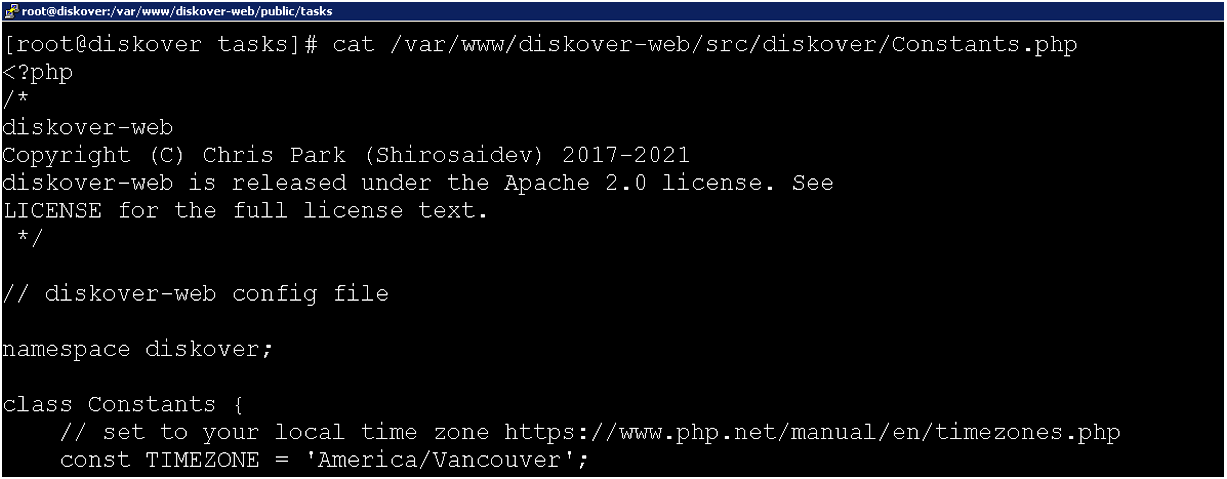
User Preference Time Zone Setting Within Diskover-Web
Individual users can set their time zone preference to their local time zone with the Diskover-Web HTML 5 user interface.
🔴 In the top right corner setting gear icon, select Settings from the drop-down list:
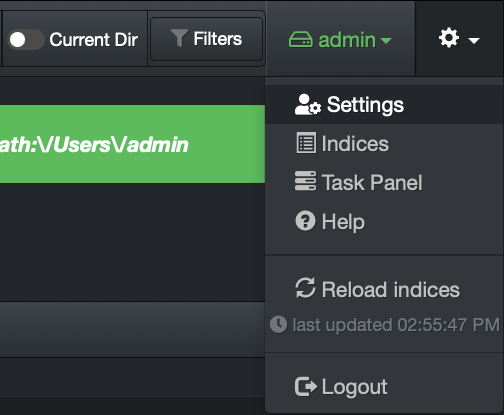
🔴 Check the box Show times in local timezone and simply exit out of the settings dialog box.

Software Activation
Licensing Overview
The Diskover Community Edition doesn't require a license key and can be used for an unlimited time.
The Diskover Editions/paid subscriptions require a license. Unless otherwise agreed:
- A trial license is valid for 30 days and is issued for 1 Elasticsearch node.
- A paid subscription license is valid for 1 year. Clients will be contacted about 90 days prior to their license expiration with a renewal proposal.
Please reach out to your designated Diskover contact person or contact us directly for more information.
License Issuance Criteria
Licenses are created using these variables:
- Your email address
- Your hardware ID number
- Your Diskover Edition
- The number of Elasticsearch nodes.
Generating a Hardware ID
After installing Diskover and completing the basic configuration, you will need to generate a hardware ID. Please send that unique identifier along with your license request.
🔴 To create your hardware ID:
cd /opt/diskover
python3 diskover_lic.py -g
🟨 IMPORTANT!
- Check that you have configured your Elasticsearch host correctly, as it is part of the hardware ID encoding process.
- Note that if your Elasticsearch cluster ID changes, you will need new license keys.
License Key Locations
Linux
Place the license keys in the following locations.
🔴 Copy diskover.lic file to:
/opt/diskover/diskover.lic
🔴 Copy diskover-web.lic file to:
/var/www/diskover-web/src/diskover/diskover-web.lic
🔴 Check that the diskover-web.lic file is owned by NGINX user and permissions are 644:
chown nginx:nginx diskover-web.lic && chmod 644 diskover-web.lic
🔴 After you have installed your license keys, you can see the info about the license using diskover_lic.py:
cd /opt/diskover
python3 diskover_lic.py -l
Windows
🔴 Place the license keys in the following locations. Copy diskover.lic file to:
C:\Program Files\diskover\
🔴 Copy diskover-web.lic file to folder:
C:\Program Files\diskover-web\src\diskover\
Mac
🔴 Copy diskover.lic file to folder:
/Applications/Diskover.app/Contents/MacOS/diskover/
Configuration Following Installation
Many parameters can and should be configured once Diskover has been installed, so you can benefit from all the features. At the minimum, the following should be configured:
Health Check
The following section outlines health checks for the various components of the Diskover Data curation platform.
Diskover-Web
To validate health of the Diskover-Web, basically ensures the Web serving applications are functioning properly.
Diskover-Web for Linux
🔴 Check status of NGINX service:
systemctl status nginx

🔴 Check status of PHP-FPM service:
systemctl status php-fpm

Diskover-Web for Windows
🔴 Check status of NGINX service.
🔴 Open Windows Powershell:
get-process | Select-String "nginx"
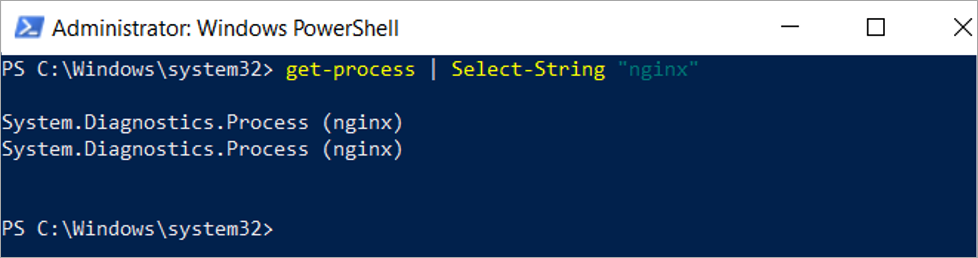
🔴 Check status of PHP-FPM service.
🔴 Open Windows Powershell:
get-process | Select-String "php"
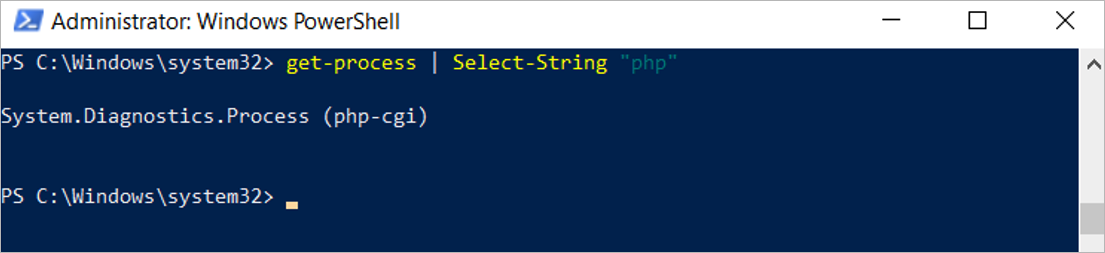
Elasticsearch Domain
Status of Elasticsearch Service for Linux
🔴 Check status of Elasticsearch service:
systemctl status elasticsearch.service

Status of Elasticsearch Service for Windows
🔴 To check the status of the Elasticsearch service under Windows, open Services by typing services in the search bar.
🔴 Ensure the Elasticsearch service is running:
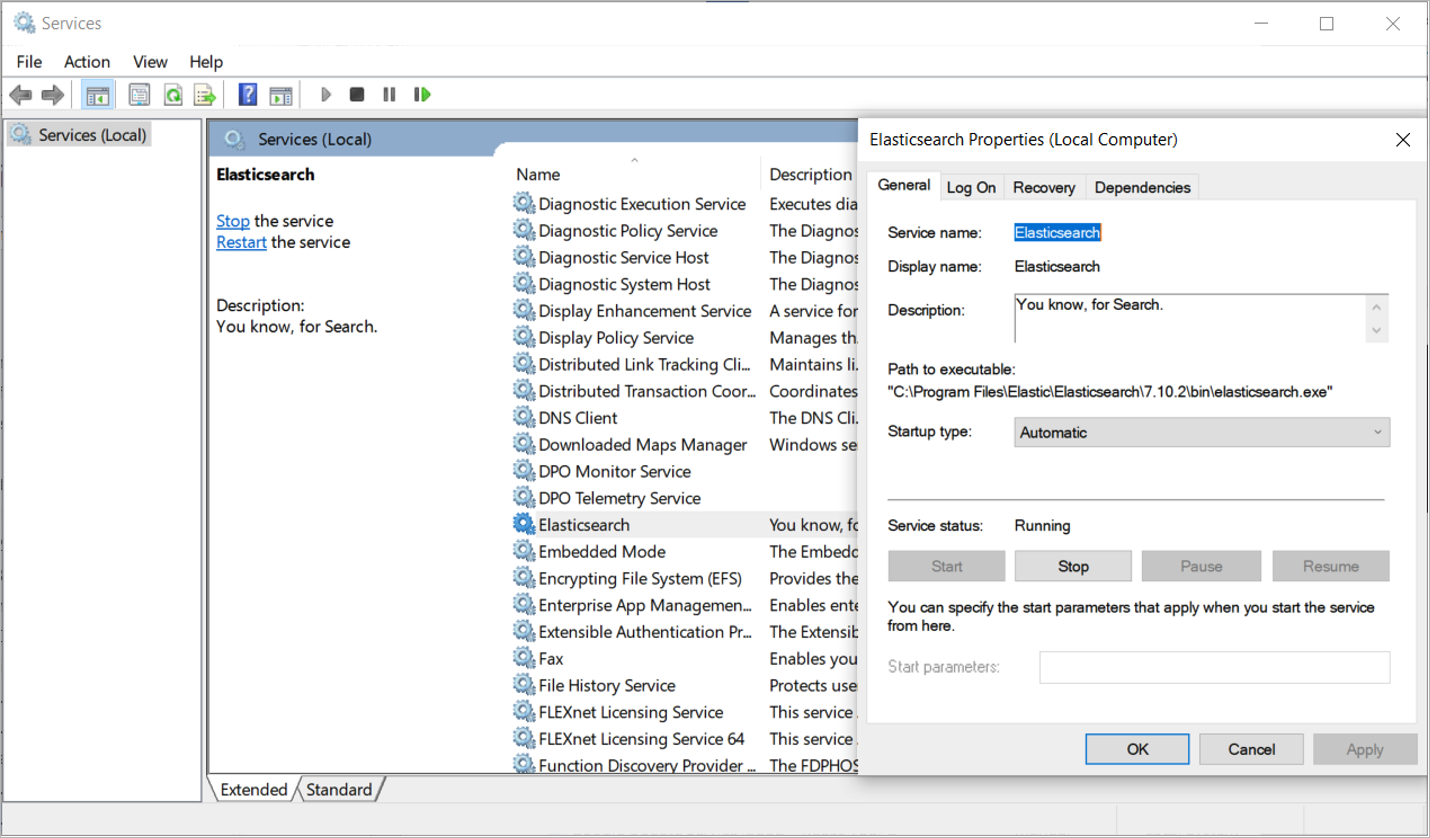
Software Update Installation
When subscribing to a paid Diskover Solution, all software updates, bug fixes, patches and version upgrades are included during the licensed period. Diskover will send an email notification to its customer base which will contain all necessary information.
Please refer to the CHANGELOG.MD files (for both Diskover and Diskover-web) in the tar.gz/zip download to see what has changed and any breaking changes. The software may fail to work after upgrading without referring to these files for important changes. Changelogs can also be viewed here.
After updating Diskover-web, it is recommended to force/hard refresh your web browser to get the latest files from the web server and clear your local browser cache.
Software Update for Community Edition
🔴 If the Diskover repo is no longer cloned in /tmp/diskover-v2-ce, clone again:
mkdir /tmp/diskover-v2-ce
git clone https://github.com/diskoverdata/diskover-community.git /tmp/diskover-v2-ce
🔴 Update local cloned repo and sync changes to installed locations:
cd /tmp/diskover-v2-ce
git fetch && git pull
rsync -rcv diskover/ /opt/diskover/
rsync -rcv diskover-web/ /var/www/diskover-web/
chown -R nginx:nginx /var/www/diskover-web
🔴 Verify that your config files are not missing any new settings:
Note: refer to changelogs for any breaking config changes, or view CHANGELOG.md files in diskover and diskover-web directories
diff <diskover_dir>/configs_sample/diskover/config.yaml ~/.config/diskover/config.yaml
cd <diskover-web_dir>/src/diskover && diff Constants.php.sample Constants.php
🔴 Set permissions:
chown -R root:nginx /var/run/php-fpm
chown -R nginx:nginx /var/lib/php/session
🔴 Check for any errors in NGINX log (ex: permission issues):
tail -f /var/log/nginx/error.log
🔴 After updating Diskover-web, it is recommended to force/hard refresh your web browser to get the latest files from the web server and clear your local browser cache.
Software Update for Linux
The update process for Diskover curation platform consists of updating two parts: 1) the Diskover indexer(s), and 2) the Diskover-Web server.
The software can be updated by extracting the latest tar.gz or zip file downloaded from the Diskover download portal and updating the Diskover source files in the proper locations.
Upgrading from tar.gz File
The following explains how to update both Diskover and Diskover-Web assuming they are installed in the default locations.
🔴 Stop diskoverd (Task worker daemon) if running:
WARNING: check that no tasks are running in diskover-web task panel before stopping the service
sudo systemctl stop diskoverd
ps -ef | grep diskoverd
This example assumes the tar file was extracted to /tmp/diskover-v2/
tar -zxvf diskover-v2-<version>.tar.gz -C /tmp/diskover-v2/
cd /tmp/diskover-v2/
🔴 Copy the Diskover files to proper locations:
rsync -rcv diskover/ /opt/diskover/
rsync -rcv diskover-web/ /var/www/diskover-web/
🔴 Set proper file systems permissions on Diskover files:
chown -R nginx:nginx /var/www/diskover-web
chmod 660 /var/www/diskover-web/public/*.txt
chmod 660 /var/www/diskover-web/public/tasks/*.json
Note: For Ubuntu, use www-data user instead of nginx.
🔴 Check your config files are not missing any new settings:
Important: Refer to changelog for any new breaking config changes. Changes are also in CHANGELOG.md files in diskover and diskover-web directories.
diff <diskover_dir>/configs_sample/diskover/config.yaml ~/.config/diskover/config.yaml
diff <diskover_dir>/configs_sample/diskoverd/config.yaml ~/.config/diskoverd/config.yaml
...
cd <diskover-web_dir>/src/diskover && diff Constants.php.sample Constants.php
🔴 Start diskoverd (Task worker daemon) if running previously:
sudo systemctl start diskoverd
sudo systemctl status diskoverd
🔴 Set permissions:
chown -R root:nginx /var/run/php-fpm
chown -R nginx:nginx /var/lib/php/session
Note: For Ubuntu, use www-data user instead of nginx.
🔴 Check for any errors in NGINX log (ex: permission issues):
tail -f /var/log/nginx/error.log
🔴 After updating Diskover-web, it is recommended to force/hard refresh your web browser to get the latest files from the web server and clear your local browser cache.
Software Update for Windows
The update process for Diskover on Windows consists of updating two parts: 1) the Diskover indexer(s), and 2) the Diskover-Web server.
The software can be updated by extracting the latest tar.gz or zip file downloaded from the Diskover download portal and updating the Diskover source files in the proper locations.
Upgrading from zip File
The following explains how to update both Diskover and Diskover-Web assuming they are installed in the default locations on Windows.
🔴 Stop diskoverd (Task worker daemon) service if running:
WARNING: check that no tasks are running in diskover-web task panel before stopping the service
🔴 Extract the zip from download portal to c:\windows\temp\diskover-v2\ or other temp folder
🔴 Run command prompt (cmd) as Administrator and sync new diskover files:
Xcopy c:\windows\temp\diskover-v2\diskover\ "c:\program files\diskover\" /e /d /c /y
🔴 Sync new diskover-web files:
Xcopy c:\windows\temp\diskover-v2\diskover-web\ "c:\program files\diskover-web\" /e /d /c /y
🔴 Start diskoverd service
🔴 Check for any errors in NGINX log (ex: permission issues):
notepad c:\program files\nginx\nginx-1.21.6\logs\error.log
🔴 After updating Diskover-web, it is recommended to force/hard refresh your web browser to get the latest files from the web server and clear your local browser cache.
Software Update for Mac
Section in development. Please contact our support team for immediate help.
Software Upgrade Installation
Upgrade from Community Edition to Annual Subscription
This section explains how to upgrade from the free Community Edition to an annual subscription.
🔴 Go to the directory where the Diskover software was downloaded to:
cd /tmp/diskover

rsync -rcv --exclude=diskover.lic diskover/ /opt/diskover/

rsync -rcv --exclude=diskover-web.lic diskover-web/ /var/www/diskover-web/

cd /opt/diskover

pip3 install -r requirements-aws.txt

for d in configs_sample/*; do d=`basename $d` && mkdir -p ~/.config/$d && cp configs_sample/$d/config.yaml ~/.config/$d/; done

cd /var/www/diskover-web/public

for f in *.txt.sample; do cp $f "${f%.*}"; done
chmod 660 *.txt

cd /var/www/diskover-web/public/tasks/

for f in *.json.sample; do cp $f "${f%.*}"; done
chmod 660 *.json

chown -R nginx:nginx /var/www/diskover-web

chmod 660 /var/www/diskover-web/public/*.txt

chmod 660 /var/www/diskover-web/public/tasks/*.json

chown -R root:nginx /var/lib/php

chown -R root:nginx /var/run/php-fpm/

chown -R nginx:nginx /var/lib/php/session
🔴 You will probably need to update your Constants.php file:
cd /var/www/diskover-web/src/diskover/

cp Constants.php.sample Constants.php
🔴 Reapply any config changes you made to your constants.php file.
Uninstall Diskover
The following outlines how to uninstall the Diskover application.
Uninstall Elasticsearch
Uninstall Elasticsearch for Linux
🔴 Determine Elasticsearch version installed:
rpm -qa | grep elastic

🔴 In the above example, remove elasticsearch-7.10.1-1.x86_64:
rpm -e elasticsearch-7.10.1-1.x86_64

Uninstall PHP-FPM
Uninstall PHP-FPM for Linux
🔴 Determine PHP-FPM version installed:
rpm -qa | grep php-fpm
🔴 In the previous example, remove php-fpm-7.3.26-1.el7.remi.x86_64:
rpm -e php-fpm-7.3.26-1.el7.remi.x86_64

Uninstall NGINX
Uninstall NGINX for Linux
🔴 Determine NGINX version installed:
rpm -qa | grep nginx
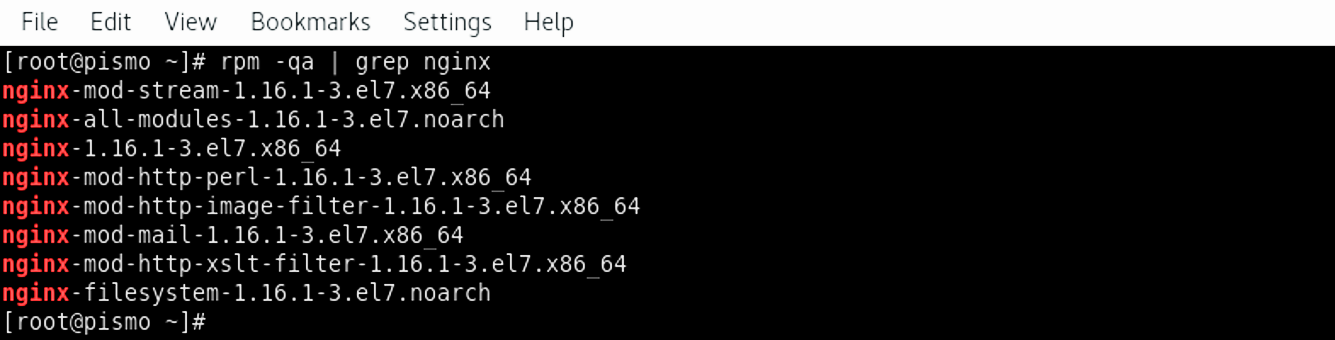
🔴 In the above example, remove all NGINX with the --nodeps argument to uninstall each package in the above list:
rpm -e --nodeps rpm -qa | grep nginx
Uninstall Diskover-Web
Uninstall Diskover-Web for Linux
🔴 To uninstall the Diskover-Web components simply remove the install location:
rm -rf /var/www/diskover-web
Uninstall Diskover Task Worker Daemon(s)
Uninstall Diskover Task Daemon for Linux
🔴 To uninstall the Task Daemon on Diskover indexer(s) perform the following:
systemctl stop diskoverd.service
rm /etc/systemd/system/diskoverd.service
Uninstall Diskover Indexer(s)
Uninstall Diskover Indexers for Linux
🔴 To uninstall the Diskover indexer components simply remove the install location:
rm -rf /opt/diskover
🔴 Remove the configuration file locations:
rm -rf /root/.config/diskover*
Support
Support Options
| Support & Ressources | Free Community Edition | Annual Subscription* |
|---|---|---|
| Online Documentation | ✅ | ✅ |
| Slack Community Support | ✅ | ✅ |
| Diskover Community Forum | ✅ | ✅ |
| Knowledge Base | ✅ | ✅ |
| Technical Support | ✅ | |
Phone Support
|
✅ | |
| Remote Training | ✅ |
*
Feedback
We'd love to hear from you! Email us at connect@diskoverdata.com
Warranty & Liability Information
Please refer to our Diskover End-User License Agreements for the latest warranty and liability disclosures.
Contact Diskover
| Method | Coordinates |
|---|---|
| Website | https://diskoverdata.com |
| General Inquiries | connect@diskoverdata.com |
| Sales | sales@diskoverdata.com |
| Demo request | demo@diskoverdata.com |
| Licensing | licenses@diskoverdata.com |
| Support | Open a support ticket with Zendesk 800-560-5853 | Mon-Fri 8am-6pm PST |
| Slack | Join the Diskover Slack Workspace |
| GitHub | Visit us on GitHub |
© Diskover Data, Inc. All rights reserved. All information in this manual is subject to change without notice. No part of the document may be reproduced or transmitted in any form, or by any means, electronic or mechanical, including photocopying or recording, without the express written permission of Diskover Data, Inc.